As I was designing the How I Wonder afghan block, I had a little revelation towards the end. You see, I usually get stuck around the part where I square it up and want to finish it off. I want it to be interesting and compliment the design, but I always seem to be at a loss as to how to do that. This time was no different, but I was. I waited. I sat on this design for weeks before I finally decided to push through the designer’s block. And it worked! My revelation came. I thought, why not put a round of star stitches around a star? It was so obvious!
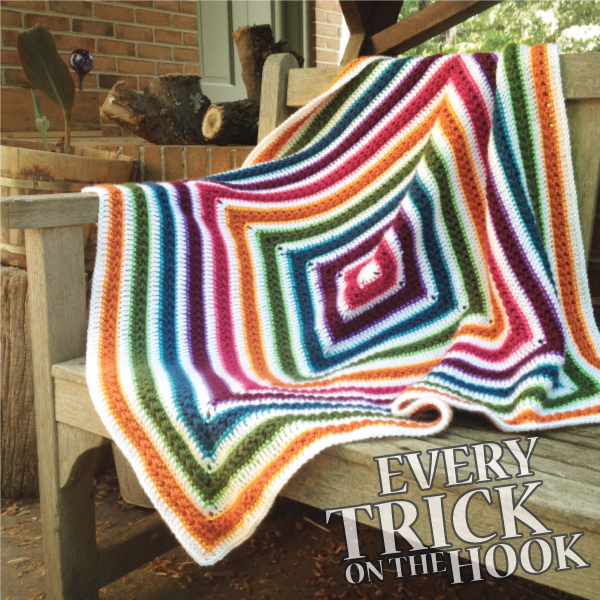
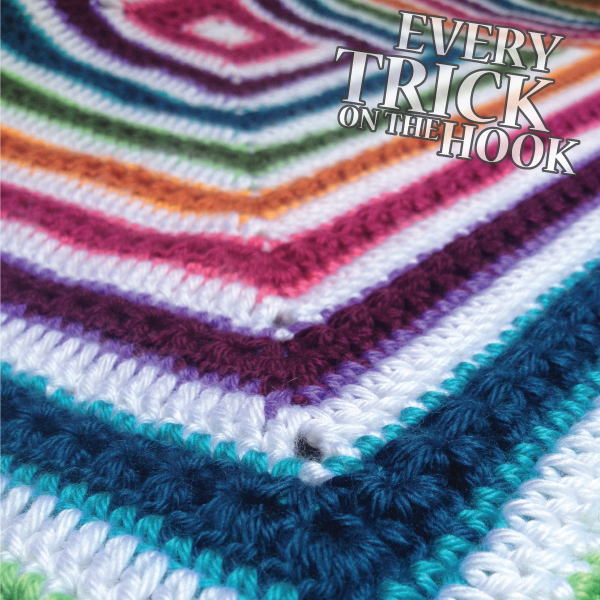
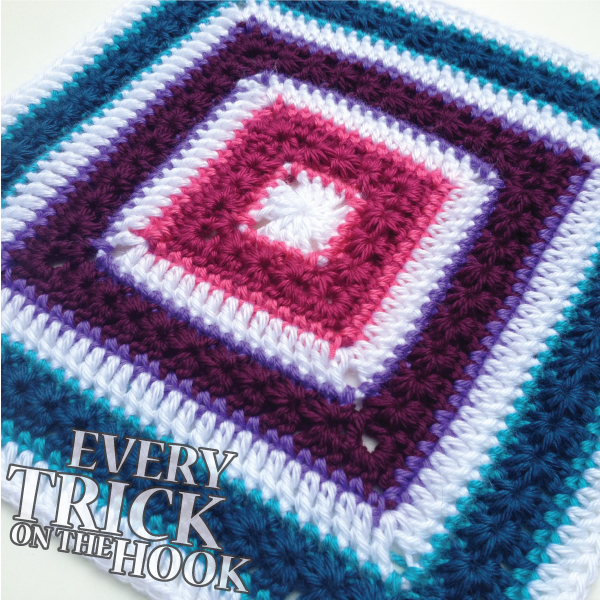
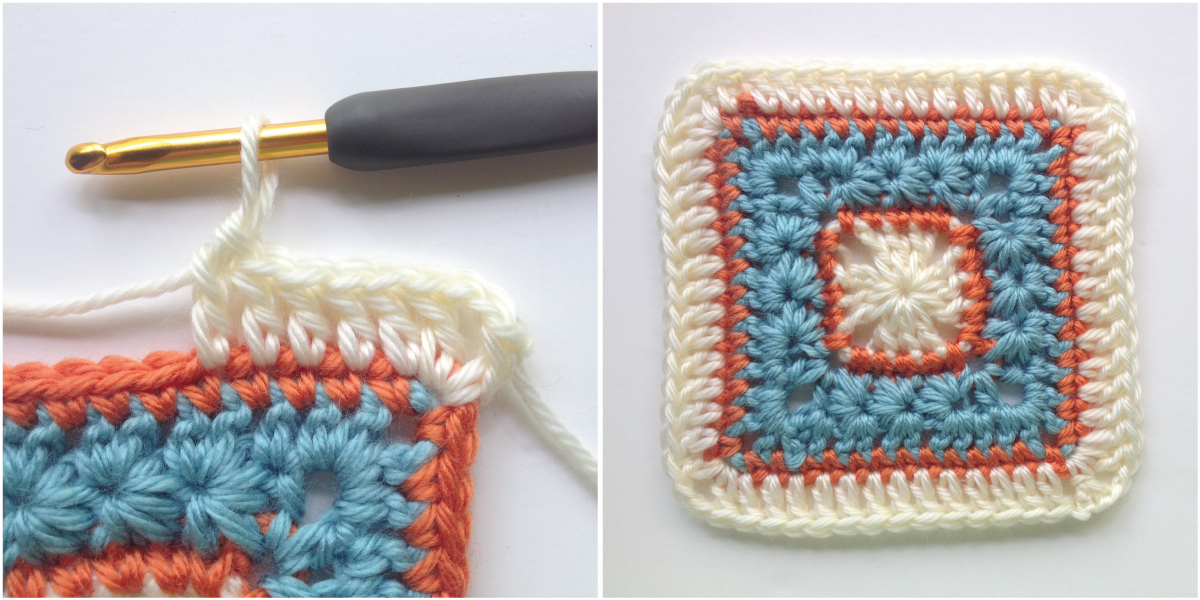
So off I went stitch, stitch, stitching. Until… I came to the first corner. Uh-oh. How do I do this? I’ve never actually seen this done before. I’m still not sure how I came up with the solution I did, but the stars seemed to have aligned for me that day and voila! I now had a technique for star stitch around a 90 degree corner. And it looked great. I had to try it by itself and see what would happen. And this happened. An entire baby blanket. I couldn’t stop. And now I have to share it with you because I think you’ll love it too.
The glory of this is that, while I’m offering you a pattern for a square or an afghan, it’s really more of a technique that you can apply anywhere you want to use the star stitch with a 90 degree corner. So at the end of this pattern I’m going to give you a couple simple options and tips on how to use this technique elsewhere. I’m particularly interested to see it used as a border to frame an afghan and then followed with a fancy edge. Someone get back to me with that, okay? 😉
So without further ado, here it is.
Stars Aligned
12” afghan square, baby afghan, or any sized square afghan
Written in American Crochet terms
Skill Level: advanced beginner or adventurous beginner
Finished Size: Any size square
Gauge: First 4 rows about 4”
Materials: Worsted weight yarn – about 120 yards for a 12″ square, or 1400 yards for a 36″ baby blanket; crochet hook size I/5.5mm; yarn needle. Or, any size yarn with appropriate hook.
This pattern is free for personal use only. Please see my Copyright page for more details on what that means.
NEW!! Download Stars Aligned printer friendly instructions. No pictures, just text. You can print and follow along with the photo tutorials as needed or just keep them handy for easy reference.
Abbreviations:
ch = chain
dc = double crochet
hdc = half double crochet
r(#) = round number
sc = single crochet
sk = skip
slst = slip stitch
sp = space
st = stitch
tr = treble crochet
yo = yarn over
Special stitches:
Standing sc – to start a round, with slip knot on hook, insert hook into indicated stitch, yo and pull up a loop, yo and pull through two loops on hook
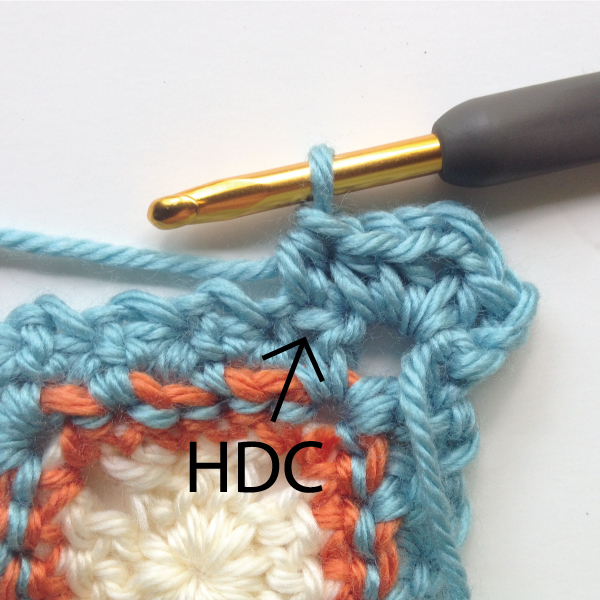
Standing hdc – to start a round, with slip knot on hook, hold slip knot in place with thumb or finger, yo and hold that in place too, insert hook in indicated stitch, yo and pull up a loop, carefully yo and draw through all three loops on hook
Standing dc – to start a round, with slip knot on hook, hold slip knot in place with thumb or finger, yo and hold that in place too, insert hook in indicated stitch, yo and pull up a loop, carefully yo and draw yarn through two loops on hook twice
Notes: I will get some tutorials for standing stitches done ASAP and update this post with the link. While you can simply use the chain alternatives, the one standing hdc is particularly important to this pattern. It’s up to you.
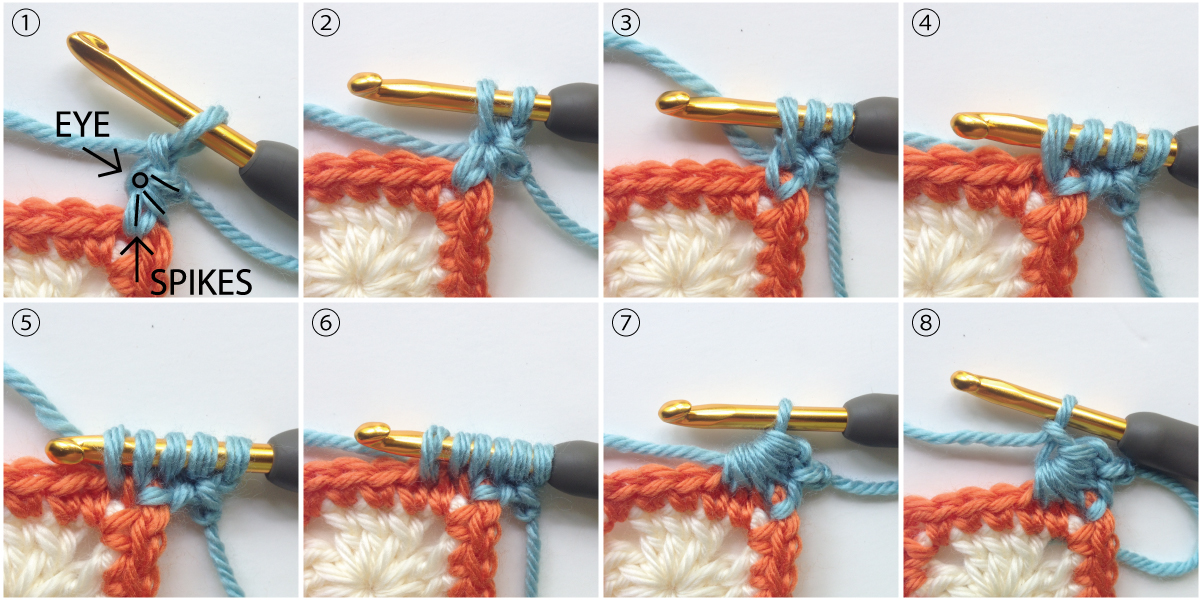
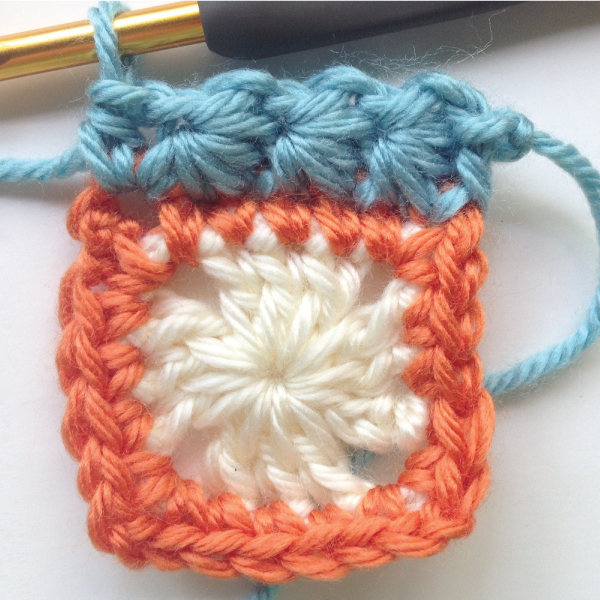
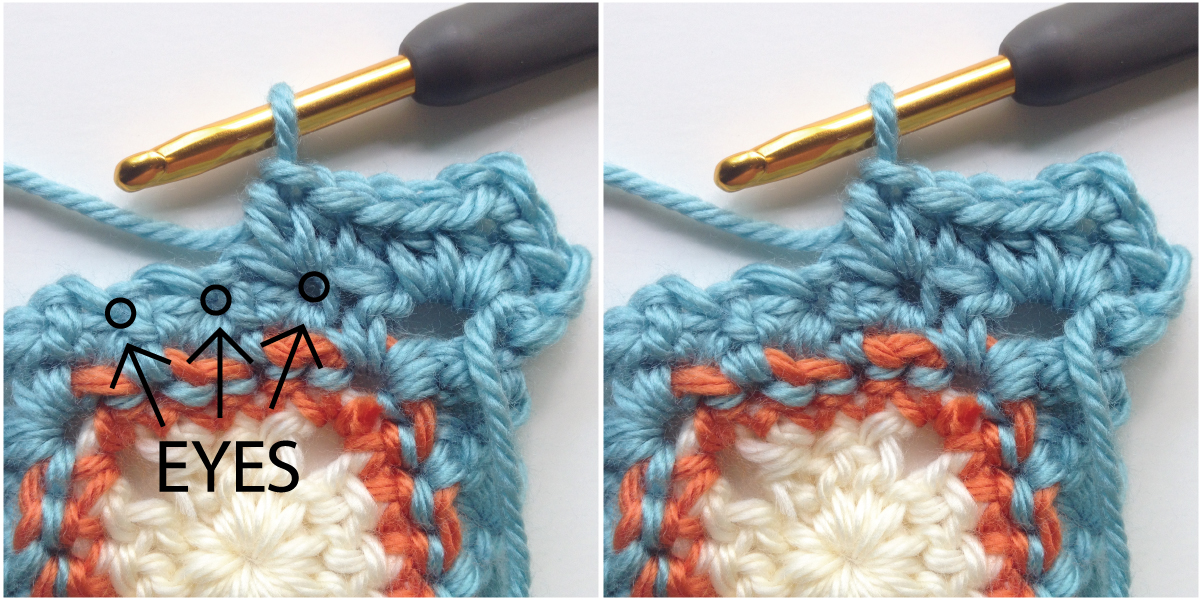
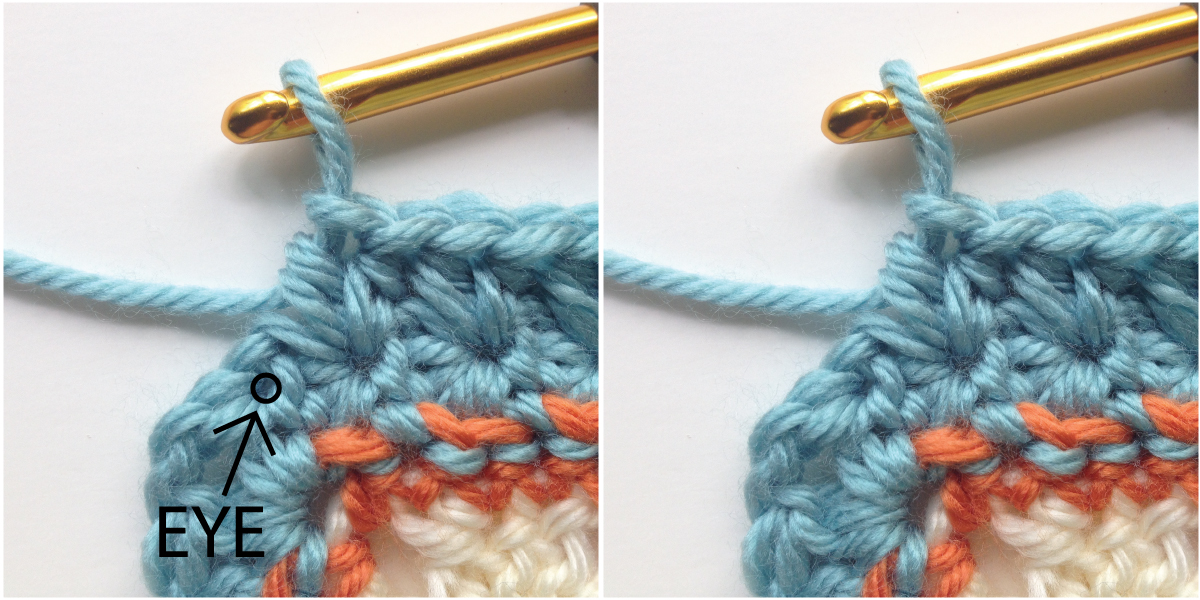
Beginning Star Stitch: Hdc (or standing hdc at the beginning of a round) in ch2 space, ch1 to form an eye ①. Insert hook into eye and pull up a loop. 2 loops on hook ②. Insert hook into the bottom spike of hdc and pull up a loop. 3 loops on hook ③. Insert hook into ch2 space and pull up a loop. 4 loops on hook ④. Insert hook into next stitch and pull up a loop. 5 loops on hook ⑤. Insert hook into next stitch and pull up a loop. 6 loops on hook ⑥. Yo and pull through all 6 loops on hook ⑦. Ch1 to form an eye ⑧.
Note: if you’re not comfortable using standing stitches, you can ch3 instead of the standing hdc. Your first loop will be pulled from the 2nd ch from hook, and the next loop will be pulled from the 3rd ch. Though, I recommend the standing hdc because it will make your corner space look nicer when you get to the next round.
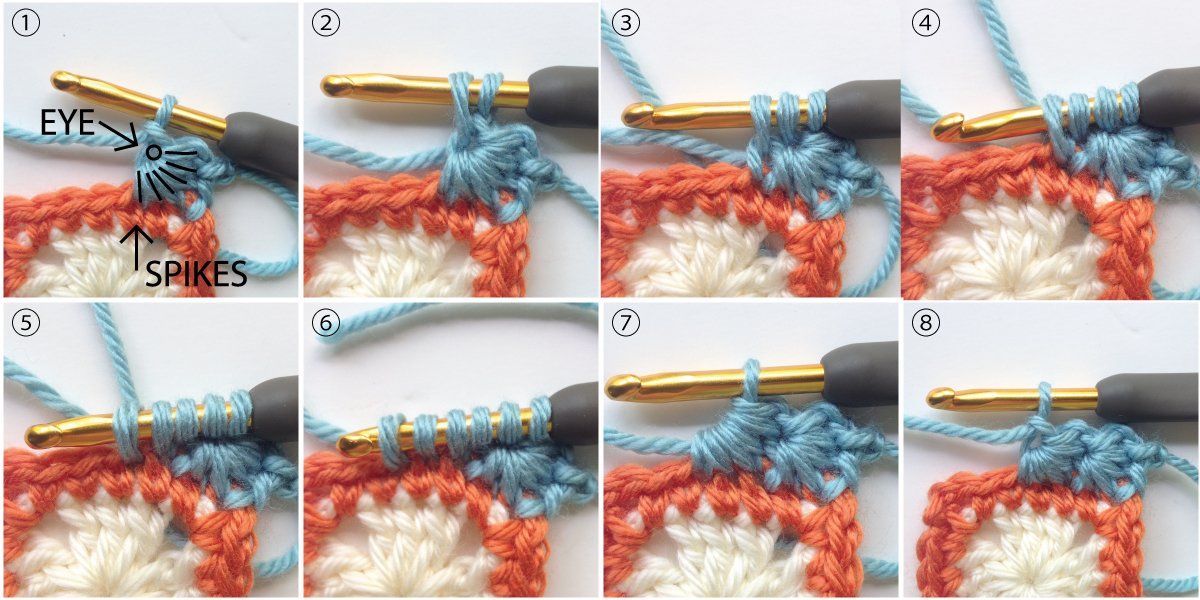
Star Stitch: Insert hook into eye of last star stitch and pull up a loop. 2 loops on hook ②. Insert hook into bottom spike of last star stitch and pull up a loop. 3 loops on hook ③. Insert hook into same stitch as last loop of last star stitch and pull up a loop. 4 loops on hook ④. Insert hook into next stitch and pull up a loop. 5 loops on hook ⑤. Insert hook into next stitch and pull up a loop. 6 loops on hook ⑥. Yo and pull through all 6 loops on hook ⑦. Ch1 to form an eye ⑧. Repeat as called for by pattern.
Commence Pattern:
Start with a magic circle (or chain loop if you prefer). I always do a double magic circle. Check out my tutorial for it in my blog post: Working Magic (Circles).
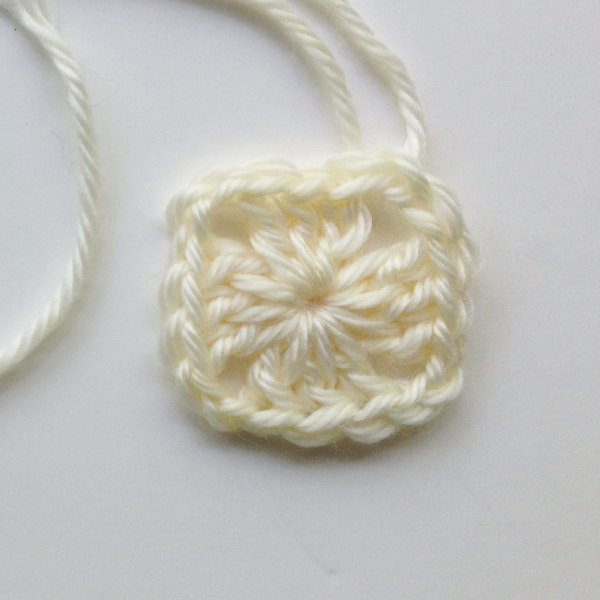
Round 1: Ch3 (counts as first dc here and throughout). Into magic circle: 2 dc, (ch2, 3dc) 3 times. Ch2 and slst to top of ch3 to join. Fasten off.
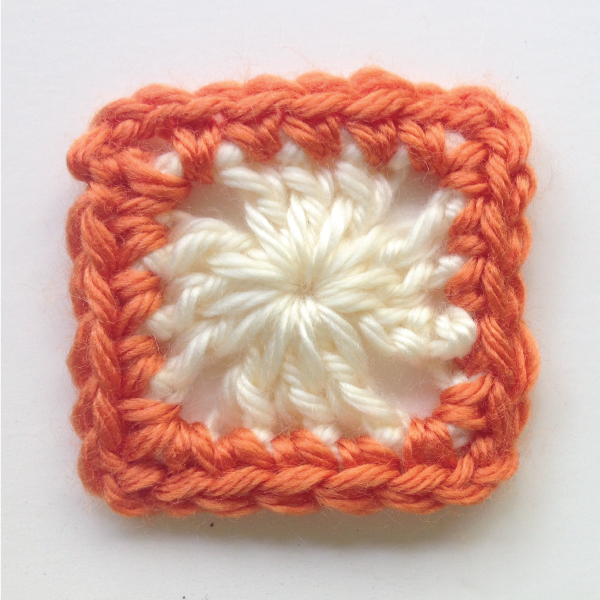
Round 2: Standing sc, ch2, sc, in corner ch2 sp. *^Sc in each stitch across,^ (sc, ch2, sc) in corner ch2 space.* Repeat from * to * 2 times and ^ to ^ once more. Slst to first sc to join. Fasten off.
For this round, you’ll need to refer above to the special stitches for instructions on the beginning star stitch and the star stitch. Keep in mind, I’ve slightly modified the beginning star stitch technique for this pattern. So if you’ve made it before, have a look to see how I’ve done it.
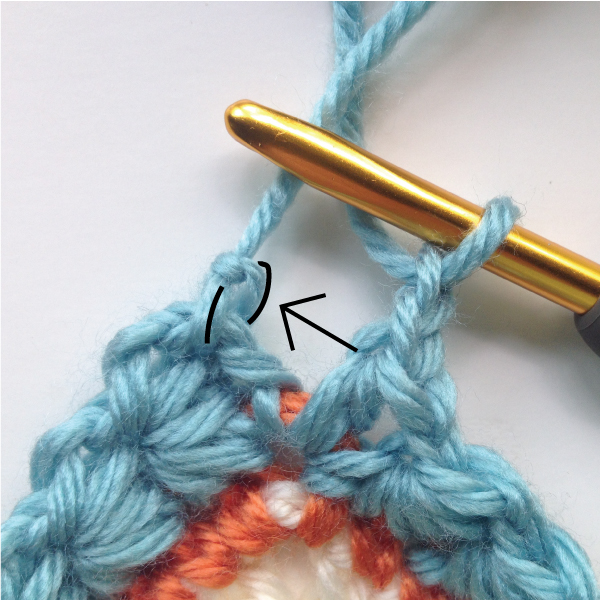
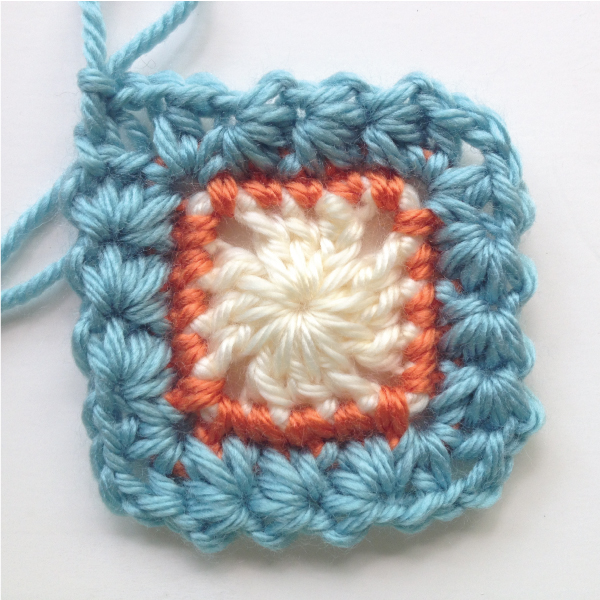
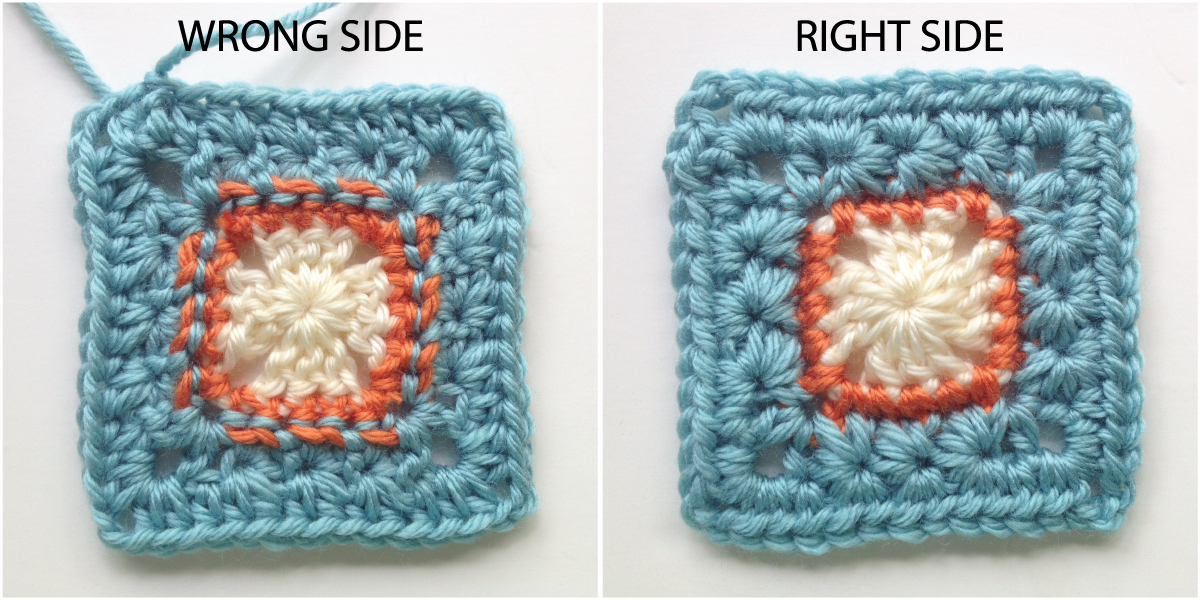
Round 3: *Work beginning star stitch starting in any corner ch2 sp. Work star stitches across with last loop of last star stitch landing in the next ch2 sp. Hdc in same ch2 sp, ch2.* Repeat from * to * 3 times. Slst to hdc of beginning star stitch. Do not fasten off. TURN.
Note: Slst to the standing hdc from the beginning star stitch can be a little difficult and feel weird because the top of the standing hdc hangs rather loosely. Slst into anyway, it will make the starting chains of the next round sit in a better place.
Round 4: Wrong side. Ch2 (counts as first hdc), (hdc, ch2, 2hdc) in ch2 corner sp. *^Hdc in next hdc, 2hdc in the eye of each star stitch, 1 hdc in the eye formed in the hdc of the beginning star stitch,^ (2hdc, ch2, 2hdc) in corner ch2 sp.* Repeat from * to * 2 times and from ^ to ^ once more. Slst to first hdc to join. Fasten off. TURN.
Round 5: Right side. Standing sc, ch2, sc, in any corner ch2 sp.*^ Sc between hdcs across,^ (sc, ch2, sc) in corner ch2 sp.* Repeat from * to * 2 times and from ^ to ^ once more. Slst to first sc to join. Fasten off.
Note: Place your scs BETWEEN the hdcs, not into the top of them. There are two reasons for this. One, it looks nicer. If you sc into the top you’ll get a ridge at the top of your star stitch and it detracts from the beauty of the stitch. Two, it will give us the right number of stitches for the rows to come.
Round 6: Standing dc, ch2, dc, in corner ch2 sp. *^dc in each stitch across,^ (dc, ch2, dc) in corner ch2 space.* Repeat from * to * 2 times and ^ to ^ once more. Slst to first dc to join. Fasten off.
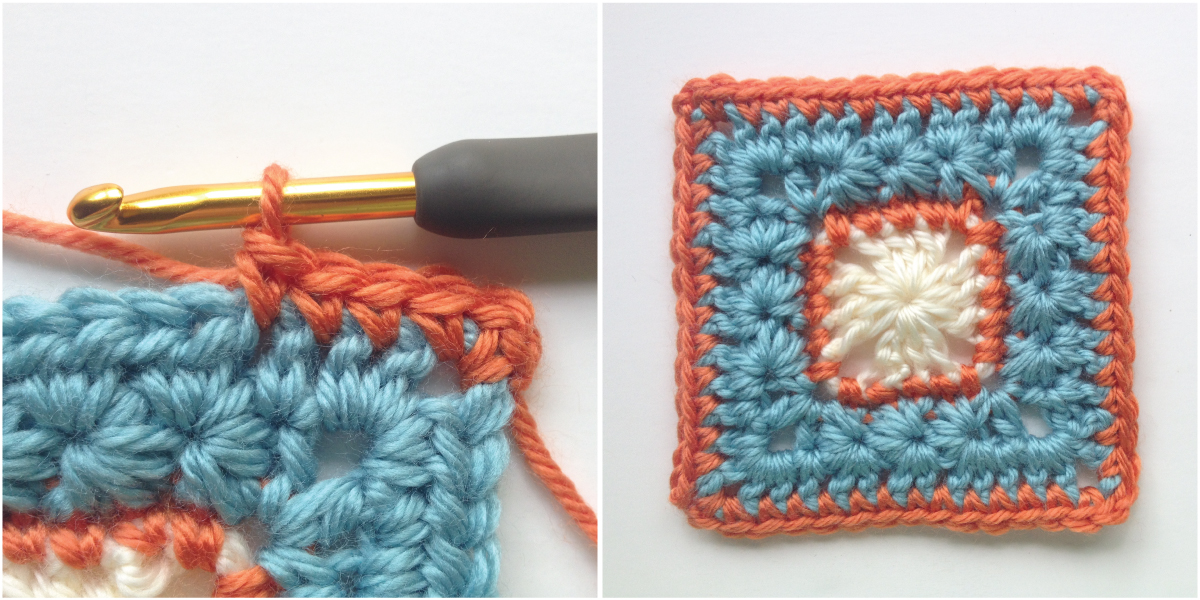
Repeat rounds 2 – 6 until desired size is reached and finish with border of your choice.
For a 12” square, repeat rows 2 – 6 twice.
You can count your stitches every round, if you want. With rounds like this, the stitches are so neat that I usually just give them a once over to make sure everything looks aligned, and then I’m extremely careful to count my star stitches on each side. I have a terrible habit of messing them up. If you do want to count here is a quick cheat sheet:
- Every round will have 4 ch2 corner spaces.
- Round 1: 12 dc
- Round 2: 5sc per side, 20 sc total
- Round 3: 3 star stitch and 2 hdc per side, 12 star stitch and 8 hdc total
- Round 4: 12 hdc per side, 48 hdc total
- Round 5: 13 sc per side, 52 sc total
- Round 6: 15 dc per side, 60 dc total
- Repeating rounds 2, 4, 5, or 6: will always have 12 more stitches than the last repeat
- Repeating round 3: will always have 6 more star stitches than the last repeat
Notes on using this technique:
Like I said in the beginning, what I’m giving you here is more of a technique than a pattern. You can use it anywhere there is a 90 degree corner to be star stitched around. But there are a couple things to keep in mind:
- Most importantly, you need to have an odd number of stitches as a foundation for row 3
- You only really need to repeat rounds 3-5.
So, for instance, you want to put a border of star stitch on a blanket and then follow it up with a fancy edge. (Please someone do this, I’m dying to see it!) You sc around the afghan making sure you have an odd number of sc across and a ch2 space in each corner. Then proceed with rounds 3-5 and finish however you like.
Or, maybe you want more star stitches and less filler. Make rounds 1-5 and then repeat rounds 3-5 until you reach your desired size.
Finally, I’ll leave you with a little trick.
Say you already have a round of stitches on an afghan/block/anything, but it’s an even number of stitches. Very simple solution: work another round of sc, hdc, or dc, it doesn’t matter, working (st, ch2, st) in the corner. But don’t work into the first stitch of each side. The first stitch sort of gets absorbed by the stitch in the corner space and you wont even notice it hasn’t been worked. And voila! You have an odd number of stitches. If you’re able to plan ahead to do this, I recommend using a round of hdc before the round where you skip a stitch. They are the best at being absorbed.
This also works if you need to go back to an even number of stitches to continue with your selected edge.
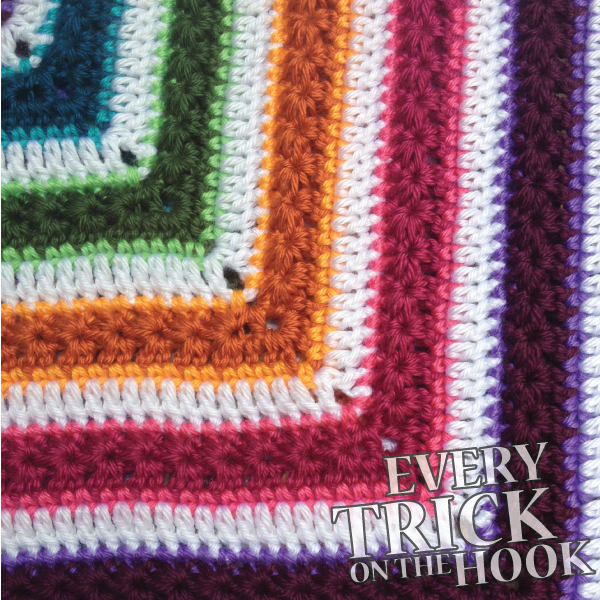
Oh! One last thing. A quick list of the colors I used if you want an idea of how to replicate my rainbow. All of the colors are Caron Simply Soft with the exception of the dark purple. That is Red Heart Soft in Grape.
- Round 1: White
- Round 2: Watermelon
- Round 3 & 4: Fuchsia
- Round 5: Watermelon
- Round 6: White
- Round 7: Iris (pretty sure it’s Iris, might be purple. I lost the label.)
- Round 8 & 9: Red Heart Soft Grape
- Round 10: Iris
- Round 11: White
- Round 12: Blue Mint
- Round 13 & 14: Ocean
- Round 15: Blue Mint
- Round 16: White
- Round 17: Limelight
- Round 18 & 19: Forest Green (And I don’t think they make it any more. Sorry! Dark Sage is your next best bet.)
- Round 20: Limelight
- Round 21: White
- Round 22: Mango
- Round 23 & 24: Pumpkin
- Round 25: Mango
And then I repeated my color sequence once for a blanket that is roughly 35″ square. I’ll be adding more rounds later, but this is as far as I got for today’s release.
That’s it! I hope you love this pattern as much as I do. Have fun with it and make sure you show me your pictures. I can’t wait to see them! And if you don’t mind, queue it, favorite it, or hook it on Ravelry. Every click helps.


This is a beautiful blanket, I love and I’m going to try to make this soon … thank you.
Pretty!! Can’t wait to try it!
Wow, this is absolutely gorgeous! Thanks for sharing your talent, hopefully I’ll get to try this soon!!
not only are you a genius but your helpful tips rock!! thank you so much! xx
Lovely pattern. I particularly appreciate your very clear instructions and beautifully clear photos. Thanks.
This if the first concentric rectangle pattern I’ve been able to find! Thank you so much for posting it <3 I wish I could have found something like this back in 2008 when I started a baby blanket for my son-to-be. I had an idea in my head for a blanket like this for him, but no knowledge other than the basic double crochet stitch (I think). And I got to work. At this point, he's 7yrs old next month, and I'm not even half done. I just have this scarf sized piece of striped blanket with 6 balls of yarn attached as it's the only way I could think to switch colors without cutting and tying in each time. v_v Never start a project without proper knowledge! Now I have to decide if I'm going to pick the hook back up and finish this blanket as I've started it, or start over and follow your pattern! :/ hmmm….
is* v_v
I love this blanket! Thanks for giving g it to us!! You’ve got such wonderful talent! Thanks! You’re the best!
Heidie
hi was wonder how I could do this in a rectangle?? My step-mom has to go to dialysis and says it gets cold in there..thank u and you patterns are beautiful..do you post the whole blanket or how to join it?
Yes! I don’t think it would be a problem to make a rectangle at all – I would start with a basic rectangle, just make sure the stitch counts on each side are appropriate for the pattern.