Welcome to day five of the 2018 Stylecraft Blogtour! Today I have some great stuff for you, but hang in there a couple minutes.
So far on the blog tour we’ve had some amazing stuff! Yesterday Lucia’s Fig Tree shared her charming Christmas pillow complete with cross stitch reindeer! Before that the tour stopped by Cherry Heart for an instant classic of a baby blanket, Crochet Between Worlds for their very clever nesting baskets, and opened with Crystals and Crochet’s fabulous waistcoat. You really need to check out these great patterns, some of which will only be free for the duration of the tour. So hurry and grab up your copies!
This year for the tour we were given a choice between two color packs of the brand new Bellissima DK, and I chose the Autumn Leaves pack (pictured below) which contained one ball each of Single Cream, Snap Pea, Mellow Yellow, Rio Red, and Ash Rose. Remember my I Heart Granny baby blanket from a few months ago? That was made with Bambino DK which is the exact same yarn but in a baby palette. So, you can mix and match the 14 grown-up colors of Bellissima with the 8 colors of Bambino to your heart’s content! In fact, the other pack, Summer Pudding, contains shades of Bambino too.
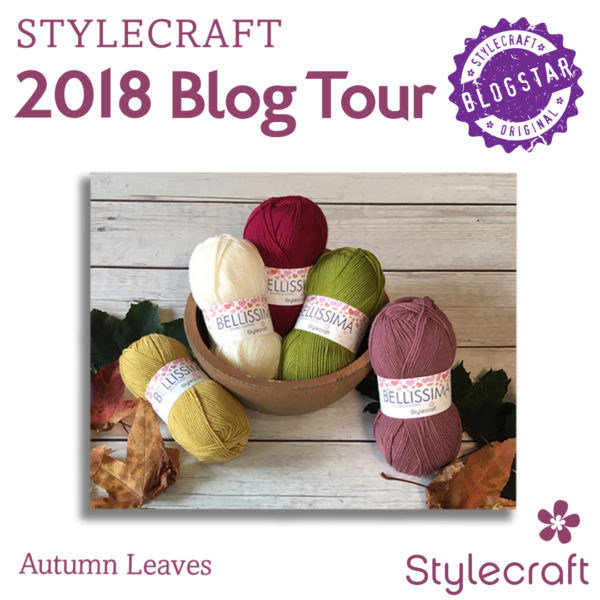
Bellissima is 100% super soft acrylic that you’re going to want to wear and snuggle. This yarn is perfect for afghans! And for anything else you will be touching a lot. The 100g balls have 268m/293y. I’m finding I like to use a 4.5mm hook best as the spin of this yarn makes for really plump and happy little crochet stitches. This does give me a little more size, so watch your gauge as necessary and depending on what you’re making.
The yarn packs from the blog tour are available from some retailers if you’re in the UK. Check out this post from Stylecraft about the tour and scroll down to see their list.
But, if you’re like me and need some reliable overseas shipping you can get Bellissima and Bambino from Deramores.com.
My Project
For my project I wanted to make a baby blanket because, like I said – SO snuggly! But, I didn’t have quite enough yarn for what I wanted to do. Instead, I decided to capitalize on Bellissima’s stunning stitch definition and sheen and made a wall hanging.
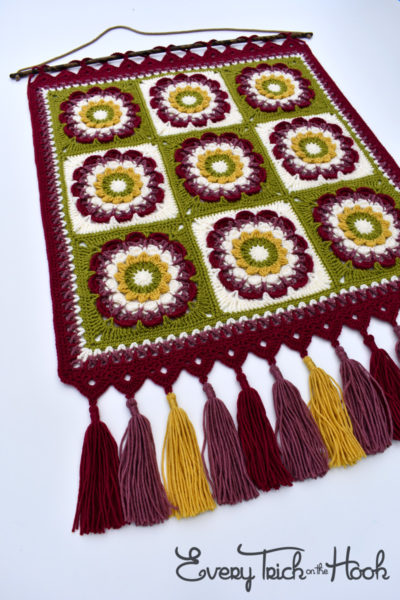
I was a little intimidated going in as I’ve never done anything like this before, but it turned out to be such a fun project! I used an all new afghan square pattern – Dixie Daydream, which you can get free for a limited time, just read to the end of the blog to find out how.
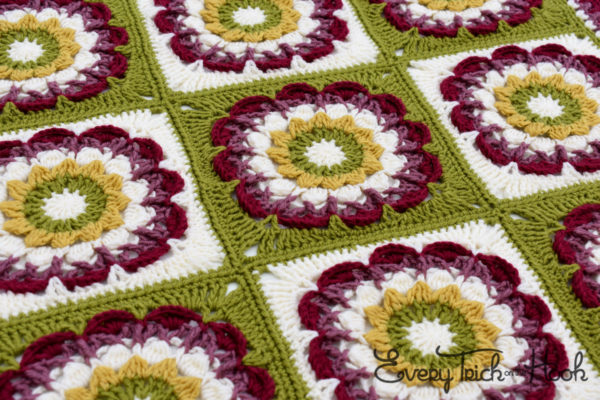
This block works just like the ones in my Lovestruck Collection which are made of 9 inch squares (if made in Aran, in DK they are 7.5) with 3 inch (about 2 in DK) borders that are interchangeable and can also be used as borders on other square and rectangle projects. I used the main squares for the center of my project and the border around them.
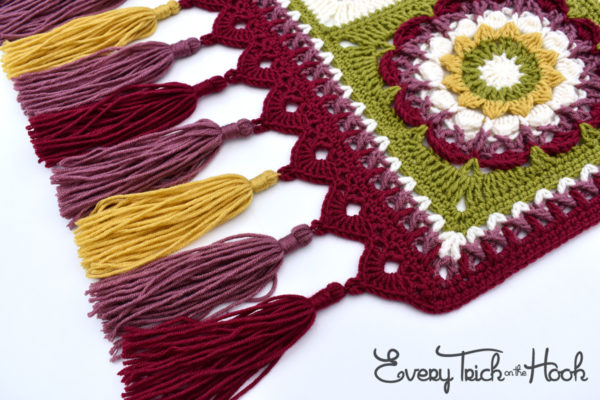
Then I wrapped things up with an all new edging pattern – Magic Carpet Edge, which is free here on my website.
Afghan blocks are my favorite type of pattern because they are so versatile and really lend themselves to your creativity. You can take a single afghan block pattern and create a whole afghan by repeating the motifs either all with the same colors for a very classy look or by changing the color sequence for each square to get a really exciting look. Then you can join them and edge them using any methods you like. Go crazy! Make something unique! It’s a really fun process. Please have a look at my collection of afghan block designs by clicking here, then take a little spin on Ravelry to see just how many amazing afghan blocks there are. The possibilities are endless!
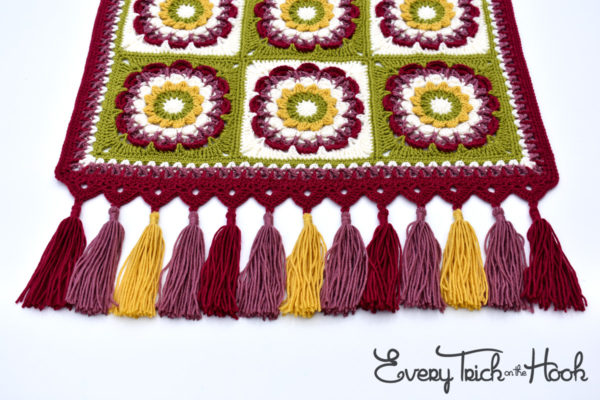
There are so many other ways to use afghan blocks, I can’t get into them all right now. For now, I’ll tell you what I did to make my wall hanging that, really, could easily be turned into an afghan by simply having more yarn to play with and making more motifs.
First off I made the first six rounds of the pattern nine times each in exactly the same order of colors: 1. Single Cream; 2. Snap Pea; 3. Mellow Yellow; 4. Single Cream; 5. Ash Rose; 6. Rio Red.
For four of the squares I made rounds 7 & 8 in Single Cream, the other five I made in Snap Pea.
To join the squares I converted round 9 to single crochet (from hdc) and used the single crochet join-as-you-go method to join. Here’s my handy video tutorial on the method:
I saved the last four rounds of the afghan block pattern to use as a border on the joined squares (the pattern contains instructions on what stitch count you need to use it that way), but first, I put a round of sc in Snap Pea around the joined squares (to get the stitch counts right I did not put an sc in the middle part of the joins). The border rounds were as follows: 10. Single Cream; 11. Ash Rose; 12. Rio Red; 13. Rio Red.
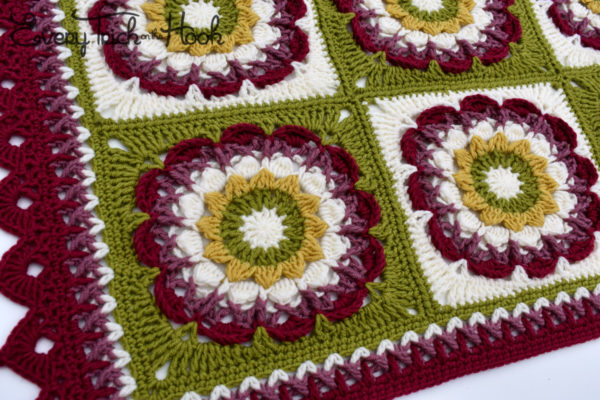
Once my squares were all bordered up I switched over to the Magic Carpet Edge pattern (using the standard version) to finish things off. Then I got to blocking. Yes, I steam blocked this baby and it came out fantastically. Bellissima only needs a light steam blocking to set the stitches and as long as you don’t press on the yarn while it’s still hot from the steam it keeps its nice plump stitches.
After blocking, it was time to add my favorite part… the tassels!!! I can’t get enough tassels these days. Remember, after you make your tassels, hit them with a little steam so that they straighten out. Nobody likes sloppy tassels.
Visit my photo tutorial for making your own tassels here.

Now the interesting part… I had to figure out how to hang it! Mr. Plum helped me cut, stain, sand, drill, and assemble a dowel and some fancy ropy looking stuff I got from the ribbon section of the craft store. I do wish I could say I did this handiwork myself, but the very same day I burnt my own toe with a curling iron (please don’t make me explain how one does this, pregnant-me has lost all her coordination), so Mr. Plum and I decided it was safer to accept his help with power tools. However, I did have to come up with a way to string it up on the rod. I tried a few things that didn’t look so hot and eventually landed on this: Slst to the corner st, ch15, slst to the center of the next picot, [ch10, slst to the center of the next picot] across, ch15, slst to the corner st, fasten off, weave in ends.
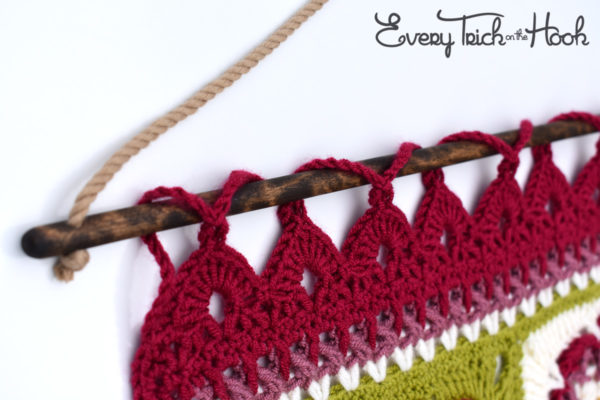
All that was left to do was hang it and enjoy!
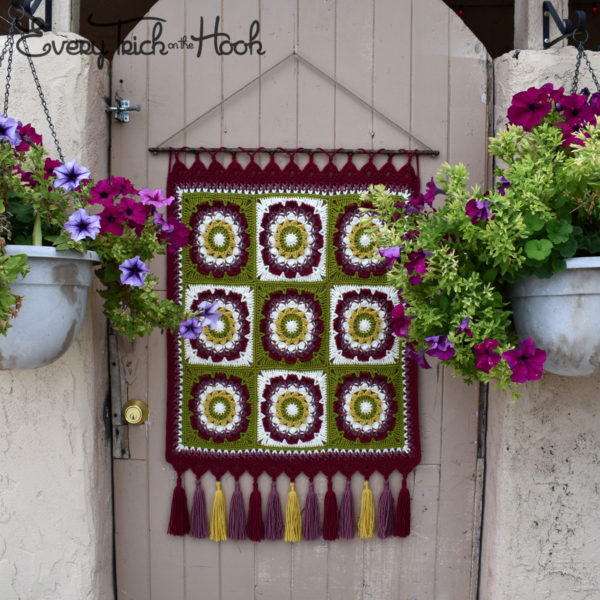
Ok, that’s not its real home. Mr. Plum insisted I get a picture with his petunias that he is so proud of. It will be kept safe inside and away from the elements.
Free Pattern!
Okay! Okay! Now, what you’ve been waiting for. You can get your free copy of Dixie Daydream on Ravelry with coupon code: blogtour2018
Please make sure your cart balance is zero before checking out. Let me know if you have any issues using the code. The code will be active through the end of the blog tour, which is 10am GMT, October 16, 2018.
Yarn Giveaway!
To enter to win a pack of the same yarn I used for my project, just fill out the below form. The giveaway is open for 24 hours (through 10am GMT, October 4, 2018), so don’t delay!
That’s it for me today! Tomorrow on the blog tour we’ll be visiting josiekitten to see what she’s made and for another chance to win a yarn pack!

This post contains affiliate links. That means I get a little bit of commission if you decide to click a link and buy something. There is never any additional charge to you. A little bit of commission means I can keep the website going and more free patterns coming at you. So, thanks for that!
Please check out the Patterns page here on Every Trick on the Hook or my Ravelry store to see more of my patterns, both free and paid.
The best way to keep up with my goings-on is to follow Every Trick on the Hook on Facebook. You can also message me there, post on the wall, and follow my posts for the latest news.
If you’re looking for a more interactive Facebook experience, join the Polly Plum Pattern Posse Facebook group. We’re a fun and supportive group. Really! There’s so much help there that chances are your question will be answered by someone before I even see it. It’s the best place to go with a question. It’s also a great place to share your Polly Plum makes and see what others are making.
If Facebook isn’t your thing you can also join the Ravelry group – Polly’s Place or follow @polly_plum_crochet on Instagram

Thank you for the pattern Rosina, what a fabulous design, hope I get the chance to work the wall hanging soon
P
Such a truly beautiful design!
Thank you so much for sharing.
Thank you Poly for yet another beautiful pattern. Your colours makes it even more beautiful. I can’t wait until I start making this pattern Thank you also for being so generous in giving the pattern for free.
Another beautiful design, you are so generous, thank you so much. I giggled while reading your story behind the beautiful wall hanging, and Mr Plum’s flowers are gorgeous.
Cheers Maggie