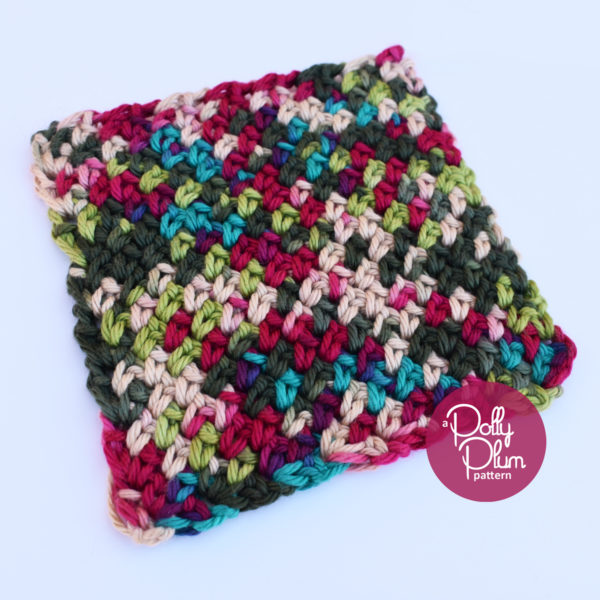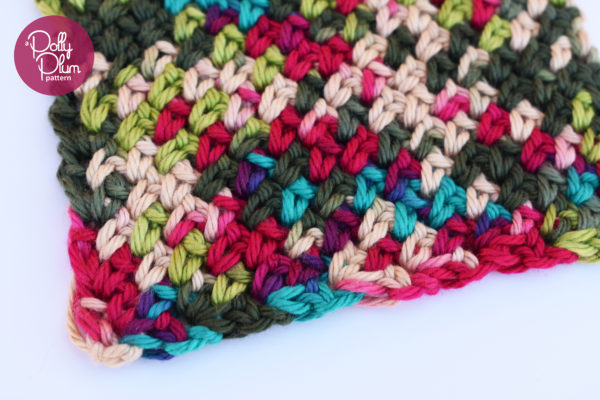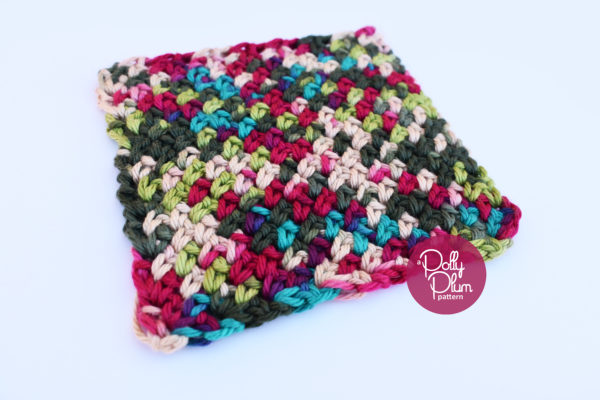
Crochet moss stitch (sometimes also called granite stitch or linen stitch) is an incredibly easy and beautiful stitch. In this variation it is worked on the bias, or from corner to corner (C2C). The fabric created is wonderfully stretchy and has a lovely drape. This pattern works beautifully with variegated yarns to disperse the colors randomly. It also works well with gradient stripes to create a subtle shift from color to color.
The pattern below will help you create a square or rectangle of C2C Moss Stitch in any size of your choosing.

Details
Pattern written in US crochet terms
Skill level: Easy
Finished Size: Any
Gauge: Not important (unless you’re recreating a project I’ve made, in that case see the blog post related directly to that project)
Hook size: Whatever is appropriate for your yarn
Yarn: Any
Pattern Notes
This stitch creates a VERY stretchy fabric. If you make something large, like a baby blanket, you are probably going to want to block it into shape. The stretchiness and the bias construction can make your square look a little less than square. I promise it’s square! But with a lot of handling – like the turning and turning of rows – you can lose some of the perfect angles.
No border or edging is provided for this pattern. The stitch can be used as is, without adding a border, for a modern look, or add any border or edge of your choosing.
Click here to favorite, queue, and hook up a project page on Ravelry.
Check out the new “Print Friendly” button at the bottom of the page to print your own copy of the pattern.
If you need help or have any questions, scroll to the bottom of this page. There are links to where you can find lots of support.
This pattern is Copyright © 2017 Polly Plum. All rights reserved.
If you would like to share this pattern, please share the link to this webpage or the Ravelry pattern page (link below). Please do not distribute this pattern or the accompanying photos in any other form. Please read more in the Copyright section.
Abbreviations
- ch – chain
- hdc – half double crochet
- sc – single crochet
- sk – skip
- slst – slip stitch
- sp – space
- st– stitch
Video Tutorial
Commence Pattern
INCREASE ROWS:
Start by making increase rows.
Row I1: With slip knot on hook ch3, sc in 3rd ch from hook. Turn.
Row I2: Ch3, sk first sc, (sc, ch1, sc) in next ch3 sp. Turn.
Row I3: Ch3, sk first sc, sc in next ch1 sp, ch1, sk next sc, (sc, ch1, sc) in next ch3 sp. Turn.
Row I4: Ch3, sk first sc, [sc in next ch1 sp, ch1, sk next st] repeat across to next ch3 sp, (sc, ch1, sc) in ch3 sp. Turn.
Repeat row I4 until the short sides of your triangle reach your desired width.
Continue with rectangle instructions if you wish to make a rectangle, or if you wish to make a square, skip to the transition row instructions.
TO MAKE A RECTANGLE:
After making increase rows, repeat rows R1 and R2 until the longest side reaches your desired length. (Skip these if you’re making a square.)
Row R1: Ch3, sk first st, sc in next ch1 sp, [ch1, sk next st, sc in next ch1 sp] repeat across side to to last sc, sk last sc, sc in final ch2 sp. Turn.
R1 Hints: There is not a ch1 sp between the final two sc of this row. The first time you make R1 the final ch2 sp will actually be the ch3 sp from row I4.
Row R2: Ch2, sk first 2 st, [sc in next ch1 sp, ch1, sk next st] repeat across to next ch3 sp, (sc, ch1, sc) in ch3 sp. Turn.
Transition Row Rectangle: Ch2, sk first st, sc in next ch1 sp, [ch1, sk next st, sc in next ch1 sp] repeat across side to to last sc, sk last sc, sc in next ch2 sp.
TO MAKE A SQUARE:
After making increase rows, make the following transition row to make a square.
Transition Row Square: Ch2, turn, sk first st, [sc in next ch1 sp, ch1, sk next st] across to next ch3 sp, (sc, hdc) in next ch3 sp.
DECREASE ROWS:
Finish with decrease rows only after making one of the transition rows for your selected shape (square or rectangle).
Decrease Rows Hints: You do NOT ch between the last two sc of each side. This is easy to forget at first, so pay careful attention. It’s important for creating a smooth decrease.
Row D1: Ch2, sk first 2 st, sc in next ch1 sp, [ch1, sk next sc, sc in next ch1 sp] repeat across side to last sc, sk last sc, sc in final ch2 sp. Turn.
Repeat row D1 until your row has only 4 sc across.
Row D2: Ch2, sk first 2 sc, sc in next ch1 sp, ch1, sk next sc, sc in next ch1 sp, sk next sc, sc in next ch2 sp. Turn.
Row D3: Ch2, sk first 2 sc, sc in next ch1 sp, sk next sc, sc in next ch2 sp.
Row D4: Ch1, turn, skip first 2 sc, sc in next ch1 sp, fasten off.

If you’d like to show your support and/or say thank you for this free pattern – the most helpful thing you can do is share a picture of your work on Ravelry or Facebook. Seriously! That’s it. If you liked the pattern, tell your friends and show them what you made.
If you’d like to see more of my work, visit the Patterns page here on Every Trick on the Hook or my Ravelry store.
The best way to keep up with my goings-on is to follow Every Trick on the Hook on Facebook. You can also message me there, post on the wall, and follow my posts for the latest news.
If you’re looking for a more interactive Facebook experience, join the Polly Plum Pattern Posse Facebook group. We’re a fun and supportive group. Really! There’s so much help there that chances are your question will be answered by someone before I even see it. It’s the best place to go with a question. It’s also a great place to share your Polly Plum makes and see what others are making.
If Facebook isn’t your thing you can also join the Ravelry group – Polly’s Place or follow @polly_plum_crochet on Instagram.
