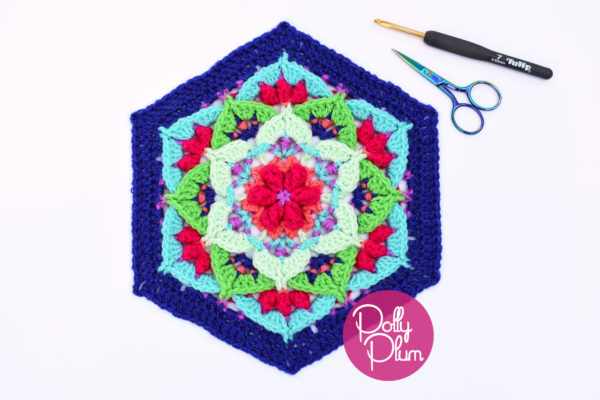
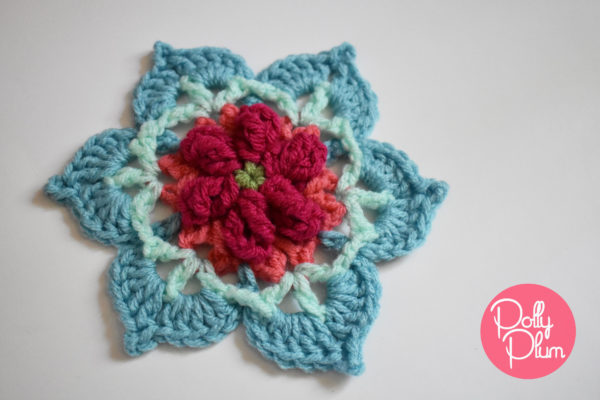
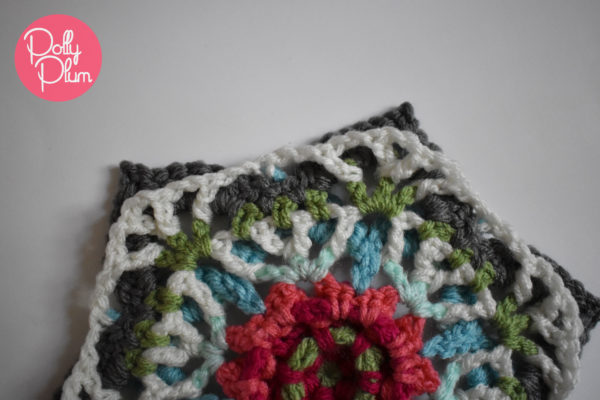
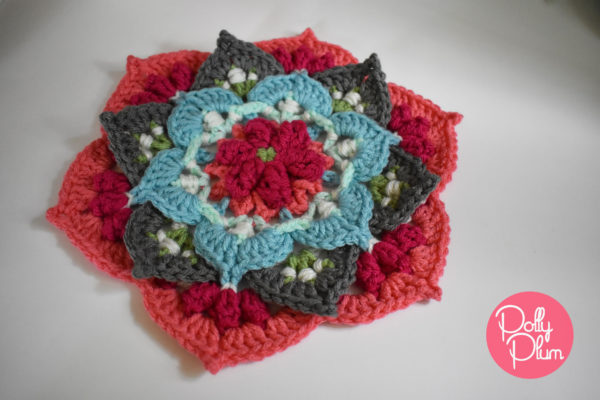
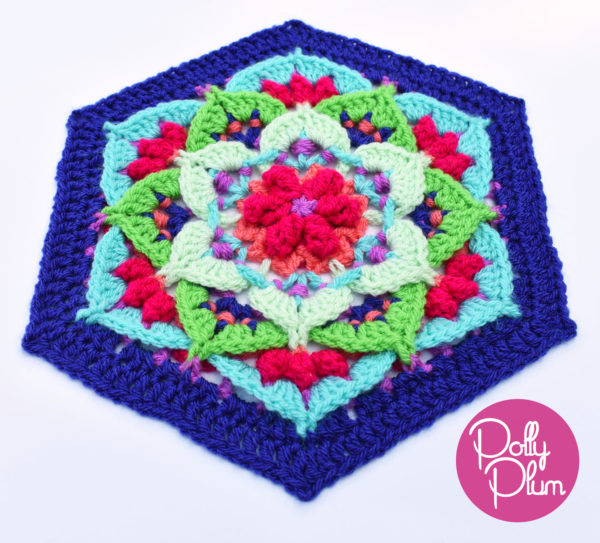
The Imagine Hexagon is based on the Imagine Square. The first 12 rounds are exactly the same, so I’ve simply copied and pasted them below to keep things simple.
Pattern written in US crochet terms
Skill level: advanced
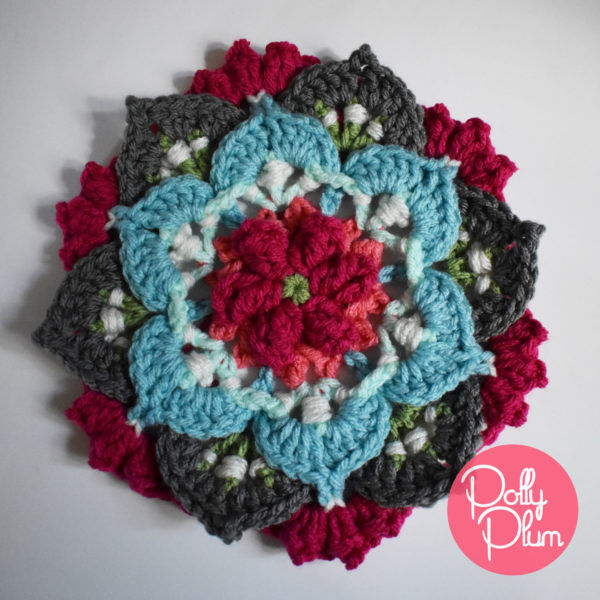
Finished Size: 9 inch in DK; ~12 inch in Aran
Hook size: 4.55mm for DK; 5.5mm for Aran
Yarn: DK or Aran
Final Stitch Count: 19 sts per side
Notes
This pattern is Copyright © 2019 Polly Plum. All rights reserved.
If you would like to share this pattern, please share the link to this webpage or the Ravelry pattern page (link below). Please do not distribute this pattern or photos in any other form. Please read more in the Copyright section.
Click here to favorite, queue, and hook up a project page for this pattern on Ravelry.
At the bottom of the page there is now a “print friendly” button. It’s really easy to use! Just click it and a window will open that gives you the option to click on the things you don’t want to print to make them go away. That way you print just pattern and save yourself some ink or toner.
If you need help or have any questions, scroll to the bottom of this page. There are links to where you can find lots of support.
Abbreviations
- ch – chain
- dc – double crochet
- hdc – half double crochet
- r(#) – round number
- sc – single crochet
- sk – skip
- slst – slip stitch
- sp – space
- st– stitch
- tr – treble crochet
- yo – yarn over
Special Stitches
Standing sc – to start a round, with slip knot on hook, insert hook into indicated stitch, yo and pull up a loop, yo and pull through two loops on hook
Standing hdc – to start a round, with slip knot on hook, hold slip knot in place with thumb or finger, yo and hold that in place too, insert hook in indicated stitch, yo and pull up a loop, carefully yo and draw yarn through all three loops on hook {alternately: slst into the indicated starting st and ch2}
Standing dc – to start a round, with slip knot on hook, hold slip knot in place with thumb or finger, yo and hold that in place too, insert hook in indicated stitch, yo and pull up a loop, carefully yo and draw yarn through two loops on hook twice {alternately: slst into the indicated starting st and ch3}
fptr-PC – 4 fptr around indicated st, remove loop from hook and hold, insert hook into top two loops of first fptr, replace loop on hook and pull through st {see video below}
fpsc/fpdc/fptr – {front post single/double/treble crochet} like regular sc/dc/tr but instead of inserting the hook in the top two loops of a stitch you insert your hook from front to back around the post of the stitch to pull up a loop
picot – ch3, slst to back bump of first ch
standing bpdc – like regular standing dc but instead of inserting the hook in the top two loops of a stitch you insert your hook from back to front around the post of the stitch to pull up a loop
bpdc– like regular dc but instead of inserting the hook in the top two loops of a stitch you insert your hook from back to front around the post of the stitch to pull up a loop
PC – {popcorn} 4dc into same st, remove hook from working loop, insert hook into first dc made, put working loop back on hook and pull through first dc
Standing PC – (standing dc, 3dc) into same st, then complete as for regular PC {hint: a ch3 can be used in place of a standing dc to begin this st}
begPC – {beginning popcorn} (ch3, 3dc) into same st, remove hook from working loop, insert hook into third ch of ch3, put working loop back on hook and pull through
Important – Before you Begin
Color changes and order are not listed. Instructions to fasten off are only included where it’s necessary regardless of what color you plan to use in the next round. Where possible, each round begins with the option to start with new yarn OR to continue with the same yarn. This is to offer you complete creative freedom and encourage you to experiment with your own colors. If you’d like details on the colors used in my version, please click here to see my blog post.
Pattern
Begin with magic circle. {Click here to learn how to make a magic circle – video tutorial includes instructions for making a chain loop look like a magic circle.}
Round 1:
Ch4 {counts as dc, ch1}. [Dc, ch1] into magic circle 5 times. Close magic circle. Slst to 3rd ch of beginning ch4 to join.
6 dc, 6 ch1 sp (12 st around)
Round 2:
With new yarn: Standing dc in any ch1 sp.
Or, with same yarn: slst into next ch1 sp, ch3 {counts as first dc here and throughout}.
Ch1, fptr-PC around next dc, ch1. [Dc in next ch1 sp, ch1, fptr-PC around next dc, ch1] 5 times. Slst to first dc to join.
6 fptr-PC, 6 dc, 12 ch1 sp (24 st around)
Round 3:
With new yarn: standing sc in ch1 sp after any dc.
Or, with same yarn: slst into next ch1 sp, ch1 and sc in same ch1 sp.
*^Fpsc around next fptr-PC, sc in next ch1 sp, (fpdc, ch2, fpdc) around next dc,^ sc in next ch1 sp.* Repeat from * to * 4 times more and from ^ to ^ once more. Slst to first sc to join.
12 fpdc, 6 fpsc, 12 sc, 6 ch2 sp (42 st around)
Hint: place st markers in the r3 fpsc to make them easier to find in r5.
Round 4:
Work only into r3 ch sps, sk all sts.
With new yarn: standing dc in any ch2 sp.
Or, with same yarn: slst into next (fpsc, sc, fpdc, ch2 sp), ch3.
[Ch2, dc] twice into same ch2 sp as first dc. *^Ch2, sk next 5 st,^ dc in next ch2 sp, [ch2, dc] twice into same ch2 sp.* Repeat from * to * 4 times more and from ^ to ^ once more. Slst to first dc {or 3rd ch of starting ch} to join.
18 dc, 18 ch2 sp (54 st around)
Hints for r5: see how I do picots by clicking here. Close r5 with an invisible join or invisible join to standing stitch for best result.
Round 5:
With new yarn: standing dc in the first ch2 sp after join {the ch1 after the first dc of any 3dc group}.
Or, with same yarn: slst into next ch2 sp and ch3.
4 more dc into same ch2 sp as first dc. *^Picot, 5 dc in next ch2 sp, ch2, sc into r3 fpsc keeping work behind r4 ch2 sp, ch2, sk the r4 ch2 sp that is in front of your work,^ into the next r4 ch2 sp make 5dc.^ Repeat from * to * 4 times more and from ^ to ^ once more. Slst to first dc to join. FASTEN OFF.
6 picots, 60 dc, 6 sc, 12 ch2 sp (96 st around)
Round 6:
All sts worked into r4, keeping them behind r5 sts.
With new yarn: standing bpdc around the first r4 dc of any 3dc group.
*^Ch2, (bpdc, ch2, bpdc) around next r4 dc,^ [ch2, bpdc around next r4 dc] twice.* Repeat from * to * 4 times more and from ^ to ^ once more. Ch2, bpdc around next r4 dc, ch2. Slst to first bpdc to join.
24 bpdc, 24 ch2 sp (72 st around)

Round 7:
With new yarn: standing sc in first ch2 sp after join {the ch sp after the first dc behind any petal}.
Or, with same yarn: slst into next ch2 sp, ch1 and sc in same ch2 sp.
*^[Ch1, sk next bpdc, sc in next ch2 sp] twice, ch2, [dc, ch2] three times
into next ch2 sp,^ sc in next ch2 sp.* Repeat from * to * 4 times more and from ^ to ^ once more. Slst to first sc to join.
18 dc, 18 sc, 24 ch2 sp, 12 ch1 sp (96 st around)
Round 8:
With new yarn: standing sc in first ch1 sp after join {the ch1 after the first sc in any group of 3 sc}.
Or, with same yarn: slst into next ch1 sp, ch1 and sc in same ch1 sp.
Sk next sc, sc in next ch1 sp, sk next sc. *^3dc in next ch2 sp, sk next dc, 3dc in next ch2 sp, picot, 3dc in next ch2 sp, sk next dc, 3dc in next ch2 sp,^ sk next sc, [sc in next ch1 sp, sk next sc] twice.* Repeat from * to * 4 times more and from ^ to ^ once more. Slst to first sc to join. FASTEN OFF.
6 picots, 72 dc, 12 sc (90 st around)

Hints for r9: click here to see how to work into a picot, use the first method, what I call “standard” in the video.
Round 9:
Work only into r7 dcs and r5 picots for entire round.
With new yarn: standing bpdc around the 3rd r7 dc of any 3 dc group.
*^Ch2, sc into center of r 5 picot, ch2, bpdc around next r7 dc, ch2, (bpdc, ch2, bpdc) around next r7 dc, ch2,^ bpdc around next r7 dc.* Repeat from * to * 4 times more and from ^ to ^ once more. Slst to first bpdc to join.
24 bpdc, 6 sc, 30 ch2 sp (90 st around)

Round 10:
With new yarn: standing PC in first ch2 sp after join {the ch2 sp before any sc made into a picot}.
Or, with same yarn: slst into next ch2 sp and make begPC.
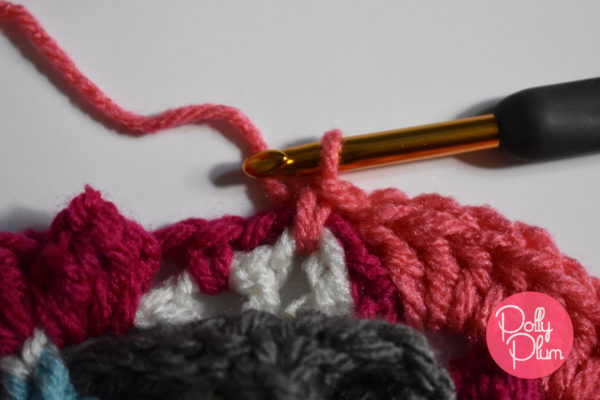
*^Ch2, PC into next sc {hint: for best result, split the sc by working under the top two loops AND between the two front legs, see video below}, ch2, PC in next ch2 sp, ch2, sk next bpdc, sc in next ch2 sp, ch4, sk next (bpdc, ch2, bpdc), sc in next ch2 sp, ch2, sk next bpdc,^ PC in next ch2 sp.* Repeat from * to * 4 times more and from ^ to ^ once more. Slst to first PC to join.
18 PC, 12 sc, 6 ch4 sp, 24 ch2 sp (102 st around)
Hint after r10: for best result, push your PCs into place by sliding the outside two closer to the center one made into the sc.
Hint for r11: for best result, use an invisible join again.
Round 11:
With new yarn: standing dc in first ch2 sp after join {the ch2 sp immediately after first PC in any group of 3 PC}.
Or, with same yarn: slst into next ch2 sp, ch3.
3 more dc into same ch2 sp as first dc. *^Picot, [sk next PC, 4dc into next ch2 sp] twice, sk next sc, sc into r10 ch4 sp and skipped r9 ch2 sp together, sk next sc, 4dc into next ch2 sp {the ch2 sp immediately before the next PC}, sk next PC,^ 4dc in next ch2 sp.* Repeat from * to * 4 times more and from ^ to ^ once more. Slst to first dc to join. FASTEN OFF.
6 picots, 96 dc, 6 sc (108 st around)
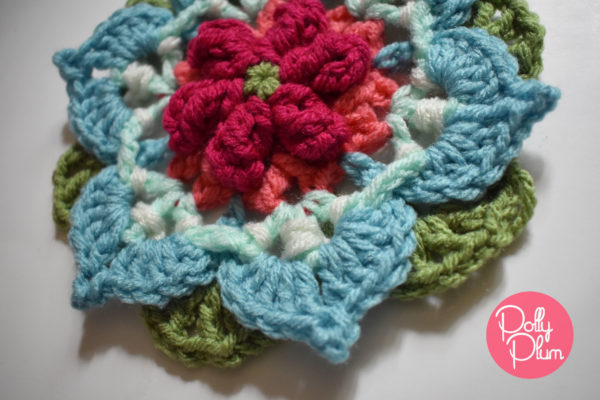
Round 12:
All sts worked into r10 keeping work behind r11, except where worked into r8 picots. You’ll need to move r11 dcs out of the way to work into r10 sts. Sk all r11 sts.
With new yarn: Standing hdc in center PC of any 3 PC group from r10.
Ch2, hdc in next r10 PC. *^Ch2, dc in next r10 sc, ch2, sc in r8 picot, ch2, dc in next r10 sc,^ [ch2, hdc in next r10 PC] 3 times.* Repeat from * to * 4 times more and from ^ to ^ once more. Ch2, hdc in next r10 PC, ch2. Slst to first hdc to join.
12 dc, 18 hdc, 6 sc, 36 ch2 sp (108 st around)
Note: This is where the pattern deviates from the original square pattern.
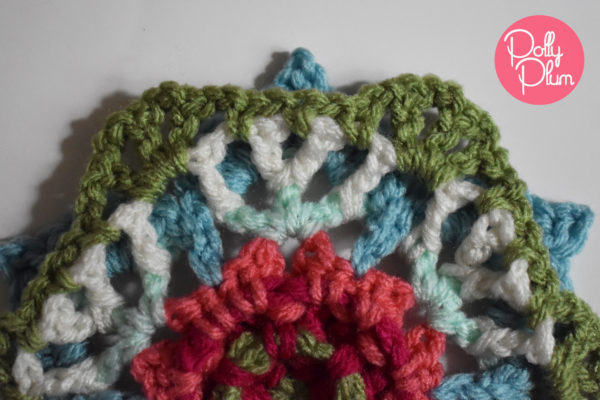
Round 13:
With new yarn: Standing dc in first ch2 sp after join.
Or, with same yarn: Slst into the next ch2 sp, ch3.
2 more dc into same ch2 sp. *^Sk next st, 3hdc in next ch2 sp, sk next st, 2hdc in next ch2 sp, sc in next st {the one made into the r8 picot, try splitting the st here}, 2hdc in next ch2 sp, sk next st, 3 hdc in next ch2 sp, sk next st, 3dc in next ch2 sp, sc in the r11 picot, sk next st,^ 3dc in next ch2 sp.* Repeat from * to * 4 times more and from ^ to ^ once more. Slst to first dc to join.
36 dc, 60 hdc, 12 sc (108 st around)
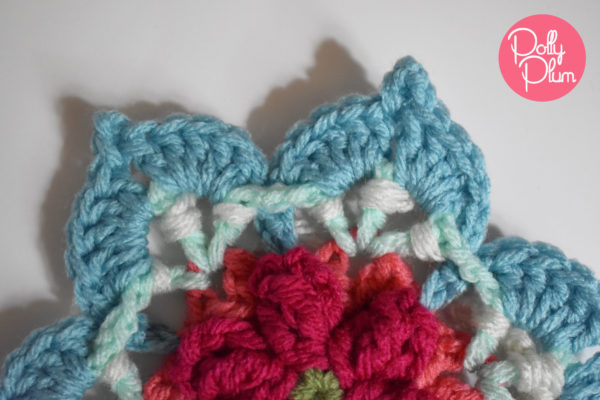
Round 14:
With new yarn: Standing dc in same st as join.
Or, with new yarn: Ch3.
Dc in each of next 16 sts. *^(Dc, ch1, dc) in next st {this will be the sc made into the r11 picot, ch1 counts as corner}, dc in each of next 17 sts.* Repeat from * to * 4 times more and from ^ to ^ once more. Slst to first dc to join. Fasten off.
114 dc, 6 ch1 sp (19 st per side)
Credits
Original pattern and design by Polly Plum
Photography by Polly Plum
Pattern testing of original square by Jilly Ash, Heather Dykstra, Courtney Laube, Danielle Matschiner, Jan White, Tiggerbee
If you’d like to show your support and/or say thank you for this free pattern – the most helpful thing you can do is share a picture of your work on Ravelry or Facebook. Seriously! That’s it. If you liked the pattern, tell your friends and show them what you made.
If you loved the pattern and want to make more, check out the Patterns page here on Every Trick on the Hook or my Ravelry store.
The best way to keep up with my goings-on is to follow Every Trick on the Hook on Facebook. You can also message me there, post on the wall, and follow my posts for the latest news.
If you’re looking for a more interactive Facebook experience, join the Polly Plum Pattern Posse Facebook group. We’re a fun and supportive group. Really! There’s so much help there that chances are your question will be answered by someone before I even see it. It’s the best place to go with a question. It’s also a great place to share your Polly Plum makes and see what others are making.
If Facebook isn’t your thing you can also join the Ravelry group – Polly’s Place or follow @polly_plum_crochet on Instagram.
