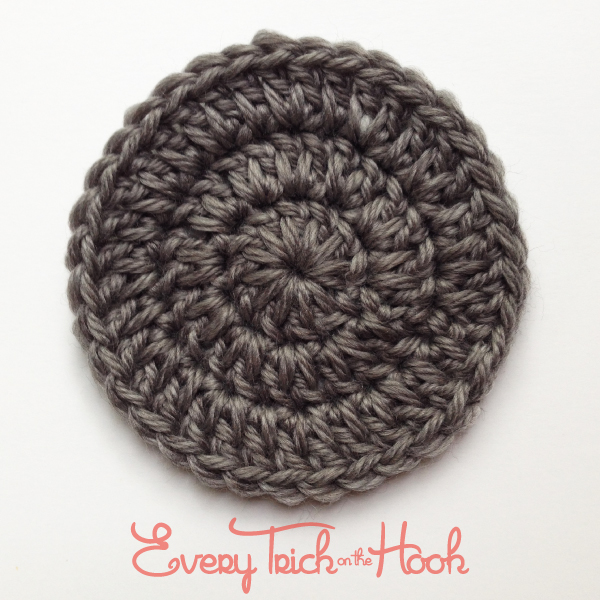
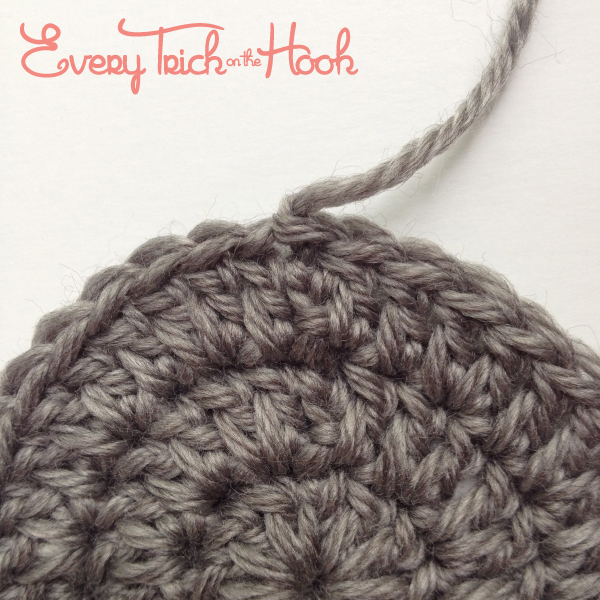
Circles are one of the most basic things you’ll ever learn to crochet. You probably learned how to make a circle early on in your crochet career when you made your first beanie. And then, I bet, later on you learned how to use an invisible join to make that circle really sleek. In fact, you’re probably asking yourself, “What could she possibly have to show to me to improve on the circle I already know how to make?”
Well, if you’re only interested in fastening off every round and making numerous color changes… the answer is: not much. But if you’re looking at making a single color circle that continues with the same yarn on each round, like so very many patterns call for, this is the tutorial for you.
I’m going to show you by making a flat circle, not a bowled shape which you might use for a beanie, but the techniques and principles will apply to both. In fact, I use these very techniques any time I work in the round. I’ll throw some hints in here and there about how different things can be applied elsewhere.
The Basics
We’ll be focusing on circles made in dc in this tutorial because it is so common. If you’re looking to make circles in sc or hdc, this is not the tutorial for you.
A flat circle is basically multiples of 12 dc. You start with a magic circle or a chain loop.
- Round 1: into the magic circle or chain loop you make 12 dc
- Round 2: 2 dc into each dc around (24 stitches total)
- Round 3: (dc, 2dc) around (36 stitches total)
- Round 4: (dc, dc, 2dc) around (48 stitches total)
And so on, ever increasing by 12 stitches evenly spaced around the circle.
Breaking all the Rules
Despite the many words below, this is a pretty simple technique for a very round and neat looking circle.
Round 1: We’re going to start off by immediately breaking one of the first rules you ever learned about crochet. The “Ch3 to start a new row/round, this counts as your first dc” rule.
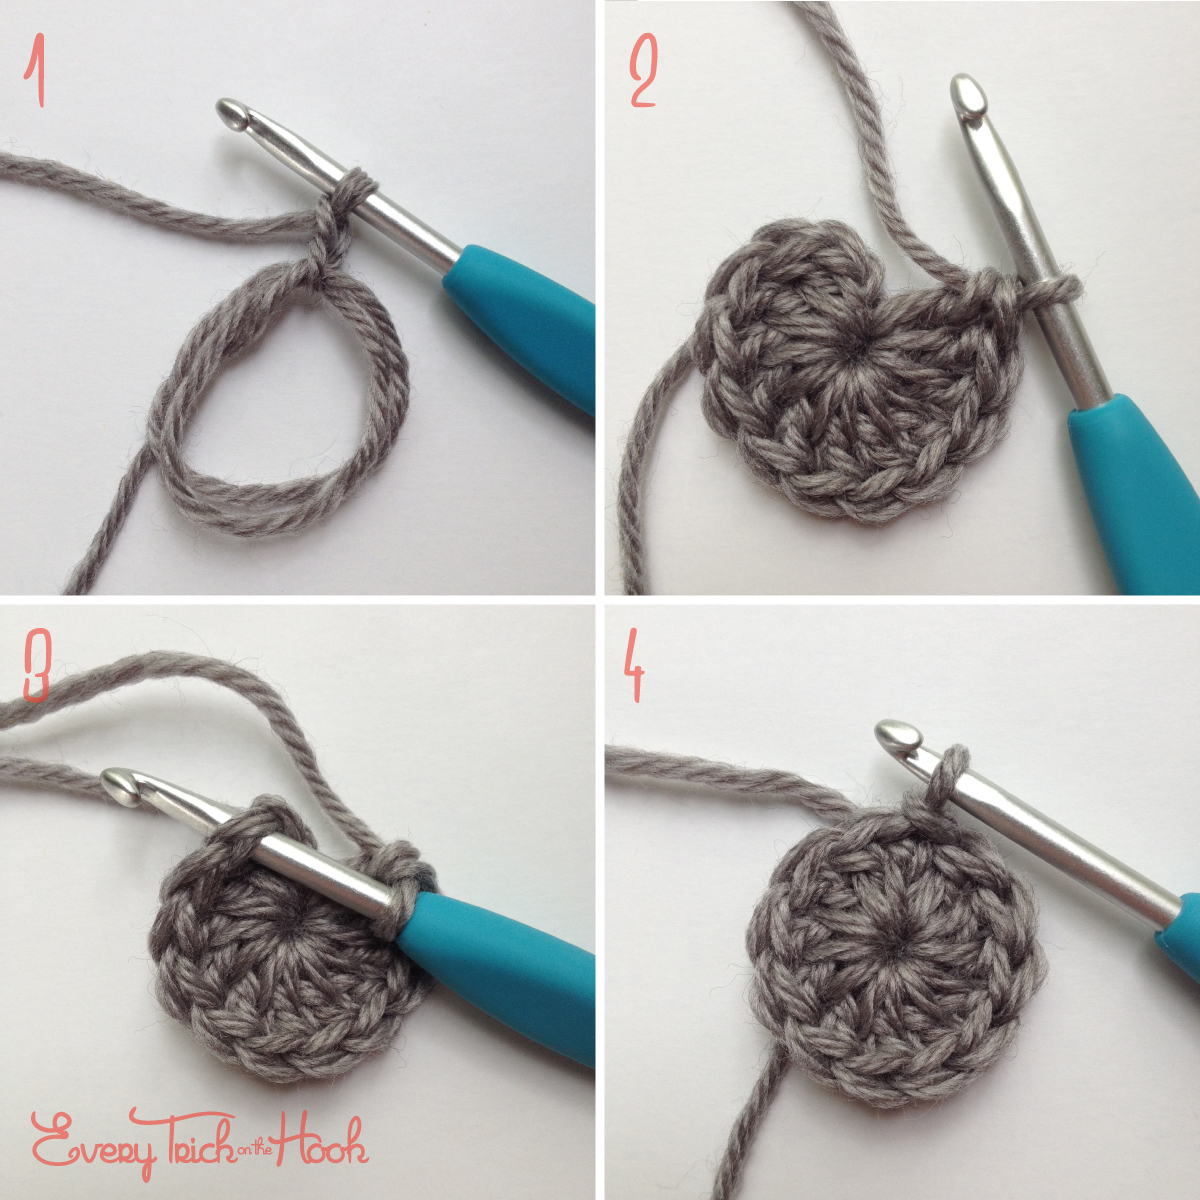
Instead, with your magic circle or chain loop ready: ch2. Yep, just 2. Trust me, it’s going to be enough. [See fig 1.1]
Make another 11 dc and close your magic circle [fig 1.2].
Now, break another rule. Don’t slip stitch to the top of the starting ch2 (the one that counted as your first dc). Ignore your starting ch and slip stitch to the dc after your starting chain to join [fig 1.3 & 1.4]. Don’t make the slip stitch too tight, you’re going to work into it later.
Round 1 Notes: The ch2 instead of ch3 is where my crochet rebellion began. But that’s another story for another time. For now, rejoice in your own rebellion. Yes, you can ch2 instead of ch3 to start a round and if anyone tells you differently send them my way.
Where to use this: I use the ch2 as my first dc any time I’m starting a round with a dc that is immediately followed by another stitch, not a chain. If my dc will be followed by a chain space I always use ch3 to stand in for my dc. Keep in mind, I’m still talking about continuing with the same yarn from the previous round. If I’m using new yarn, I’m using standing stitches, and that is a whole different tutorial.
I’ll admit, all my patterns say to ch3 as your first dc. Why? Because that is the generally accepted standard and I do feel obligated to present to you patterns that are standardized (to a certain degree). It’s better to know the rules and choose to break them out of understanding, than to not know them and break them out of ignorance – in art anyway. And when it comes right down to it, a ch3 is just plain too big to stand in for a dc, it leaves an ugly gap, and I hate it. So when I can, I ch2. It’s slightly smaller than a dc and much much neater than a ch3.
The next rule we broke was when we slip stitched to the stitch after the first dc (our stand in chain). This works a lot like an invisible join. The slip stitch essentially becomes the top of the dc. But I bet you’re wondering, “won’t this move my stitch placement forward by one stitch?” And you would be correct, but look at round 2 to see how I compensate for that and use it to it’s fullest advantage for a better circle.
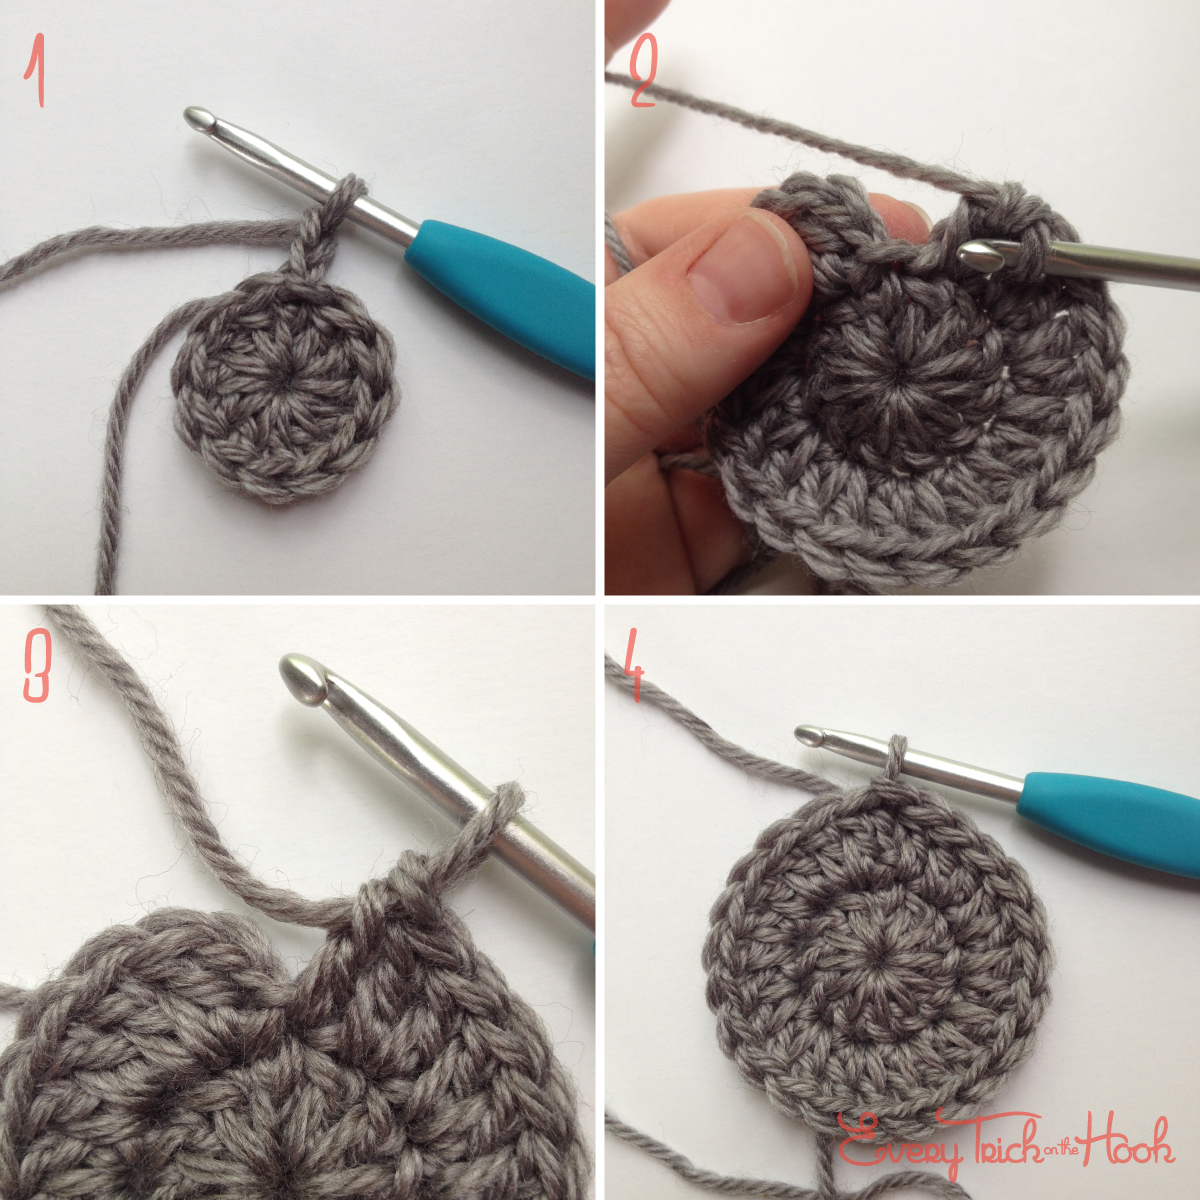
Round 2: Just like in round 1, ch2 to start [fig 2.1]
Now I’m going to throw a wrench in things. This isn’t really your first dc, it’s your last. Well, that’s how I look at it anyway. See how oddly it is placed? It doesn’t really line up with the stitch you joined to. It lines up better with the previous stitch, the ch2 that we started round 1 with, doesn’t it? Boom. Mind blown. Okay, maybe not. But you see where I’m going with this? So, I want you to pretend the starting ch2 you just made is not there (for now) and make 2 dc into the same stitch that you joined to.
Make 2dc into each of the next 10 stitches. After that, all you have left is this gap of a slip stitch before your starting ch2 [fig 2.2]. If we weren’t breaking all the rules, if we were following them, you would leave that slip stitch alone. You would leave it alone and there would be a nasty little gap between your last stitch and your first. So instead…
Dc into the slst [fig 2.3]. Together, that last dc and your starting ch2 make up the last group of 2dc, and for technicality’s sake – they would count as being made into the first stitch of round 1 which was your original starting ch2. Your ch2 is always going to hover over the last ch2.
To join, slip stitch to the dc immediately after your starting ch2 [fig 2.4].
Round 3: I’ll go through round 3 just to make sure you get the idea, but essentially the tricks are the same as round 2.
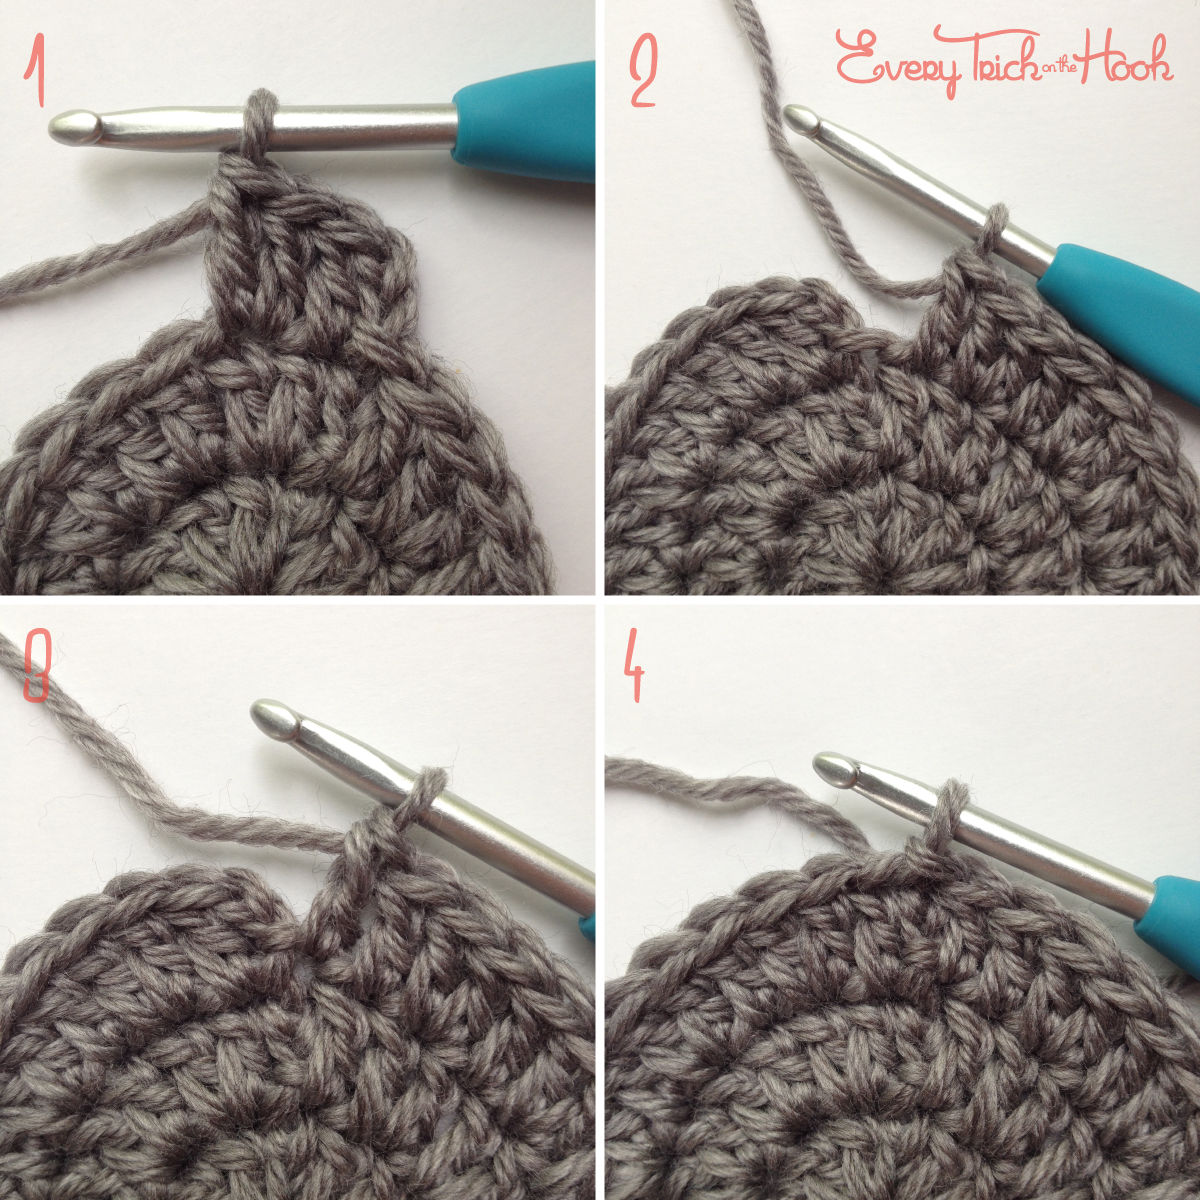
Ch2 to begin, but don’t count it as anything for now. The typical pattern of stitches for round 3 would be (dc, 2dc) repeated around. So, you should dc in the first st, the one you joined to in the last round. 2dc in the next st [fig 3.1]. (Dc in next st, 2dc in next st) 10 times, then dc in the next st. You should only have the slip stitch left [fig 3.2]. Dc in the slip stitch [fig 3.3]. That last dc and the starting ch2 together count as the 2dc part of the last pattern repeat. Slst to the dc after the starting ch2 to join [fig 3.4]
Continuing: You would continue the pattern this way, increasing as you would a traditional circle, but your starting ch2 always ends up as the second dc in the 2dc part of the final pattern repeat around, and you slst to the dc after your starting ch2 to join.
Finishing
To finish with traditional fasten off: Slip stitch to the dc immediately after your starting ch2 and fasten off.
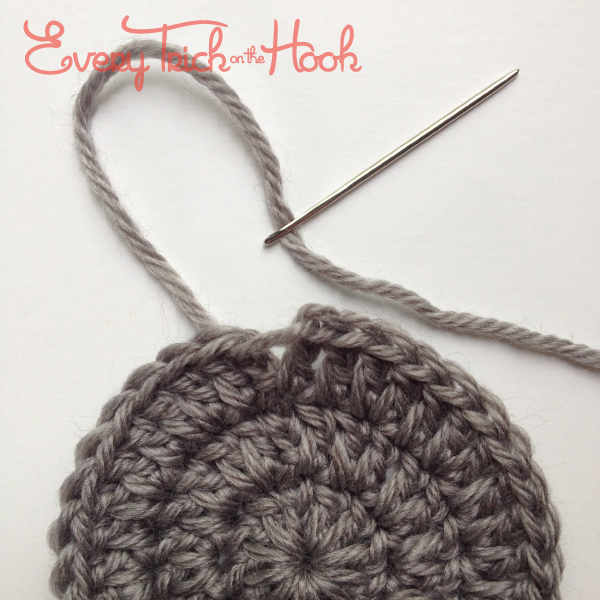
To finish with trendy invisible join: Cut the yarn after last dc and pull through last loop on hook. Use yarn needle to draw yarn under two loops of the dc immediately after your starting ch2 and continue with invisible join.
Disclaimer: I have three talents: crochet, I know instinctively when my kitchen timer is seconds away from going off, and I can over-complicate anything. If you think your circles are just fine the way they are, then keep on keeping on. I come up with this crap these techniques because I think it’s fun. As soon as it stops being fun, I’ll stop. If you don’t think it’s fun, or it just doesn’t work for you, then don’t worry about it. Crochet your way, crochet my way, crochet any way you want. Just crochet and love every moment of it.
That’s all for today! I hope you had fun and find nifty ways to use my little tricks.
As always, comments, criticism, questions, and complaints are all welcome below.
Hook on!
