This is a collection of Pattern Notes and Tips & tricks for the Stardust Melodies CAL. If you’re participating in the free version of the event you may want to bookmark this page. If you purchased the eBook all of the below information is contained in the Introduction document.
PATTERN NOTES
IMPORTANT – READ BEFORE YOU BEGIN
Each round of every pattern starts by working a stitch into the same stitch you slip stitched into to join in the previous round. But for the sake of repeats, sometimes the first st isn’t pointed out. Sometimes the pattern starts you off by saying to make a stitch into the next stitch. If you’re just starting a round and all you’ve done so far is the ch1 at the very beginning and the very first thing the pattern says to do is to stitch into the “next stitch,” that means the first stitch, the one with the slip stitch already in it. (I know, I know, this is a bit unconventional for me and my pattern writing, but hang in there. When you see how the patterns go you’ll understand why I took some liberties with the pattern writing.)
When you make a stitch into a lower round you will always leave the sc behind it unworked. Count that st as worked unless otherwise noted.
There’s a catch to the two previous important notes – when you start a round with a stitch made into a below round the first st counts as worked so you don’t need to worry so much about the note that tells you to never skip the first stitch because technically you didn’t.
See the section called “Stitch Placement” before you start. It will help a lot.
Stitch Counts
Stitch counts are identical for every square. They start with 1 stitch per side in round 1 and increase by 2 stitches every round – not counting ch2 corners.
- Round 1 = 1 stitch per side
- Round 2 = 3 stitch per side
- Round 3 = 5 stitch per side
- Round 4 = 7 stitch per side
- Round 5 = 9 stitch per side
- Round 6 = 11 stitch per side
- Round 7 = 13 stitch per side
- Round 8 = 15 stitch per side
- Round 9 = 17 stitch per side
- Round 10 = 19 stitch per side
- Round 11 = 21 stitch per side
- Round 12 = 23 stitch per side
- Round 13 = 25 stitch per side
- Round 14 = 27 stitch per side
- Round 15 = 29 stitch per side
- Round 16 = 31 stitch per side
Crochet Terms
All patterns are written in US terms.
TIPS & TRICKS
Standard Join
When joining a round per the written pattern – in the middle of one side of your square – slip stitch to BOTH loops of the indicated stitch and then pull the slip stitch tight (unless instructed otherwise). Be very careful not to work into the slip st as though it were a stitch when you make the next round.
Corner Join
Here are instructions for an alternate means of joining the rounds of your squares so that the seam goes up the corner rather than the middle of one side.
Beginning in round 2 and repeating for every round: do not pull the joining slip stitch of the last round tight – this slip stitch will act as the top two loops of the stitch it is made into, do not start the new round as instructed in the pattern – instead slip st into the corner chain 2 space (the corner chain 2 space will always be your next stitch), ch1, locate where the pattern instructions say to “work the following on each of the next 3 sides” and work those instructions on all 4 sides (those instructions always begin in the corner ch2 space), when you come back around to the stitch you slip stitched into to join the last round – work into the front and back loops of the slip stitch as instructed in the pattern rather than the loops of the stitch into which it was made.
Gauge

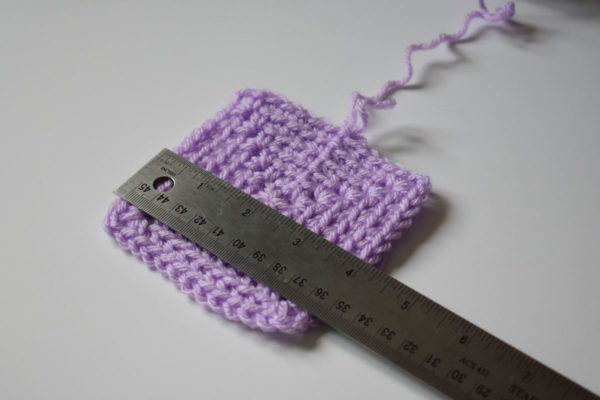
You don’t need to make a sample or a swatch to check your gauge. On the next square that you make, take a measurement at round 5 or 6 and jot it down. On all the following squares, measure at the same point to make sure your tension is on par.
Finding the First Stitch

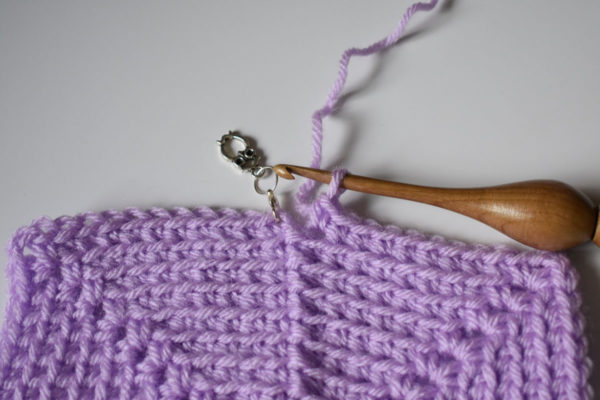
Put a stitch marker in both loops of the first stitch of every round to make it easier to find for joining.
Counting
The best way to ensure you aren’t making any mistakes is by counting your stitches. Count groups of stitches and count each side of each round. Refer to the stitch counts diagram on the previous page for per-side stitch counts of every round.
Shaping Up
Expect that your first few rounds won’t look great, probably not even very square, until you proceed to the middle and later rounds of the pattern. They will square up and the pattern will emerge as you crochet. Don’t be afraid to give the corners a little tug to shape them up as you go.
Lighting
Make sure you work with good lighting. Using all 1 color means you need to read your stitches for proper stitch placement. Lighter colored yarn and good lighting will help.
STITCH PLACEMENT
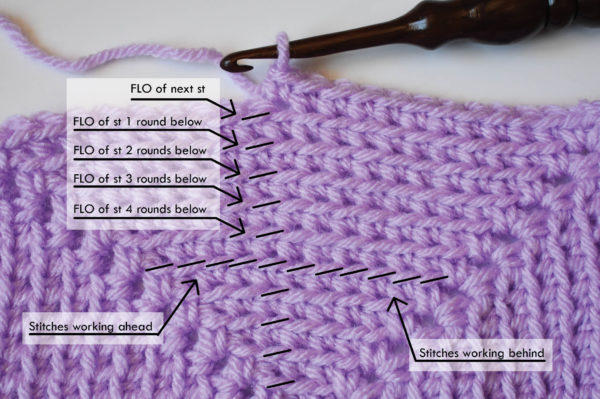
WORKING INTO BELOW ROUNDS: The below picture is a close up of a square – the basic, or foundation, square discussed in the “Charts” section. In the picture round 12 is currently being worked. Notice the horizontal lines going across? Those are the unworked front loops of previous rounds. Those are what you want to look for when placing stitches.
To place a stitch in a below round, count the horizontal bars directly below the next stitch. See the graphic below (click to view enlarged).

WORKING INTO STITCHES AHEAD OR BEHIND: Notice how the horizontal bars are segmented? Those are individual stitches. Many stitches in the patterns are worked into the front loop only of the stitch “directly below” the next stitch as discussed above, but some are worked into stitches “ahead” or “behind.” Think of the stitch directly below as stitch zero. To work ahead, count stitches forward. To work behind, count stitches backwards.
Use the above instructions on working into below rounds in conjunction with the instructions on working ahead and behind to place the more complex stitches in the patterns.
COLOR PLACEMENT
This graph is made of 60 squares. Use it to plan your color placement. First, block out the number of squares you’re planning on making, then break out the colored pencils or your kid’s crayons and get to work. Print as many of this sheet as you need to try out different color layouts.

I hope this information helps! Please, always feel free to ask if you have any questions or need help.

Please check out the Patterns page here on Every Trick on the Hook or my Ravelry store to see more of my patterns, both free and paid.
The best way to keep up with my goings-on is to follow Every Trick on the Hook on Facebook. You can also message me there, post on the wall, and follow my posts for the latest news.
If you’re looking for a more interactive Facebook experience, join the Polly Plum Pattern Posse Facebook group. We’re a fun and supportive group. Really! There’s so much help there that chances are your question will be answered by someone before I even see it. It’s the best place to go with a question. It’s also a great place to share your Polly Plum makes and see what others are making.
If Facebook isn’t your thing you can also join the Ravelry group – Polly’s Place or follow @polly_plum_crochet on Instagram.

Leave a Reply