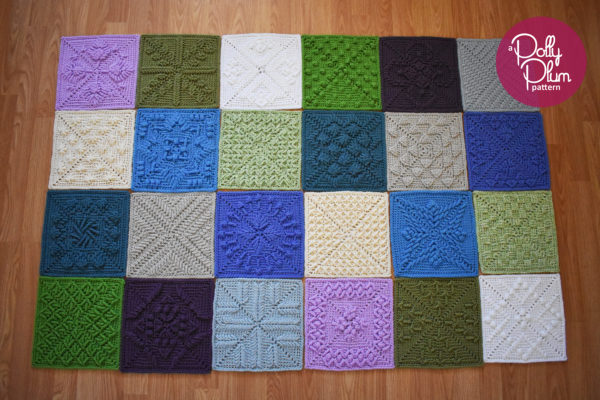
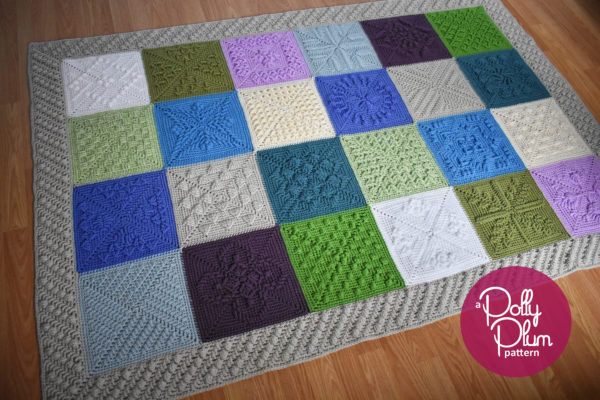
This is. We made it. We’re done. Okay, we’re almost done. This is, however, the last blog post for the Stardust Melodies Crochet Along. I’m not really sure what to say. It’s been an awesome adventure. But let’s not get teary-eyed just yet. Most of us are still working on our afghans because you’ve been waiting patiently for the border patterns.
Thank you, again, for your patience. These border patterns are a day late due to some time consuming technical difficulties I had over the weekend involving publishing some helpful stuff about joining. So before we get into the borders, let’s talk about joining.

I talked to many crochet along participants in the Polly Plum Pattern Posse about joining and what their plans were, and I realized that there are a lot of questions about how to join afghan squares that need to be answered. I hadn’t intended on including joining tutorials in the crochet along, but after our conversations I realized it was needed.
So here are my two preferred methods for joining our Stardust Melodies squares. In these videos I tried to really get into the details and answer the questions I heard. Like, how do you join across corners? Or, how do you work along the rough edge? That is all covered in these videos. I hope they are complete and comprehensive enough to get you through the entire joining process smoothly.
Single Crochet Join
Joining with single crochet is the absolute easiest way to join squares. It makes a ridge of stitches between your squares that can really add to the overall texture and look of your afghan. It’s super fast and it’s fun because it’s just like regular crocheting.
Single Crochet Join As You Go
This method can actually be used as you go or when you’re done. I almost never use it as I go. I much prefer to add a round of single crochet to do the method after I’ve made all of my squares and chosen a final layout, which is exactly what I did for my own Stardust Melodies afghan.
This join is very flat and adds a super cool twisted texture between squares. It’s a great way to join without using an additional color – however you still can join in another color if you wish. It’s also a great way to join without adding an additional color that does not involve sewing.
Borders
I’m presenting you two options for bordering our Stardust Melodies afghans. Of course you can always go off and add your own border that you like. I’m always in favor of making a project your own. So go crazy if you want! Or, check out the two patterns I’m providing below.
Free Pattern – Basic Moss Stitch Border

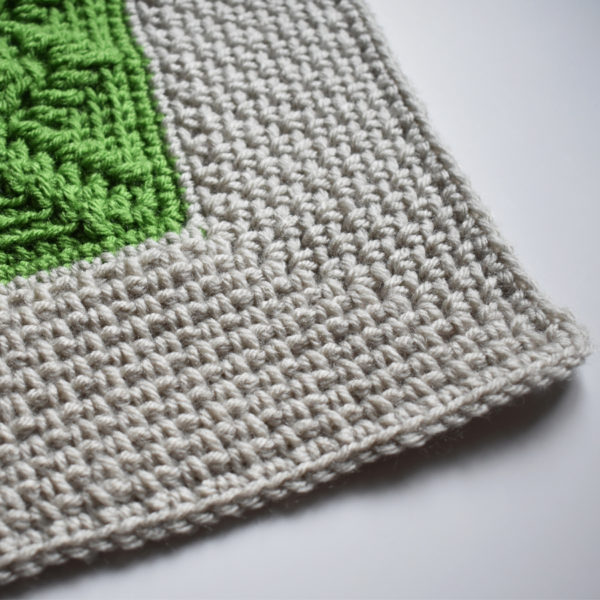
First up is our free option. This basic border is anything but boring. Moss stitch is a lovely way to finish any project. It has a great texture that’s just enough to frame your work but will never compete with it. You can make this border as wide or narrow as you like. It’s incredibly flexible and I’ve included a simple trick for making it work with any stitch count.
Get the free pattern and video tutorial here.
I Wish You Love – eBook Exclusive Border

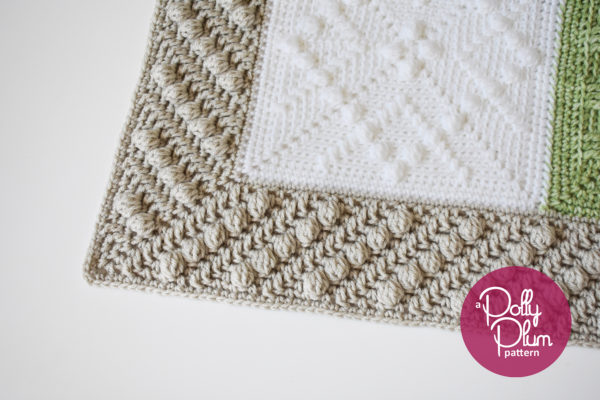
Ok, I have to admit I’m excited about this. I’m pretty fond of this border and how it works up. This pattern is easy to make and incredibly flexible. It works with any stitch count and it can be made as wide or narrow as you choose.
This pattern is exclusively available in the eBook, as is it’s video tutorial.
Click here to favorite, queue, or hook up a project page on Ravelry.
There is some good news and bad news, however. The good news is that I did a major, last-minute overhaul on this pattern. It paid off. I’m extremely proud of how the border looks and how it works up. The flexibility is, in my opinion, priceless. You don’t have to have your stitch counts worked out at all to add this border because of the way it builds. That means no math, no counting, and basically no planning. You can jump right into crocheting. The bad news is that it uses more yarn than I initially estimated. However, more good news, it’s flexible enough that you do not need to add all of the rounds. The pattern repeats can be made to your liking or to your yarn’s availability. So in the end, I don’t think it’s too bad after all.
The End.

That’s it. We’re done. I can’t wait to see final pictures of your afghans. I’ll be setting up a photo album in the Polly Plum Pattern Posse for us to collect them and look at them later. So when you’re done, be sure to add your photo there for others to reference later.
Also, please make a Ravelry page for your project if you haven’t yet. It’s incredibly helpful to me and others. It’s a simple way to answer a lot of questions easily when others see your gorgeous works and want to know how you did it.
Thank you so much for participating! Please feel free to keep your questions coming and keep sharing those photos.

Please check out the Patterns page here on Every Trick on the Hook or my Ravelry store to see more of my patterns, both free and paid.
The best way to keep up with my goings-on is to follow Every Trick on the Hook on Facebook. You can also message me there, post on the wall, and follow my posts for the latest news.
If you’re looking for a more interactive Facebook experience, join the Polly Plum Pattern Posse Facebook group. We’re a fun and supportive group. Really! There’s so much help there that chances are your question will be answered by someone before I even see it. It’s the best place to go with a question. It’s also a great place to share your Polly Plum makes and see what others are making.
If Facebook isn’t your thing you can also join the Ravelry group – Polly’s Place or follow @polly_plum_crochet on Instagram
