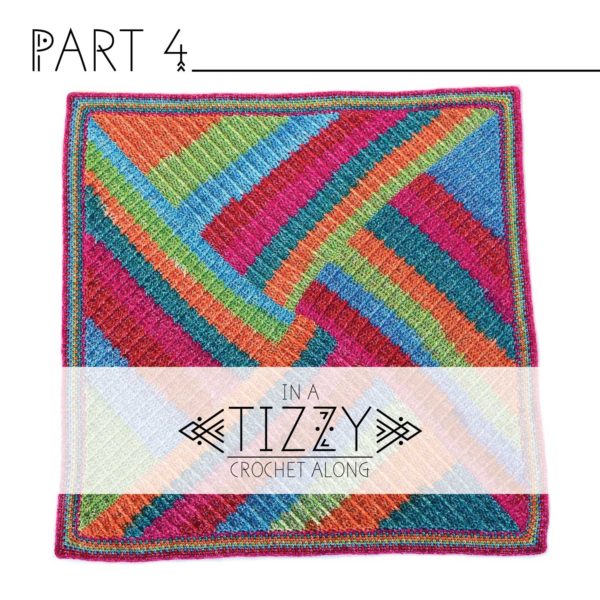
In a Tizzy crochet along with Polly Plum part 4. A fun, adventurous, and unique free crochet blanket pattern designed especially for yarn cakes.
This page contains affiliate links. If you click them and make a purchase I get a small commission at no additional cost to you.
Well this is it! The last part of our crochet along. I just want to say how fun this has been for me and what a joy it is to see your blankets grow. Thank you so much for participating and sharing your pictures and enthusiasm. I hope you loved the event as much as I did, and I hope you love your blankets too!
In this, our final installment, we’re going to border and block our blankets.
The border is a simply moss stitch border that I’ve used before. I chose this border because it helps hold things in a nice tidy square when they tend to want to twist and do their own thing, the way this blanket does.
If you have another border in mind that you’d prefer to use, go for it! I love to see what you come up with when you get creative.
I’ve also shared my blocking process below. I use steam blocking on all my acrylic and acrylic blend yarn. It’s an exceptionally effective technique that is permanent and yields a softer, drapey fabric.
Premium PDF
If you loved making this and see yourself making it again in the future, consider buying the premium pattern PDF. It’s a great addition to your pattern collection and helps support me so I can keep bringing you more great patterns like this one.
But don’t worry. The pattern will remain free here on my blog and the PDF will always be available too.
Video Tutorial
Schedule
Part 4 – June 3, 2022 (this post)
Notes
This pattern is Copyright © 2022 Polly Plum. All rights reserved.
If you would like to share this pattern, please share the link to this webpage or the Ravelry pattern page (link below). Please do not distribute this pattern or photos in any other form. Please read more in the Copyright section.
Ravelry: Click here to favorite, queue, and hook up a project page for this pattern on Ravelry.
Details
Crochet Terminology: US
Skill Level: Intermediate
Stitches used: slip stitch, chain, double crochet, treble, front post extended double crochet, back post extended double crochet, Join-dc {created for this pattern}
Size: any size square
Hook size: 5mm or whatever size is appropriate for your yarn
Gauge: not important for this pattern
Additional materials: yarn needle and scissors for weaving ends
Yarn: Sample uses 5 cakes of Lion Brand Mandala Ombre in Happy, but pretty much any yarn works great for this project
Abbreviations
- ch – chain
- dc – double crochet
- hdc – half double crochet
- r(#) – round number
- sc – single crochet
- sk – skip
- slst – slip stitch
- sm – stitch marker
- sp – space
- st– stitch
- tr – treble crochet
- yo – yarn over
Special Stitches
Standing sc – to start a round, with slip knot on hook, insert hook into indicated place, yo and pull up a loop, yo and pull through two loops on hook
Pattern – Border
Tip: The border used here is simple moss stitch, but you can use whatever border you like. As written, round 1 will give you an odd number of stitches or stitch counts of 3x +2, or 6x +5. To adjust the stitch count, simply add or remove a st from the side of one of the trs as many times as you need to. Space your additions/removals evenly along the sides of your blanket.
Round 1
With RS facing, standing sc in any corner of your blanket, ch2, sc again in corner.
*^[Work 3 sc along the side of the next tr/ch4] repeat across side of blanket,^ (sc, ch2, sc) in next corner.*
Repeat from * to * twice more and from ^ to ^ once more. Slst to first sc to join.
Round 2
Slst into next corner ch2 sp and ch1.
*(Sc, ch2, sc) in corner ch2 sp, ch1, sk next st, [sc in next st, ch1, sk next st] repeat across side.*
Repeat from * to * 3 times more. Slst to first sc to join.
Round 3
Slst into next corner ch2 sp and ch1.
*(Sc, ch2, sc) in corner ch2 sp, ch1, sk next st, [sc in next ch1 sp, ch1, sk next st] repeat across side.*
Repeat from * to * 3 times more. Slst to first sc to join.
Repeats
Repeat r3 to desired width. Finish with round F.
Note: In the sample I made, round 3 of the moss stitch border is made a total of 6 times with the intention of using all the colors in the self-striping yarn, while starting and ending with the same color. A small amount of scrap yarn was used to prevent a color change at the very end of round F.
You can do the same with your colors, or if you’re running low on yarn you can simply repeat round 3 until you’re getting low (but not too low) on yarn and then finish with round F.
Round F
Ch1 and sc in same st as join.
*3sc in corner ch2 sp, sc in each st and ch1 sp across side.*
Repeat from * to * 3 times more. Slst to first sc to join. Fasten off.
Blocking
Do you absolutely have to block your blanket? Of course not! If you’re happy with it the way it is, call it done. But, if you like blocking your blankets, or you’re just curious, here’s how my blocking process goes.
Materials
- Blanket
- Blocking wires (optional)
- Pins, rust resistant
- Fabric steamer (optional) & water
- Tape measurer
- Blocking surface (I use interlocking foam exercise mats for small blankets like this one, but your blocking surface only needs to be a big flat-ish area that can take pins. Usually I use my mattress.)
Step 1
Weave in all ends securely.
Step 2
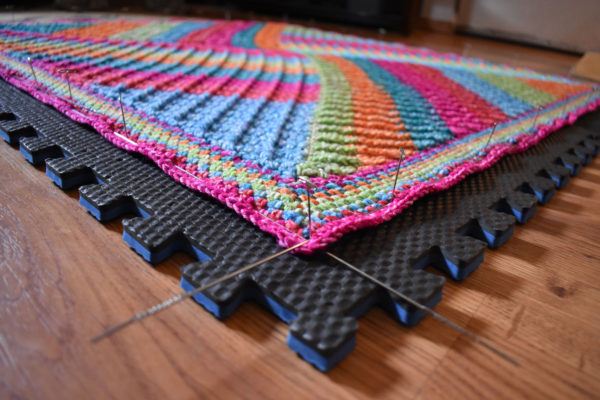
Spread your blanket out on your blocking surface. Weave the blocking wires along the outside round of your border at roughly the same size intervals. Overlap them several inches where two meet.
Step 3
Use the measuring tape to make sure your blanket is square. Measure the center both ways and all four sides. Then place pins on the inside of the wires to hold them in place. Put at least one pin in the corners where two wires meet. Use two or more pins where wires overlap.
If you’re not using blocking wires, measure and pin your blanket to size. Adjust pins as needed until the blanket is square.
Step 4
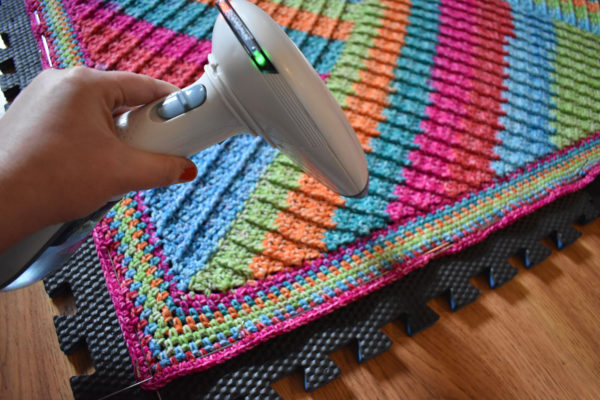
Using the fabric steamer, apply steam to the entire blanket. Hover your steamer a few inches above your blanket. Do NOT touch or press down on the blanket while it is hot. Work back and forth along the body of your blanket. Then around the border.
If you’re not using steam, mist your blanket with water until lightly saturated.
Step 5
As soon as your blanket is cool you can remove the pins and blocking wires.
If you’re not using steam, allow your blanket to dry fully before removing the pins and wires.
Step 6
Before you pick up your blanket you may notice a gentle wave left along the edges from the blocking wires. To remove this, leave your blanket where it’s at. Gently pat down the waves and apply more steam. DO NOT touch the blanket that has just been steamed and DO NOT put your hand in or anywhere near the steam.
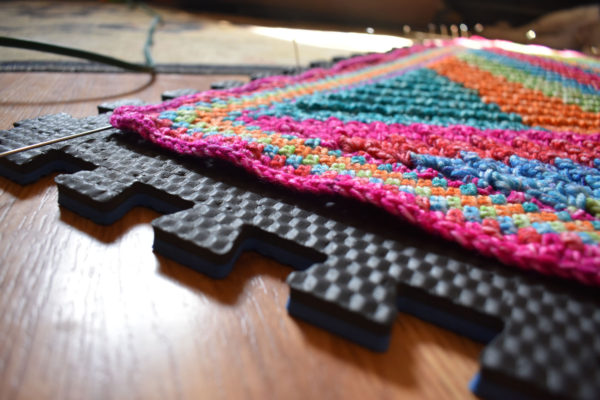
Blocking is now complete and your blanket is finished! You will notice a significant difference in the drape of your blanket. It will be softer, but it will also hold its shape much better, even through the wash.
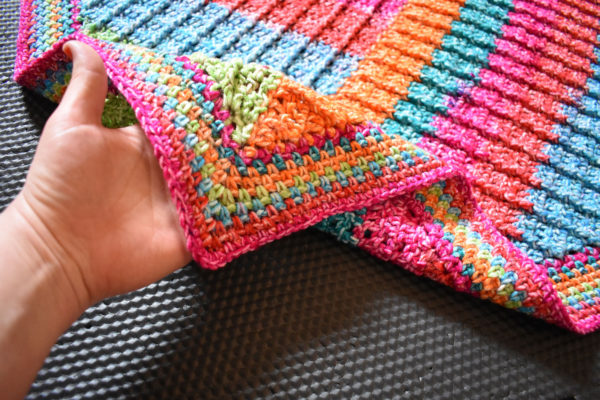
Well, that’s it! We’re done! I can’t believe it. It’s been so much fun and went by so fast!
I hope you’ll share pictures of your finished blankets and follow me on all the places (see below) so that you’re sure to hear about the next CAL. (Hint: I have at least two in the works and sometimes I spontaneously CAL, like I did for this pattern!)
Take good care of yourself and your yarn. Until next time…

Credits
Original crochet pattern design – Polly Plum
Photography and graphic design – Polly Plum
Testers:
Yanya Huddleston
Adrienne McCarthy
Leanne O’Connell
Cheryl Pitre-Cable
Yellowhammer Handcrafts
If you’d like to show your support and/or say thank you for this free pattern – the most helpful thing you can do is share a picture of your work on Ravelry or Facebook. Seriously! That’s it. If you liked the pattern, tell your friends and show them what you made.
If you loved the pattern and want to make more, check out the Patterns page here on Every Trick on the Hook or my Ravelry store.
The best way to keep up with my goings-on is to follow Every Trick on the Hook on Facebook. You can also message me there, post on the wall, and follow my posts for the latest news.
If you’re looking for a more interactive Facebook experience, join the Polly Plum Pattern Posse Facebook group. We’re a fun and supportive group. Really! There’s so much help there that chances are your question will be answered by someone before I even see it. It’s the best place to go with a question. It’s also a great place to share your Polly Plum makes and see what others are making.

Leave a Reply