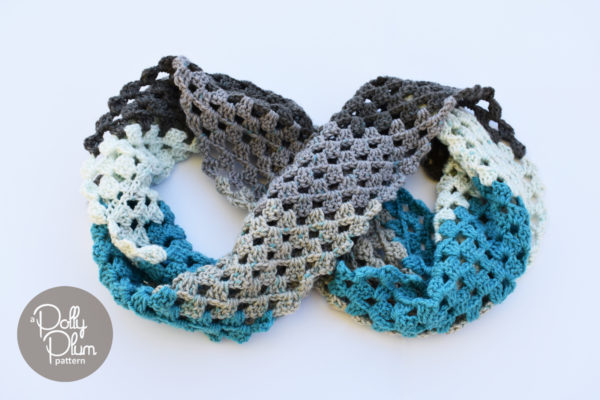
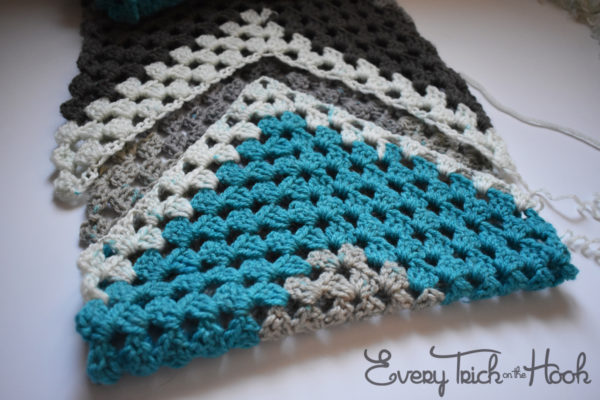
My first ever granny stitch pattern, this project is fast and easy and was designed to make the most out of your cakes of self-striping yarn. Though, it will work equally well with most yarns. The granny stitch includes a turn in the middle to break up the striping and adds motion and interest, and the lightly scalloped border is built into the rows.
Work this one as an infinity scarf or a cowl or something in between. The pattern is extremely easy to adjust if you’d like to make yours wider or narrower.
Details
Pattern written in US crochet terms
Skill level: Easy/beginner
Finished Size: Infinity scarf – 12 inches wide by 56 inches around; Cowl – 18 inches wide by 36 inches around
Yarn: Caron Cakes – 1 cake (350m/383yds) will make 1 infinity scarf or cowl at the sizes listed above. An infinity shawl made with another type of cake yarn may require 2 cakes to get the same size due to differences in yardage. Lion Brand Mandala will make a cowl about 16 inches wide and 42 inches around. Any yarn with appropriately sized hook will work for this pattern but estimating the size of your finished project will be up to you.
Hook size: 5.5mm (4.5 with Lion Brand Mandala yarn or whatever hook is appropriately sized for your yarn)
Gauge: 12 dc and 6 rows = 4 inches
Pattern Notes
Adjusting the size of this pattern is quite easy! Simply add or subtract 8 chains from your starting chain. This will add or subtract one group of 3dc from each side of each row. You’ll just need to be careful that you make sure and do your corner in the middle.
Click here to favorite, queue, and hook up a project page on Ravelry.
Check out the new “Print Friendly” button at the bottom of the page to print your own copy of the pattern.
If you need help or have any questions, scroll to the bottom of this page. There are links to where you can find lots of support.
This pattern is Copyright © 2017 Polly Plum. All rights reserved.
If you would like to share this pattern, please share the link to this webpage or the Ravelry pattern page (link below). Please do not distribute this pattern or the accompanying photos in any other form. Please read more in the Copyright section.
Abbreviations
- ch – chain
- dc – double crochet
- hdc – half double crochet
- sc – single crochet
- sk – skip
- slst – slip stitch
- sp – space
- st – stitch
Special Stitches
None.
Video Tutorial
Coming soon!
I’ve been having technical difficulties, and I only want to bring you the best quality I can manage. So I’m looking at other solutions with what equipment I have available in hopes I can make a video that is not only helpful, but maybe even a little bit pleasant to watch.
For now, please see the photo-tutorial I’ve done instead.
Pattern
Instructions are for infinity scarf with cowl in (parentheses).
Ch 60(92) {Try over-chaining and click here for the tutorial}
Row 1: 2dc in 4th ch from hook {3 skipped ch count as first hdc}, ch1, sk next 3 ch, [3dc in next ch, ch1, sk next 3 ch] 6(10) times, (3dc, ch2, 3dc) in next ch, ch1, sk next 3 ch, [3dc in next ch, ch1, sk next 3 ch] 6(10) times, (2dc, hdc, ch1) in last ch. Turn.
Row 2: [Slst into next dc] twice, slst into next ch1 sp, ch3, 2dc into same ch1 sp, ch1, sk next 3dc, [3dc into next ch1 sp, ch1, sk next 3 dc] 6(10) times, (3dc, ch2, 3dc) into next ch2 sp, ch1, sk next 3dc, [3dc into next ch1 sp, ch1, sk next 3 dc] 6(10) times, (2dc, hdc, ch1) in next ch1 sp. Turn.
Repeat row 2 until nearly all the yarn is used but there is still enough to make at least one more row. Turn. {Approximately 60(40) rows total.} It does not matter which side you end on.
Making sure the scarf is not twisted, bring the two ends together.
Note: The join row is worked just like row 2, but instead of chain spaces you’ll be working slip stitches to join to row one. The slip stitches go into the bottom of the chains where your row 1 stitches were worked. Skip the unworked ch3 sps from your starting chain.
Join Row: [Slst into next dc] twice, slst into next ch1 sp, ch3, 2dc into same ch1 sp, slst into the bottom of the first chain of your row 1 sts where your first 3dc were worked, sk next 3 dc, [3dc in next ch1 sp, slst into the bottom of the next chain of your row 1 sts where your next 3dc were worked, sk next 3 dc] 6(10) times, 3dc in next ch2 sp, ch1, slst into the bottom of the next chain of your row 1 sts where the 6dc were worked, 3dc in same ch2 sp as last 3 dc, slst into the bottom of the next chain of your row 1 sts where your next 3dc were worked, sk next 3dc, [3dc in next ch1 sp, slst into the bottom of the next chain of your row 1 sts where your next 3dc were worked, sk next 3 dc] 6(10) times, (2dc, hdc, ch1) in next ch1 sp. Fasten off.
Row 1 Tutorial
Note: numbers in (parentheses) are for making the wider/shorter cowl instead of the infinity scarf.
- Chain 60(92). Try using the over-chaining technique to avoid miscounting.
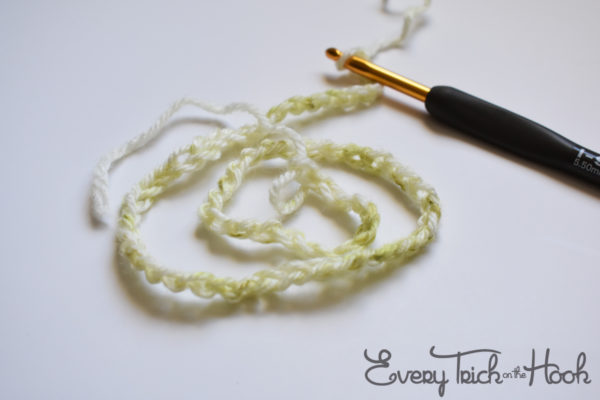
2. Make 2 dc in the 4th chain from the hook, then ch1.
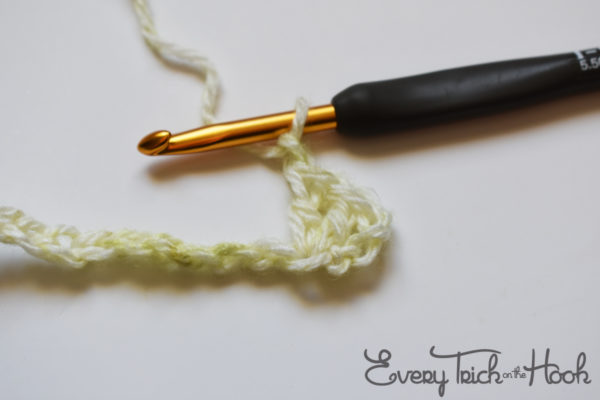
3. Skip the next 3 chains, then make 3dc in the next chain. Ch1.
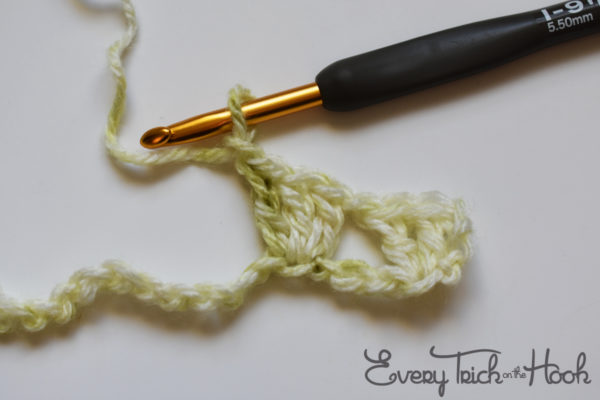
4. Make step 3 a total of 6(10) times.
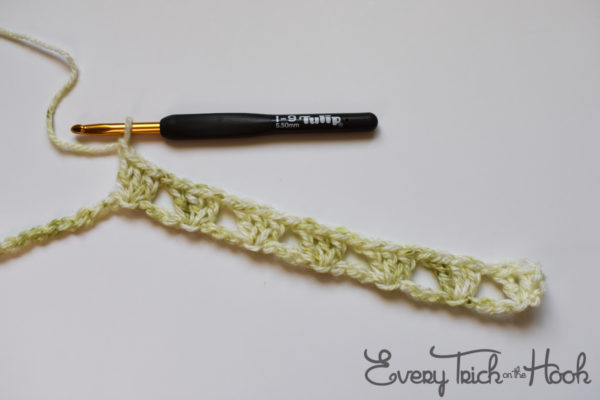
5. Skip 3 more chains, then make your corner by making (3dc, ch2, 3dc) in the next chain. Ch1.
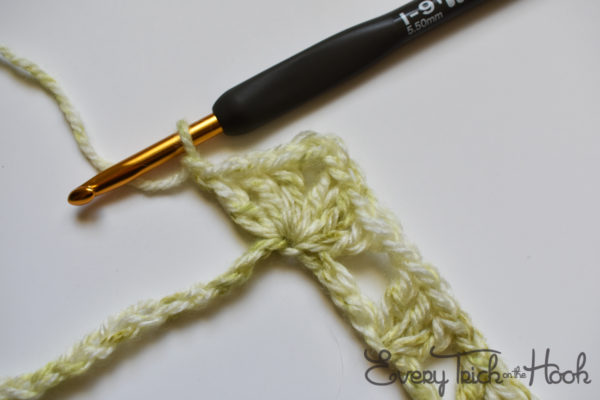
6. Skip the next 3 chains, 3dc in the next chain, ch1. Do that 6 times total just like you did on the first side.
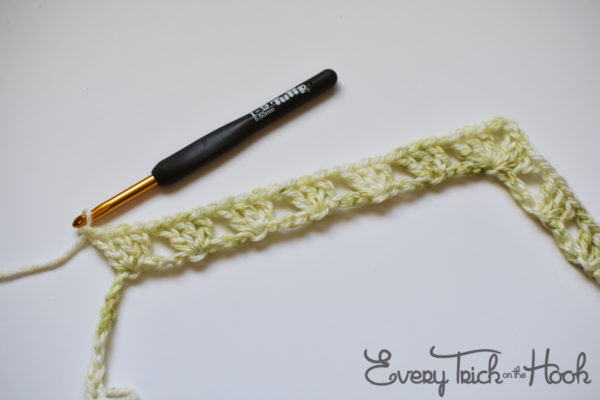
7. Skip the next 3 chains, then finish this row by making (2dc, hdc, ch1) into the next chain.
Note: I’ve used over-chaining here, so it looks like I have too many chains. See the tutorial to find out why and how. If you’ve used over-chaining too, now is the time to go ahead and pull those chains out and secure them as in the tutorial.
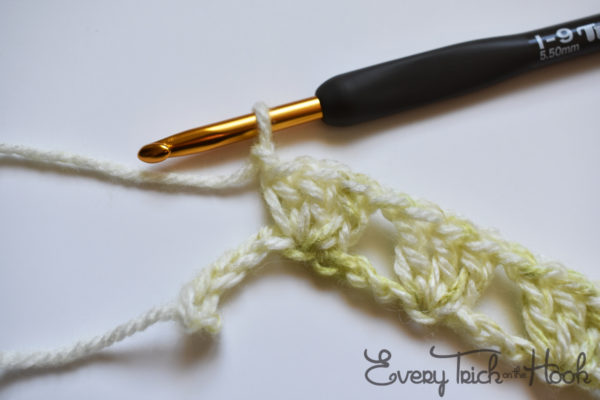
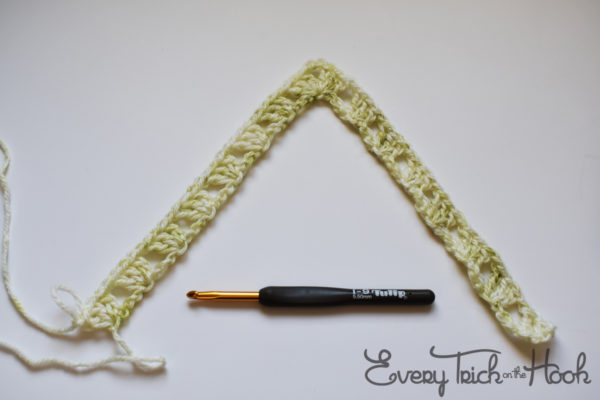
Here’s what your work should look like so far:
Row 2 Tutorial
Turn your work over to start the new row.
- Ignore the first stitch (the hdc), slip stitch into the next dc, and into the dc after that. Slip stitch into the ch1 space. Ch3.
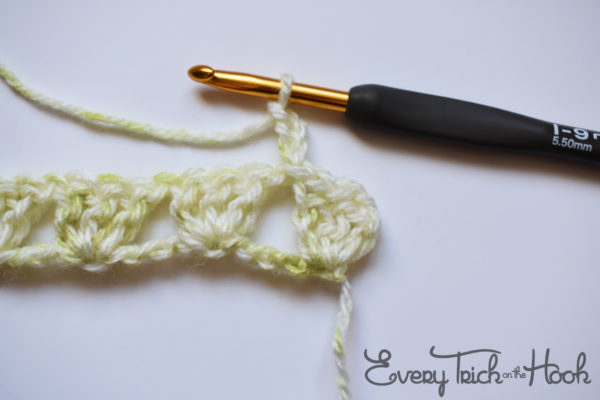
2. Make 2dc into that first ch1 space. Ch1.
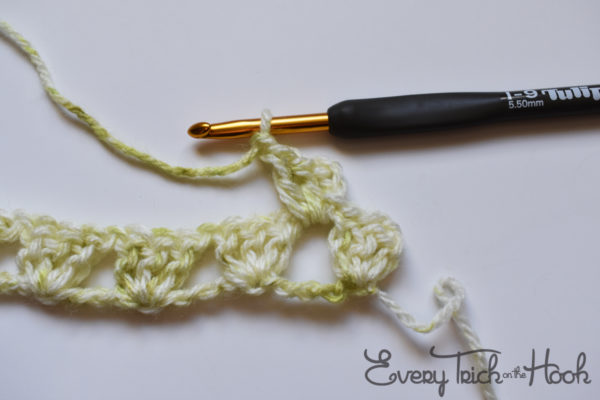
3. Skip those next 3 dc. Make 3dc into the next ch1 sp. Ch1.
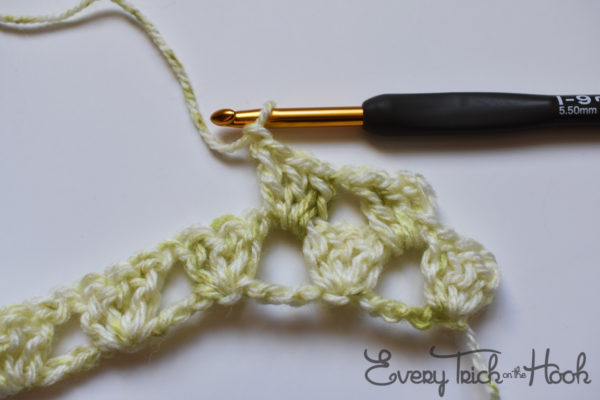
4. Make step 3 a total of 6(10) times. Your next chain space should be the corner.
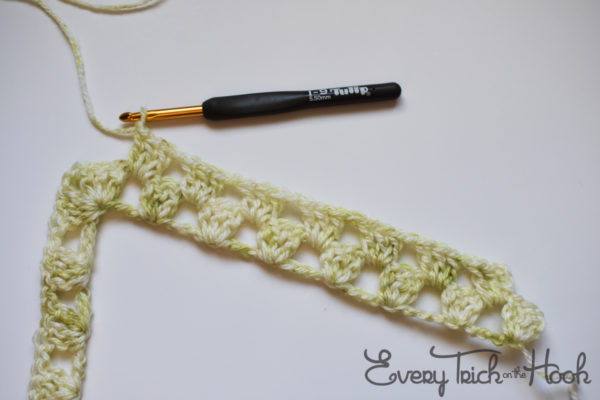
5. Make (3dc, ch2, 3dc) into the corner ch2 space. Ch1.
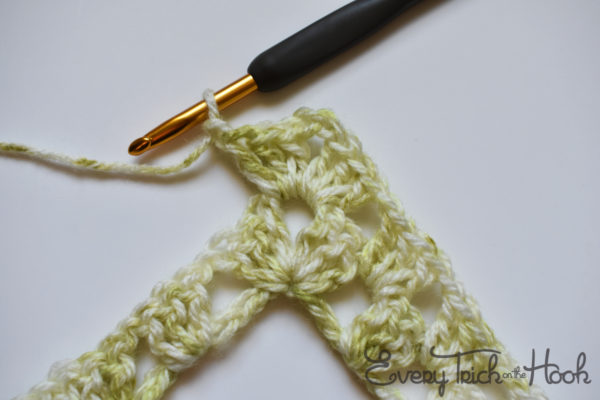
6. Work as in step 3 again, a total of 6(10) times. You should have 1 ch1 space left to work into.
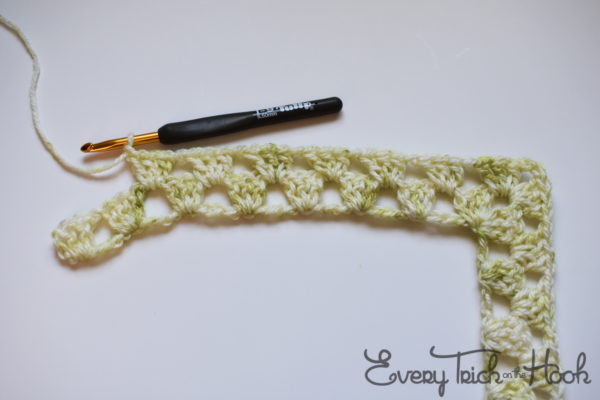
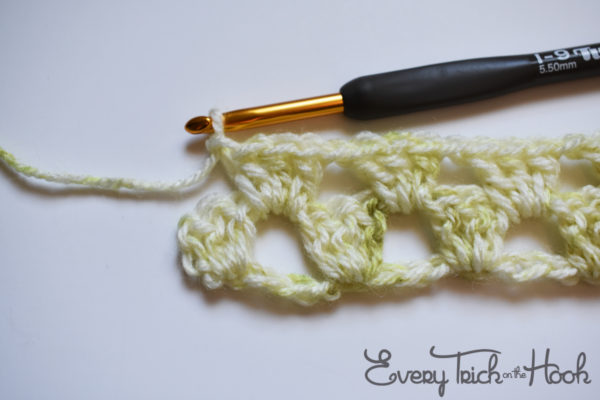
7. Into that last ch1 space make (2dc, hdc, ch1).
Body
Repeat row 2 instructions until you have used almost all of your yarn. You’ll need enough to make 1 more row for the join.
Join Row Tutorial
- Bring the two ends of the scarf together and line them up to get ready to join them.
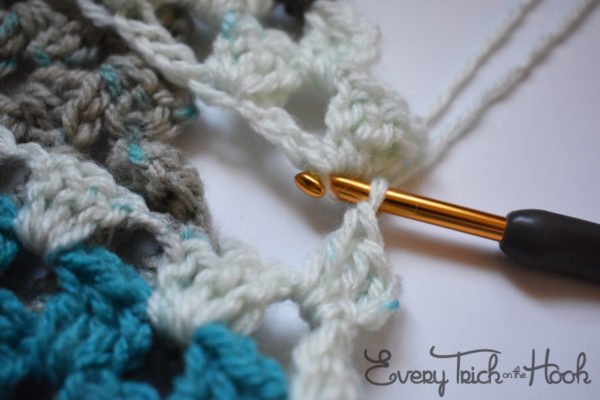
2. Do the first stitches of the row like normal: [Slst into next dc] twice, slst into next ch1 sp, ch3, 2dc into same ch1 sp
Now, where you would normally make a ch1, instead you’re going to find the chain at the base of your first row 1 stitches, insert your hook and make a slip stitch.
That slip stitch acts as the ch1 between groups of 3dc and it also joins your ends.
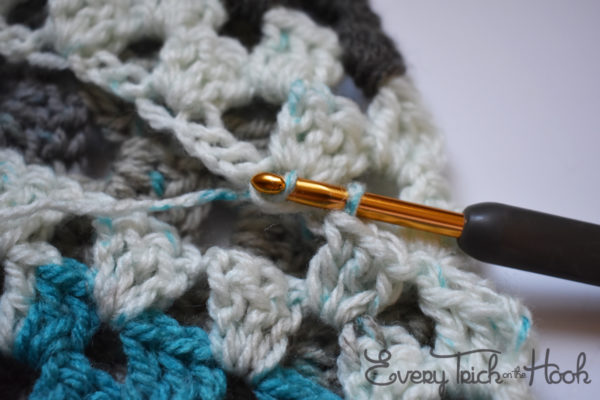
3. Make your next 3dc in the next ch1 sp like you normally would.
Then, find the chain at the base of the next group of 3dc from round 1. Make a slip stitch into it just like you did into the last one.
The ch3 spaces from your foundation chain that fall between groups of 3dc in row 1 can be ignored.
4. Continue working like that all the way up to the corner.
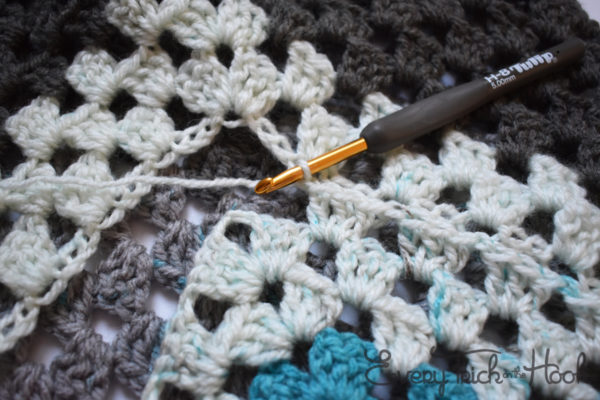
5. To do the corner, make your first group of 3dc into the ch2 space as normal.
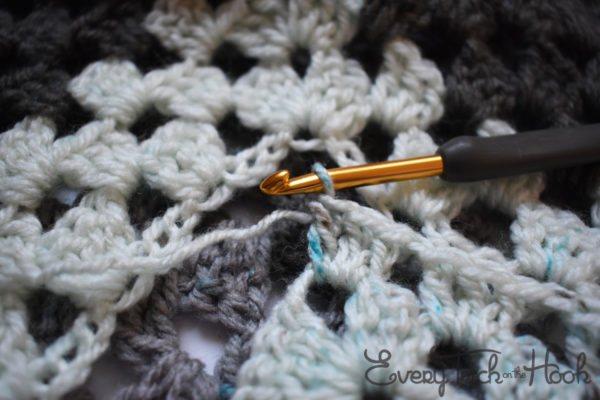
6. Ch1.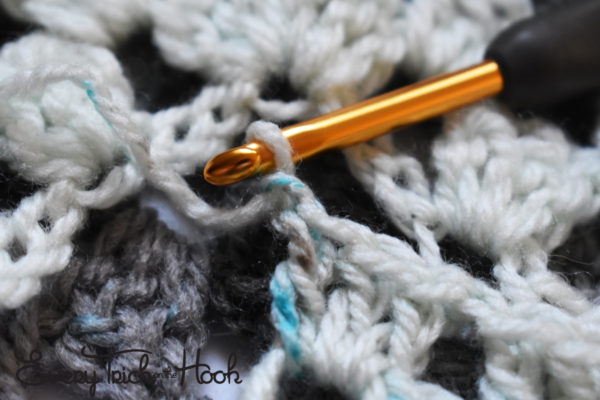
7. Slip stitch to the chain at the base of the row 1 corner stitches.
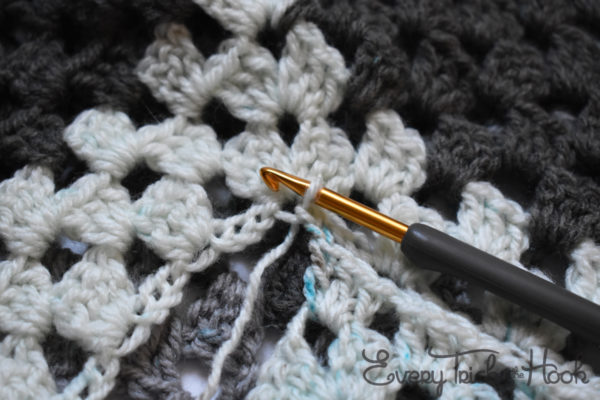
8. Make your next group of 3dc into the same ch2 space as the last group to complete your corner.
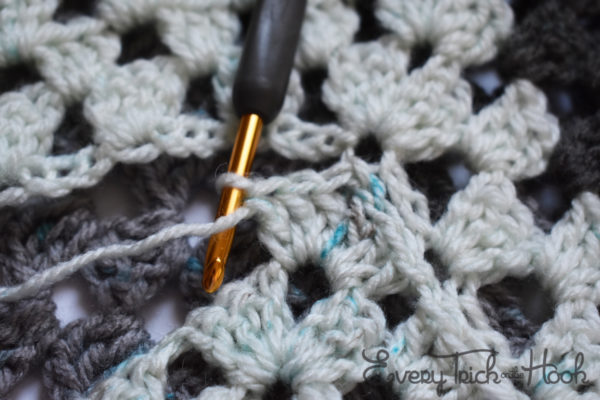
9. Make a slip stitch into the chain at the base of the next group of 3dc from row 1.
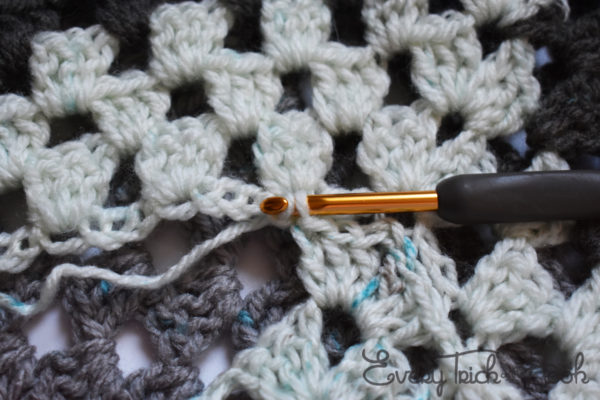
10. Work like you did on the first side down the second side.
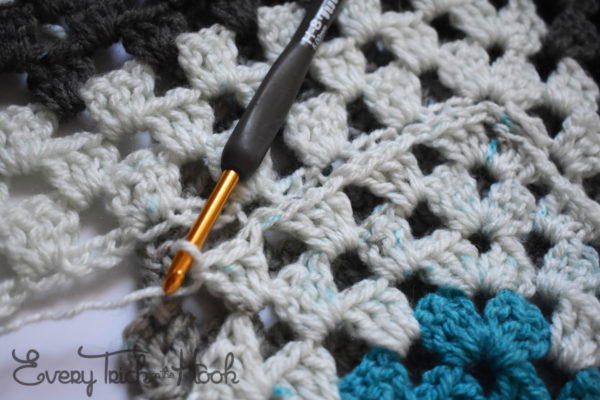
11. Work that way all the way to the slip stitch that goes into the chain at the base of the last 3dc group from row 1.
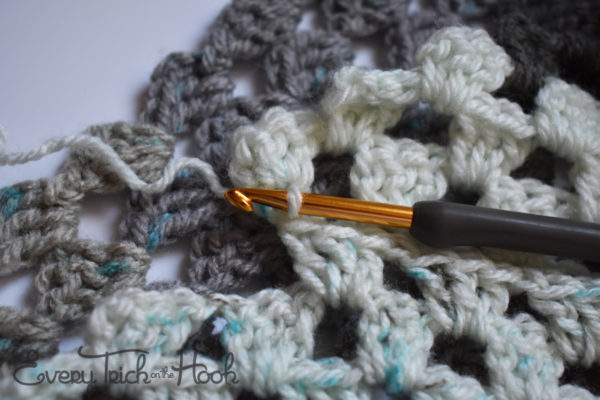
12. Finish by making your last group of stitches into the last ch1 sp: (2dc, hdc, ch1)
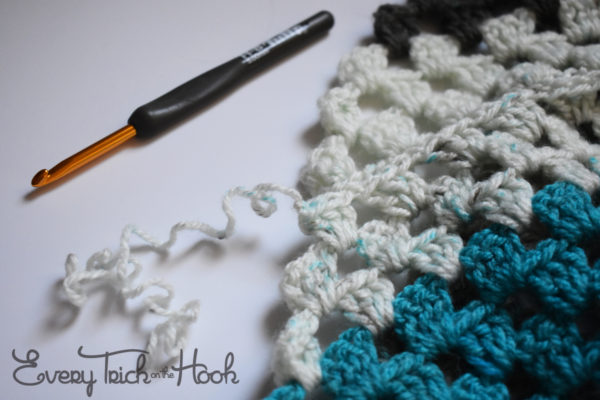
Fasten off. Weave in your ends and block.
If you’d like to show your support and/or say thank you for this free pattern – the most helpful thing you can do is share a picture of your work on Ravelry or Facebook. Seriously! That’s it. If you liked the pattern, tell your friends and show them what you made.
If you’d like to see more of my work, visit the Patterns page here on Every Trick on the Hook or my Ravelry store.
The best way to keep up with my goings-on is to follow Every Trick on the Hook on Facebook. You can also message me there, post on the wall, and follow my posts for the latest news.
If you’re looking for a more interactive Facebook experience, join the Polly Plum Pattern Posse Facebook group. We’re a fun and supportive group. Really! There’s so much help there that chances are your question will be answered by someone before I even see it. It’s the best place to go with a question. It’s also a great place to share your Polly Plum makes and see what others are making.
If Facebook isn’t your thing you can also join the Ravelry group – Polly’s Place or follow @polly_plum_crochet on Instagram.
