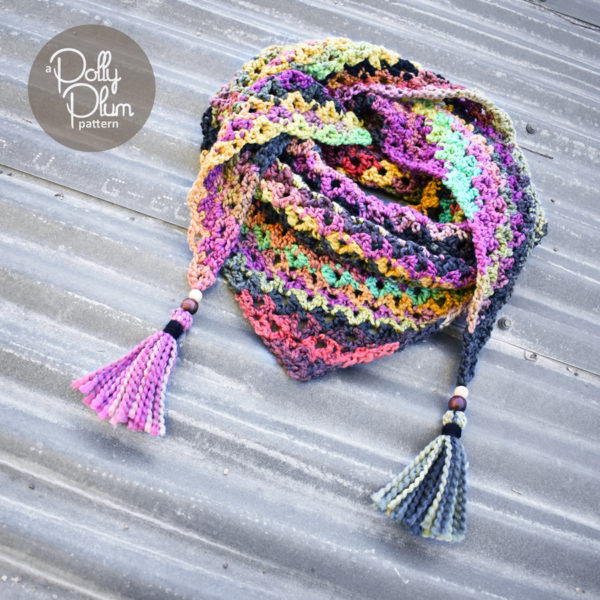
Jayma is an incredibly easy shawl pattern that’s designed specifically for those balls of chunky yarn with tons of gorgeous but relatively quick color changes. You know the ones. Those irresistible yarns that make it home with you but don’t always make it into a project then sit on your shelf for months, maybe years. This simple stitch allows you to show off pretty yarn in all its glory. It mixes up brief color stripes just enough to add a bit of interest but not compete with the yarn itself. The light lacy quality keeps the chunky yarns from being bulky and the extra wide triangle gives you length for wrapping and draping without eating up yardage.
Better yet, this project is FAST. Super fast. Emergency gift fast. “OMG, I forgot to make that person a gift and the thing is tomorrow” fast. I made both of my shawls in about 3 hours each, including end weaving, blocking, and making the tassels.
Click here to read the blog post all about Jayma and she came to be.
Details
Pattern written in US crochet terms
Skill level: Easy/beginner
Finished Size: Any
Gauge: Not important
Hook size: Whatever is appropriate for your yarn, go up a size or two if you crochet on the tight side.
Yarn: Any. Self-striping with a medium to short color change recommended for maximum effect. 2 or 3 balls. This is a hook until you’re done or until your yarn is gone sort of project.
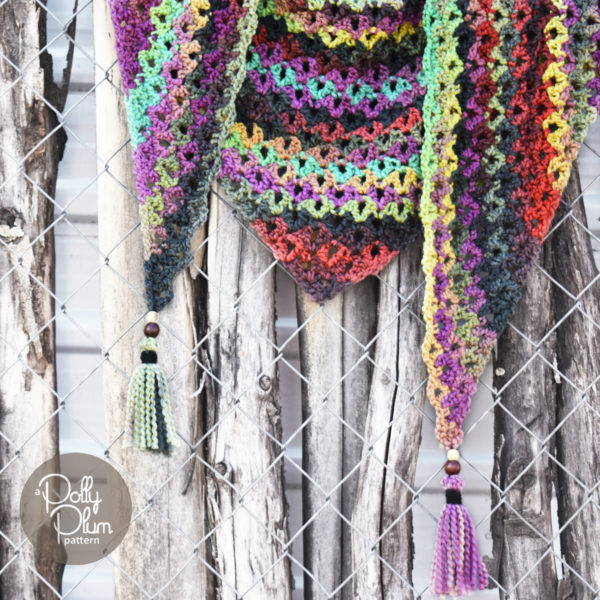
The yarn pictured is Yarn Bee First Love in Purple Multi available from Hobby Lobby. I used 2 balls and a 6.5mm hook and my shawl is about 60 inches from point to point, not counting tassels.
Pattern Notes
Blocking will help open up the stitches of this shawl, especially if you’re using a chunky yarn.
Click here to favorite, queue, and hook up a project page on Ravelry.
Check out the new “Print Friendly” button at the bottom of the page to print your own copy of the pattern.
If you need help or have any questions, scroll to the bottom of this page. There are links to where you can find lots of support.
This pattern is Copyright © 2017 Polly Plum. All rights reserved.
If you would like to share this pattern, please share the link to this webpage or the Ravelry pattern page (link below). Please do not distribute this pattern or the accompanying photos in any other form. Please read more in the Copyright section.
Abbreviations
- ch – chain
- dc – double crochet
- sc – single crochet
- sk – skip
- slst – slip stitch
- sp – space
- st – stitch
Special Stitches
Wide V – dc, ch2, dc
Pattern
Row 1: Ch4 {first ch is where you’ll make your stitches, next 3 chains count as your very first dc}, into very first chain make (wide V, dc). Turn.
Row 2: Ch3 {counts as first dc here and throughout}, wide V into first st {this is the st that the chains are coming out of}, sk next dc {this is the first dc of the wide V}, sc into next ch2 sp, sk next dc {this is the second dc of the wide V}, (wide V, dc) in last dc of row {this will be the top ch of the ch3 that counted as your first dc in row 1}. Turn.
Note: From here on out you’ll be working into the ch2 spaces of the wide V’s and skipping the dc’s of the wide V’s.
Row 3: Ch3, wide V into first st, sc in next ch2 sp, wide V in next sc, sc in next ch2 sp, (wide V, dc) in last st of the row. Turn.
Row 4: Ch3, wide V into first st, sc in next ch2 sp, (wide V in next sc, sc in next ch2 sp) repeat across to last ch2 sp, (wide V, dc) in last st of the row. Turn.
Repeat round 4 to desired size.
Weave in all ends and block.
Make 2 tassels with remaining yarn. Attach tassels to the two points. For a little extra something, add a couple beads before each tassel.
Click here for tassel photo tutorial.
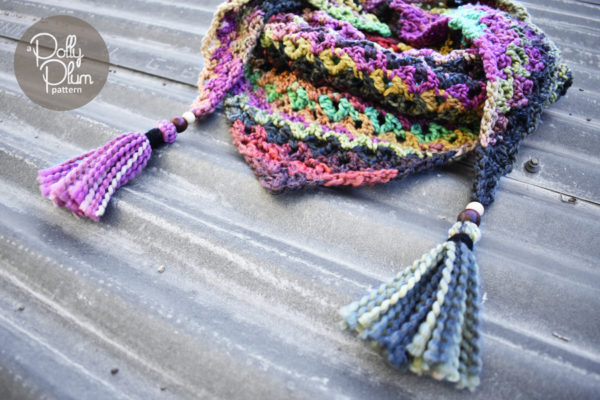
Photo Tutorial
Notes are in italics and are there to help explain what’s going on.
Row 1:
Chain 4. {The first chain is where you’ll make your stitches. The next 3 chains count as your first dc.}
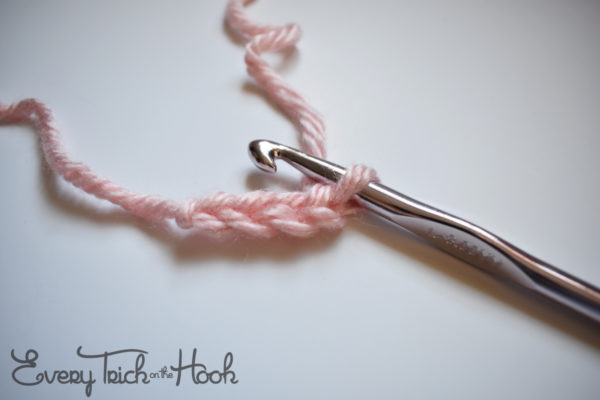
Into the first chain {technically that’s the 4th chain from the hook, but the first one you made} make: (wide V, dc).
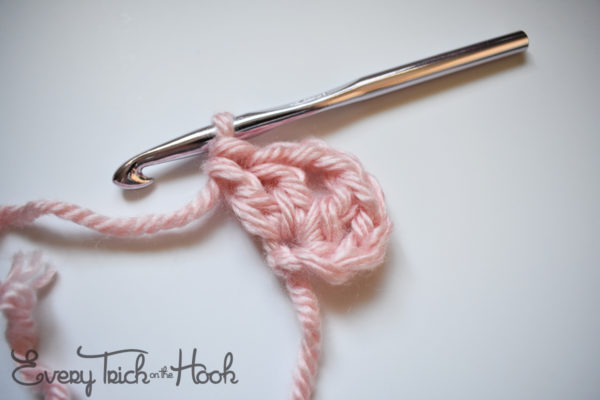
Row 2:
Turn and ch3. The ch3 counts as the first dc of your row. {Each row will start with a ch3 and it always counts as your first dc. This is important because you’ll be working into the top chain of this chain 3 later.}
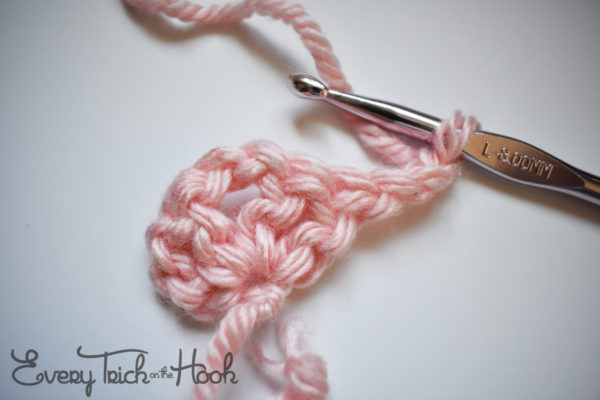
Make a wide V into the FIRST stitch. {The very first stitch is the one that the ch3 is coming out of.} Skip the next dc which is the first dc of the Wide V from row 1.
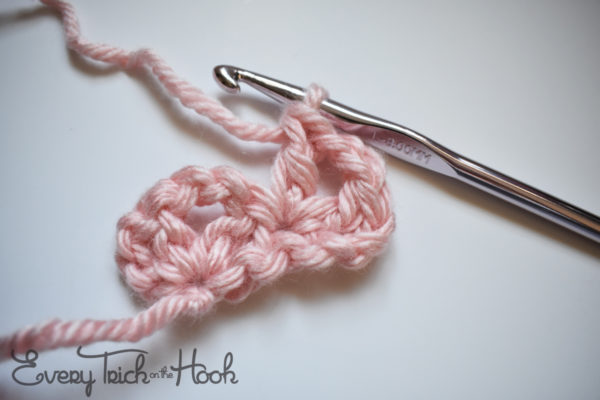
Sc in the ch2 sp of the row 1 wide V.
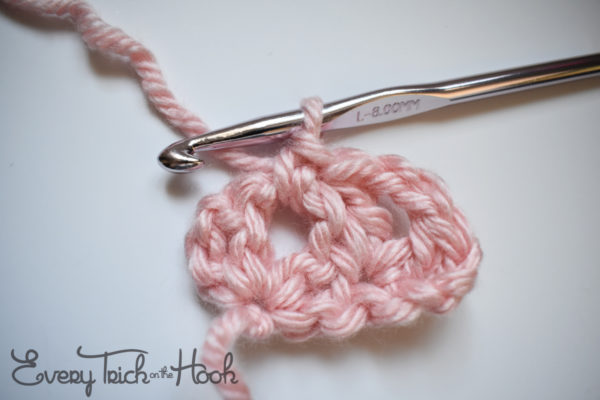 VERY IMPORTANT: Skip the next dc, that’s the second dc of the wide V. Your going to work into the dc after it. Technically, that dc is the ch3 that counts as your first dc of the previous row. So work into the top chain of that ch3 and make: (wide V, dc).
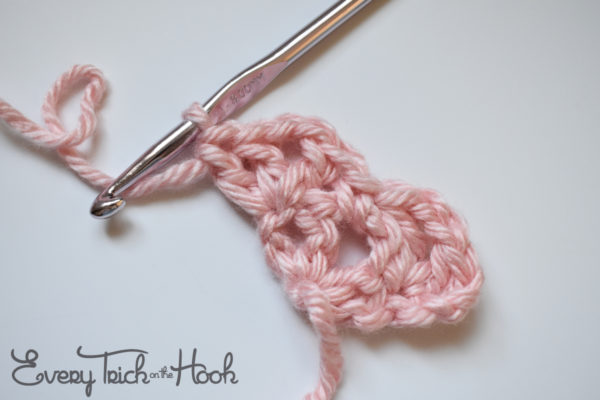
Row 3:
From here things are going to look a lot like what you’ve already done.
Turn and ch3. Into the very first st make a wide V.
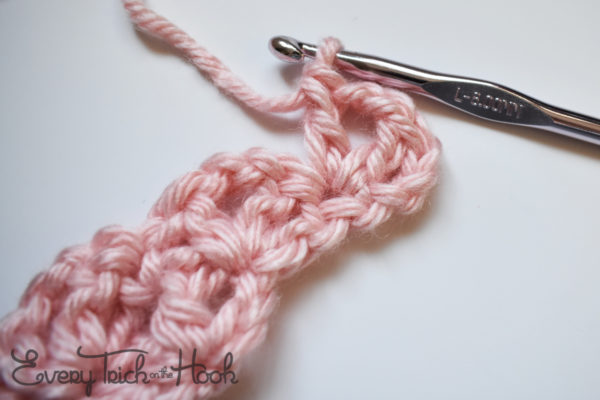
Sc in the next ch2 sp.
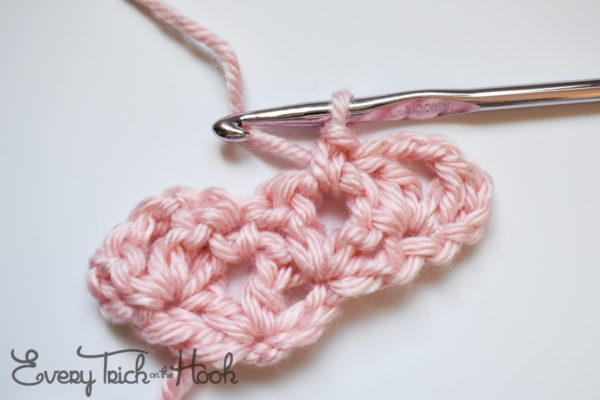
Into the sc that’s between the previous rows wide Vs make a wide V.
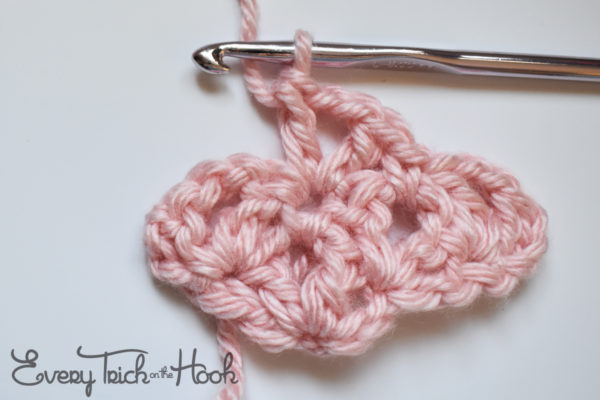
Sc in the next ch2 sp.
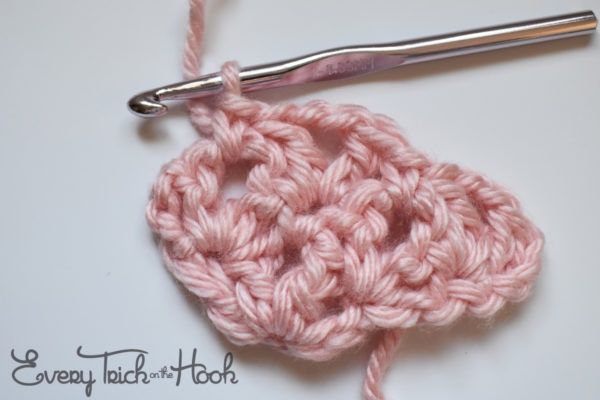
Now, like you did in the previous row, work into the very last dc of the side {the dc that is technically a ch3 that counts as a dc so you’ll just work into the top ch} and make: (wide V, dc).
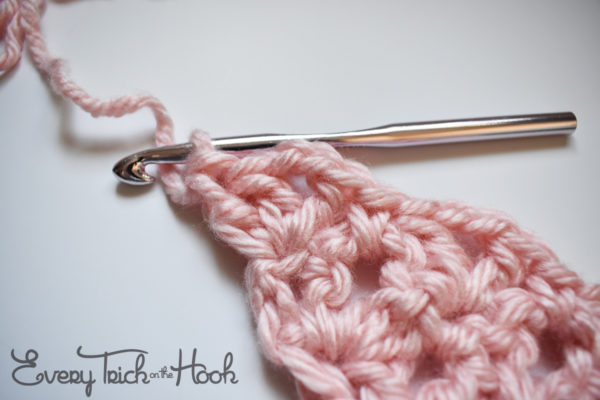
Additional Rows:
Continue working in the same manner as round 3. Start every row the same way as row 3. Then make an sc into the ch2 spaces of the previous rows wide Vs and make wide Vs into the scs between the previous rows wide Vs. Finish every row the same way as row 3.
Make as many addition rows as you want until you reach your desired size or until you run out of yarn.
Weave in ends and block.
Add tassels to the two widest points of the shawl.
If you’d like to show your support and/or say thank you for this free pattern – the most helpful thing you can do is share a picture of your work on Ravelry or Facebook. Seriously! That’s it. If you liked the pattern, tell your friends and show them what you made.
If you’d like to see more of my work, visit the Patterns page here on Every Trick on the Hook or my Ravelry store.
The best way to keep up with my goings-on is to follow Every Trick on the Hook on Facebook. You can also message me there, post on the wall, and follow my posts for the latest news.
If you’re looking for a more interactive Facebook experience, join the Polly Plum Pattern Posse Facebook group. We’re a fun and supportive group. Really! There’s so much help there that chances are your question will be answered by someone before I even see it. It’s the best place to go with a question. It’s also a great place to share your Polly Plum makes and see what others are making.
If Facebook isn’t your thing you can also join the Ravelry group – Polly’s Place or follow @polly_plum_crochet on Instagram.
