I’ve been crocheting for many years but I’ve only been blocking for the last two years and I have to tell you that I’m addicted. I’m serious, I block everything, even if it doesn’t really need it. I love the finished look, the straight edges, and softer feel. I use primarily acrylic yarns because the bulk of my projects end up being gifts or donations and I’ve found that it’s hard to pass on complicated care instructions. This led me to research and experimentation into a way to block that lasts because I certainly couldn’t ask someone else to do it after every wash! As a result, in this past year I’ve discovered steam blocking and I’ll never go back. Steam blocking acrylic, if done correctly is safe and permanent. During steam blocking you will notice that your stitches relax and soften. As you steam you can gently tug your stitches into place and when they cool they will “lock”. It’s truly a fantastic technique! This means that you can block a project, wash it (sometimes even dry it), gift it, and it will hold its shape!
Steam blocking acrylic often gets a bad rap because you can use this technique to ‘kill’ the acrylic. What this means is that you use the heat to literally melt the plastic fibers in the yarn, flattening and smoothing out the stitch definition, and removing stretch from the fabric of your work. Sometimes this technique is used on purpose to set certain pieces such as masquerade masks or crocheted letter and number appliques. However, it’s not something you can do as easily on accident as you might think. Acrylic yarn melts at 500 degrees Fahrenheit, the steamer I use only reaches 395 degrees Fahrenheit. You can still damage or over relax your yarn so diligence and attention are required in the technique and if you choose to use an iron that produces steam over a steamer (more about those choices in a bit) you should never touch the iron to your work.
Here’s what you need to get started:
You are going to need a surface big enough to accommodate your project. You are going to want this surface to be able to absorb the moisture from steaming and to breath as the project dries. It will also need to accommodate you pinning your project down. I personally use my guest bed which has a 4-inch foam topper on it and a comforter to absorb the moisture! You can also use foam blocking mats and towels to achieve the same effect.
Rust resistant pins. (You do not want a project ruined by rust, trust me on this one!) These are the pins I use:
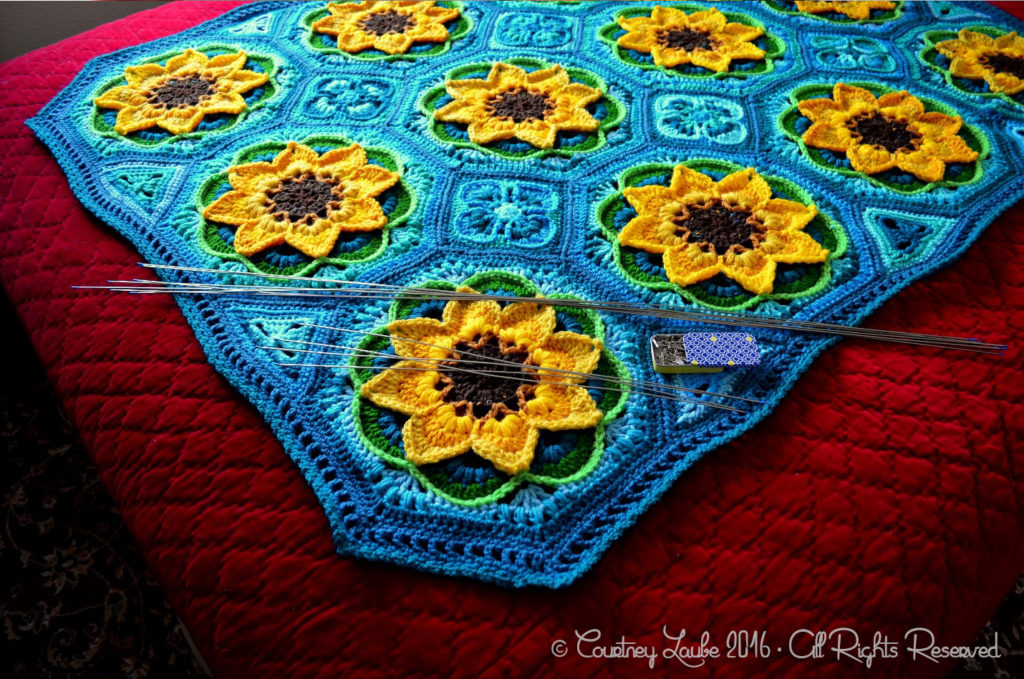
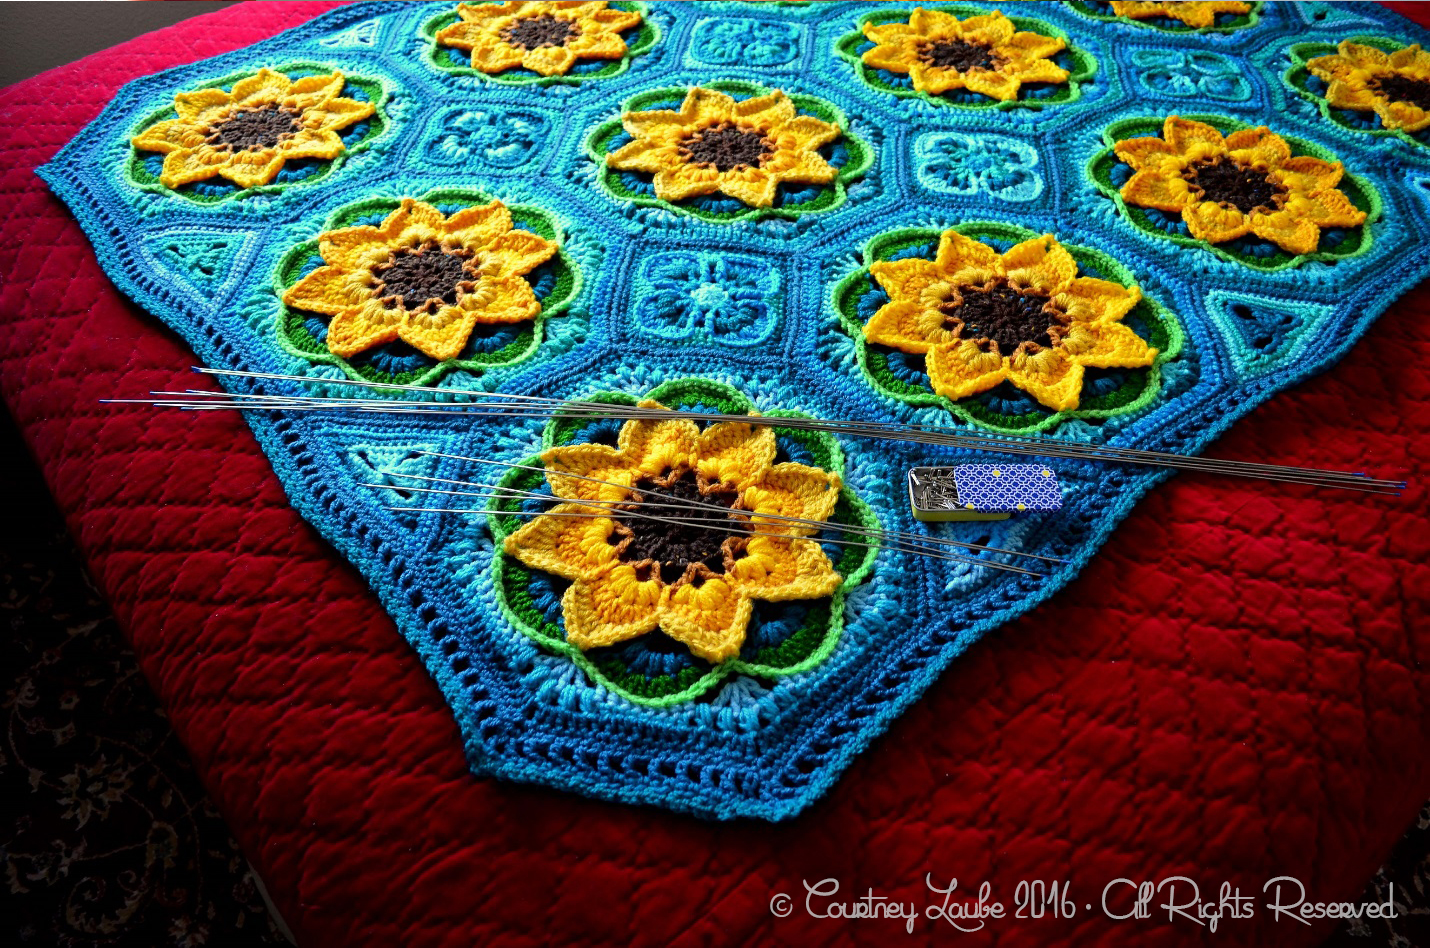
*Optional* Blocking wires. I love blocking wires! I use a mixture of short 12” and long 36” wires for this project as the sides are just a little too long for one wire. This is the specific set I have:
A steam gun or steam iron. I personally use a Conair Extreme Steam Fabric Steamer that is used to replace dry cleaning. I have no idea if it’s any good for that but it’s an awesome steam blocker!!! You can also use a steam iron if you have one handy.
If you choose to purchase a steamer here is what you want to look for: A long cord, a truly contained reservoir (you don’t want leaking or spilling), one that can be held sideways as well as up and down. This is the steamer that I use:
If you choose to use a steam iron you are going to need a steam iron that uses a method similar to the following product and shoots steam because you never want to touch your iron to your work.
This is the specific one that I use. It calls for distilled water (which I always forget to use) and has reviews for clogging but don’t forget that if you can run plain white vinegar through your coffee pot to clear out hard water clogs you can run it through a water system like this steamer.
Time and refills! This technique takes some time. You’ve spent weeks painstakingly forming every stitch… this is not a process you want to rush, so be prepared. You will have to refill your reservoir, often. I like to plug in my headphones with music or an audio-book to pass the time because this is time you are going to want to spend. You also might want to grab a chair or a stool to give you back little breaks because there is just something about this angle that can be a bit uncomfortable. Take the time, give yourself breaks, it will be worth it!!!
First and foremost, I encourage you to test these techniques out on a test swatch just to get a feel for how this will work for you. I’m a dive right in kind of person and the first thing I blocked was an afghan I had already been working on for 12 weeks but that’s just me and I wouldn’t recommend that kind of craziness for everyone! I suggest you crochet a test swatch using the yarn that you used to crochet the large piece you are going to be blocking. The reason for this is that each acrylic yarn has its own density and loft. It will react differently to the heat and the reaction of the yarn you will be using will require you to make small adjustments in how long you keep your steam on each section and how far away you hold your appliance. If this is your first time blocking, testing on a small swatch could prevent a disaster. I love blocking, the way it softens my work and gives it a drape, but what if you do not like it at all? With a little practice you’ll be an expert at gauging just how your yarn is responding and you’ll be able to adjust on the go but I strongly urge you to consider a test this first time.
Let’s get started!
Today I’m going to be blocking my finished Lotus Moon Tiles. You can find this lovely pattern here: http://www.ravelry.com/patterns/library/lotus-moon-tiles
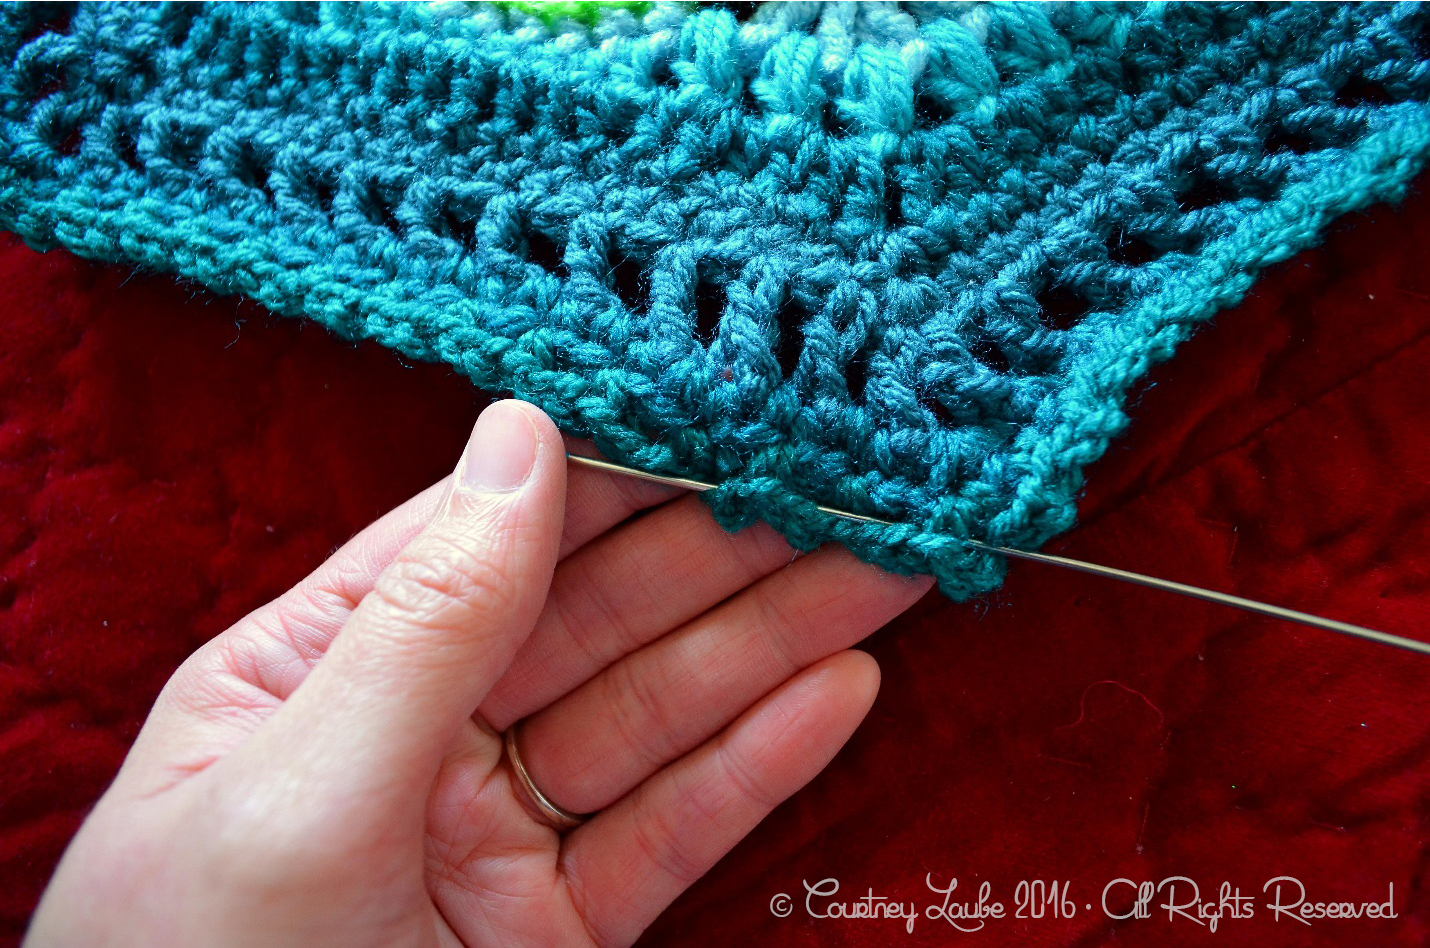
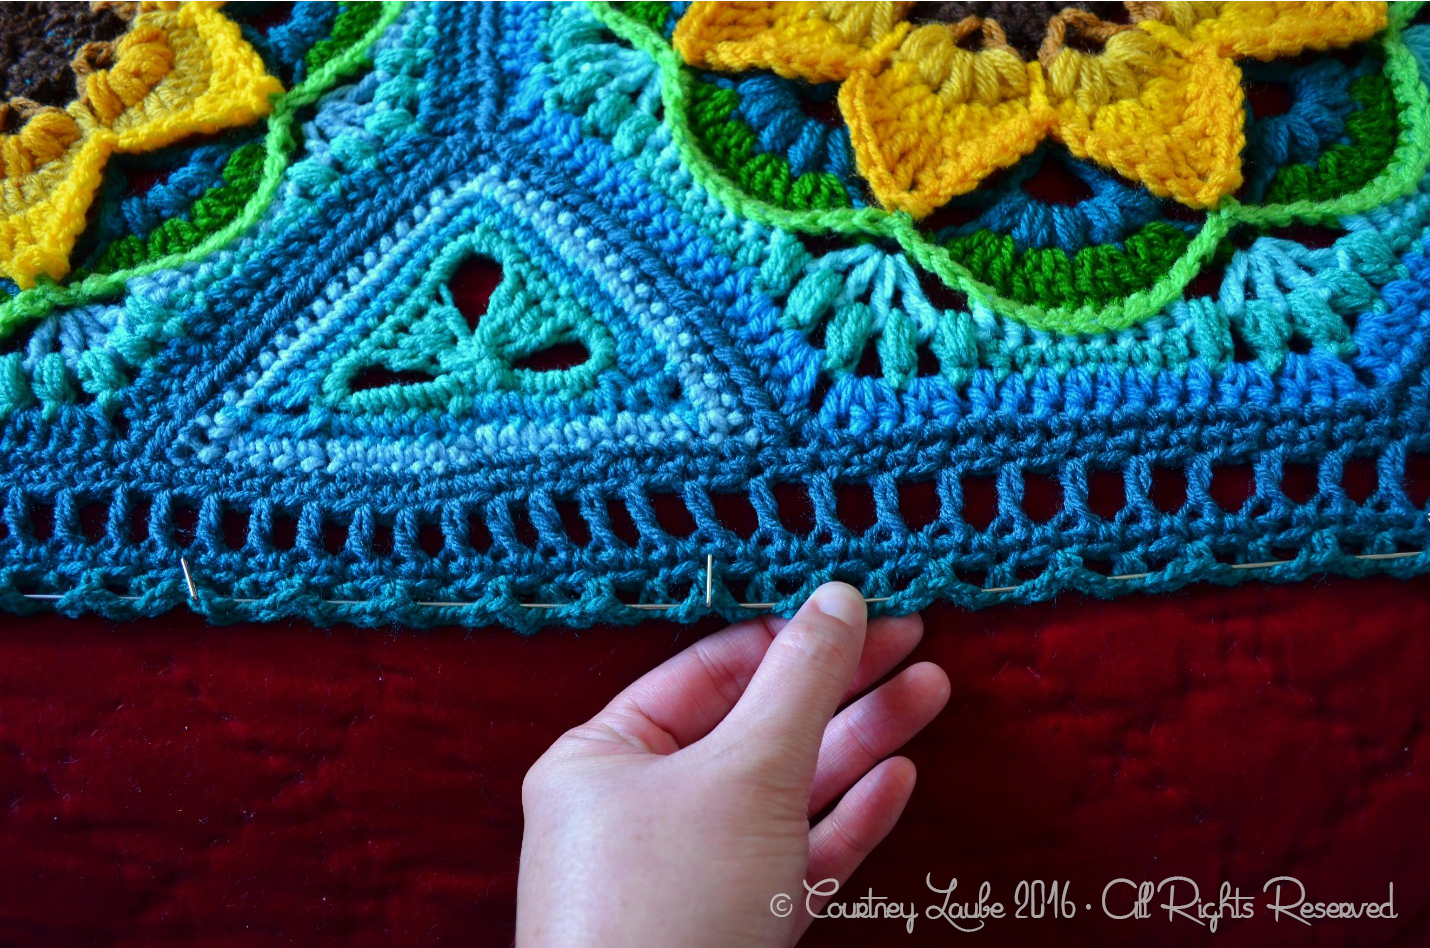
Your first step is to insert your blocking wires into your project. When choosing where to weave your blocking wires you want to start in a corner and weave as close to the edge as possible. You want to weave every other stitch or so. If you span too many stitches your edges will come out with a wavy look so you want to take the time to make this as even as possible. In this piece we have handy ch1 spaces. We are going to use that final row of sc, ch 1, sc all the way around to weave in and out. That will give us a firm anchor to the final row of the project so that we can stretch it to a good shape. Start in the corner of one of the small sides.
This is what it should look like.
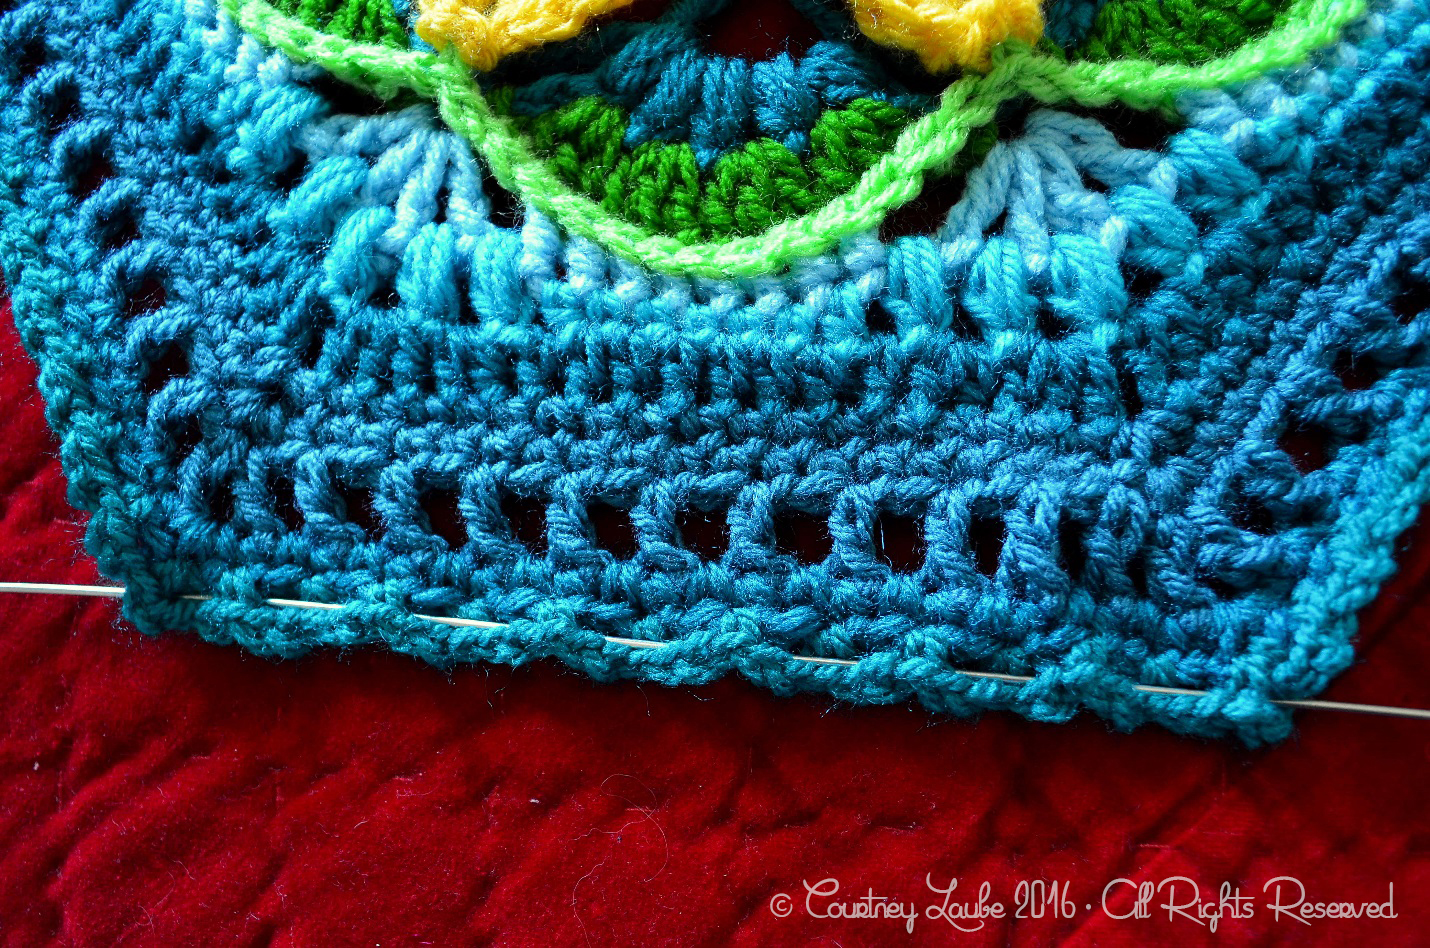
Continue weaving your blocking wires all the way around your blanket making sure to leave some sticking out at each end for strength.
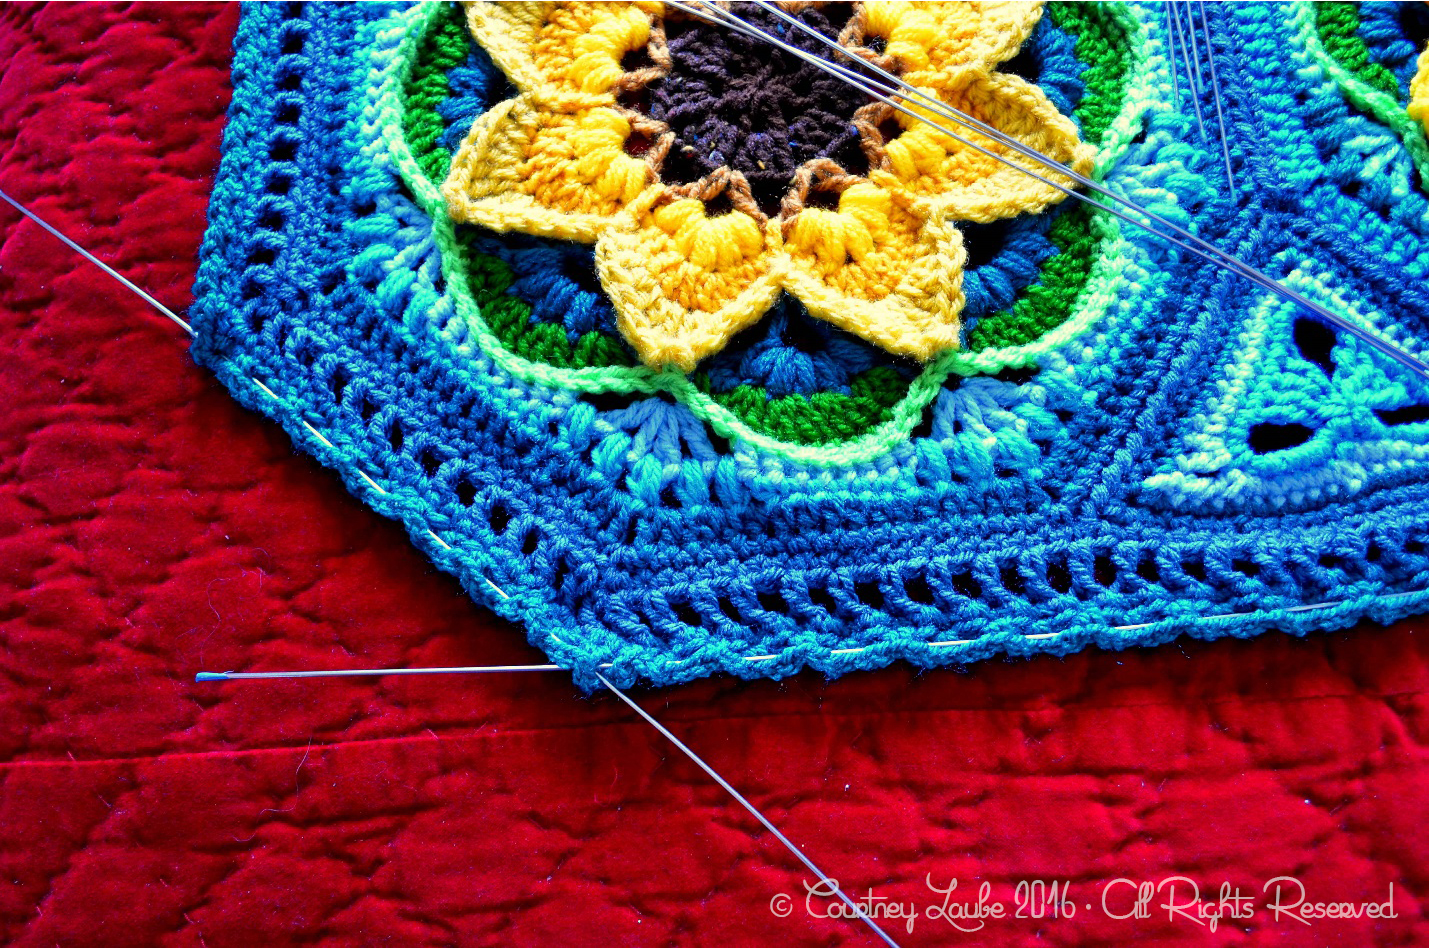
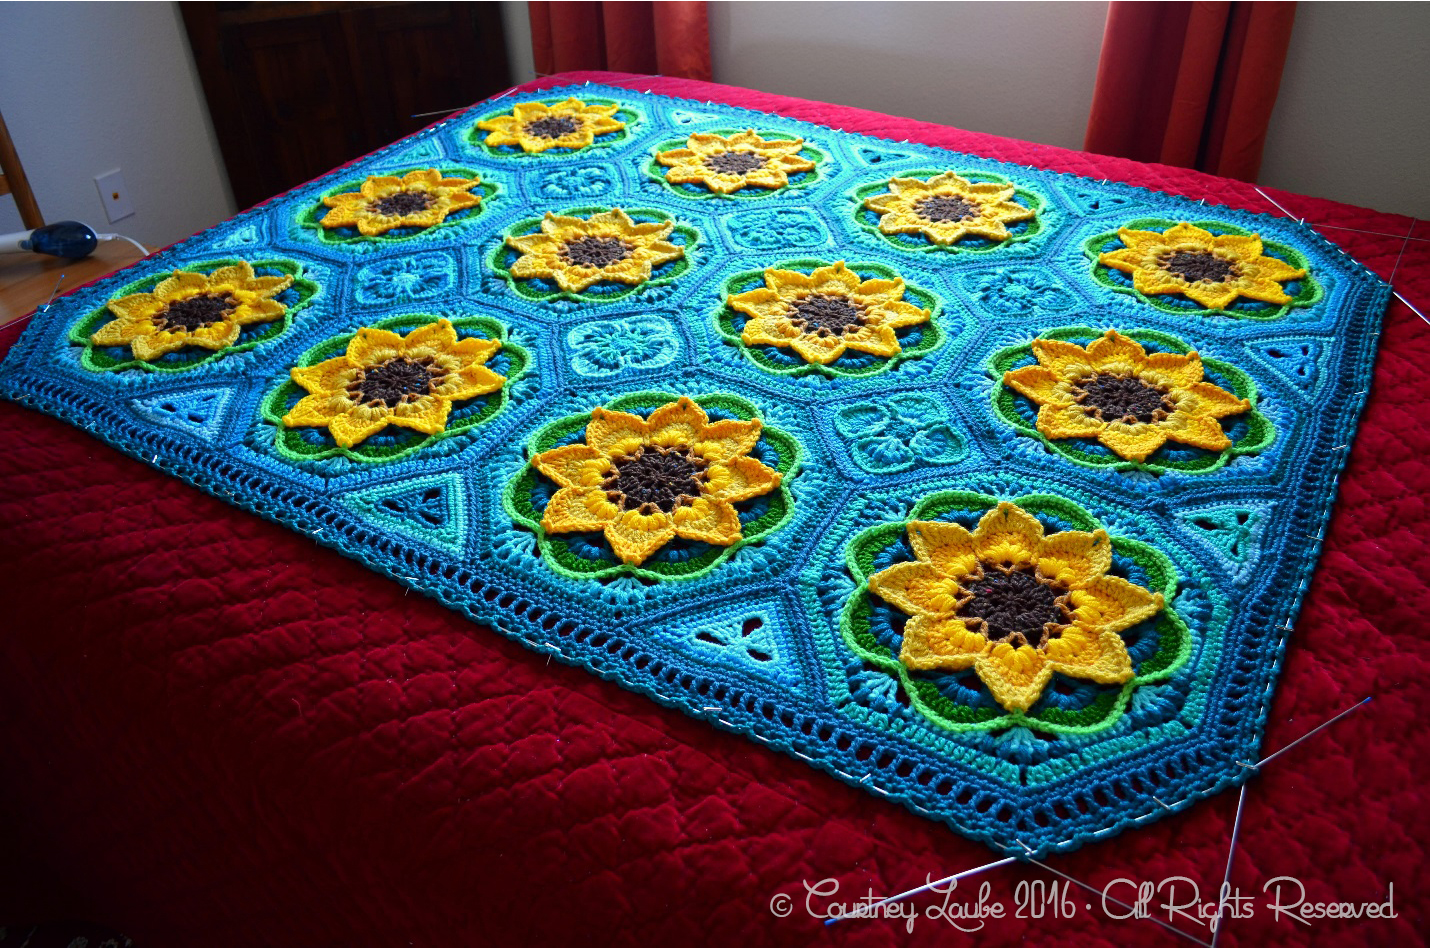
Once your wires are all inserted, pin your piece into shape. Make sure to pay close attention to your lines and don’t shy away from pulling out your measuring tape! Remember that once you steam block your acrylic and it cools the stitches will lock. This will be the finished size of your afghan. You want to be precise. Measure at the top and bottom and at intervals along the sides to make sure that you are stretching and pinning it evenly.
Once finished take a step back and make sure that your overall shape is pleasing to the eye. This is the time to correct anything that bothers you.

Now that your work is pinned out and ready to go it’s time to start steaming! Turn on your steamer or iron, wait for it to preheat, and let’s get started!
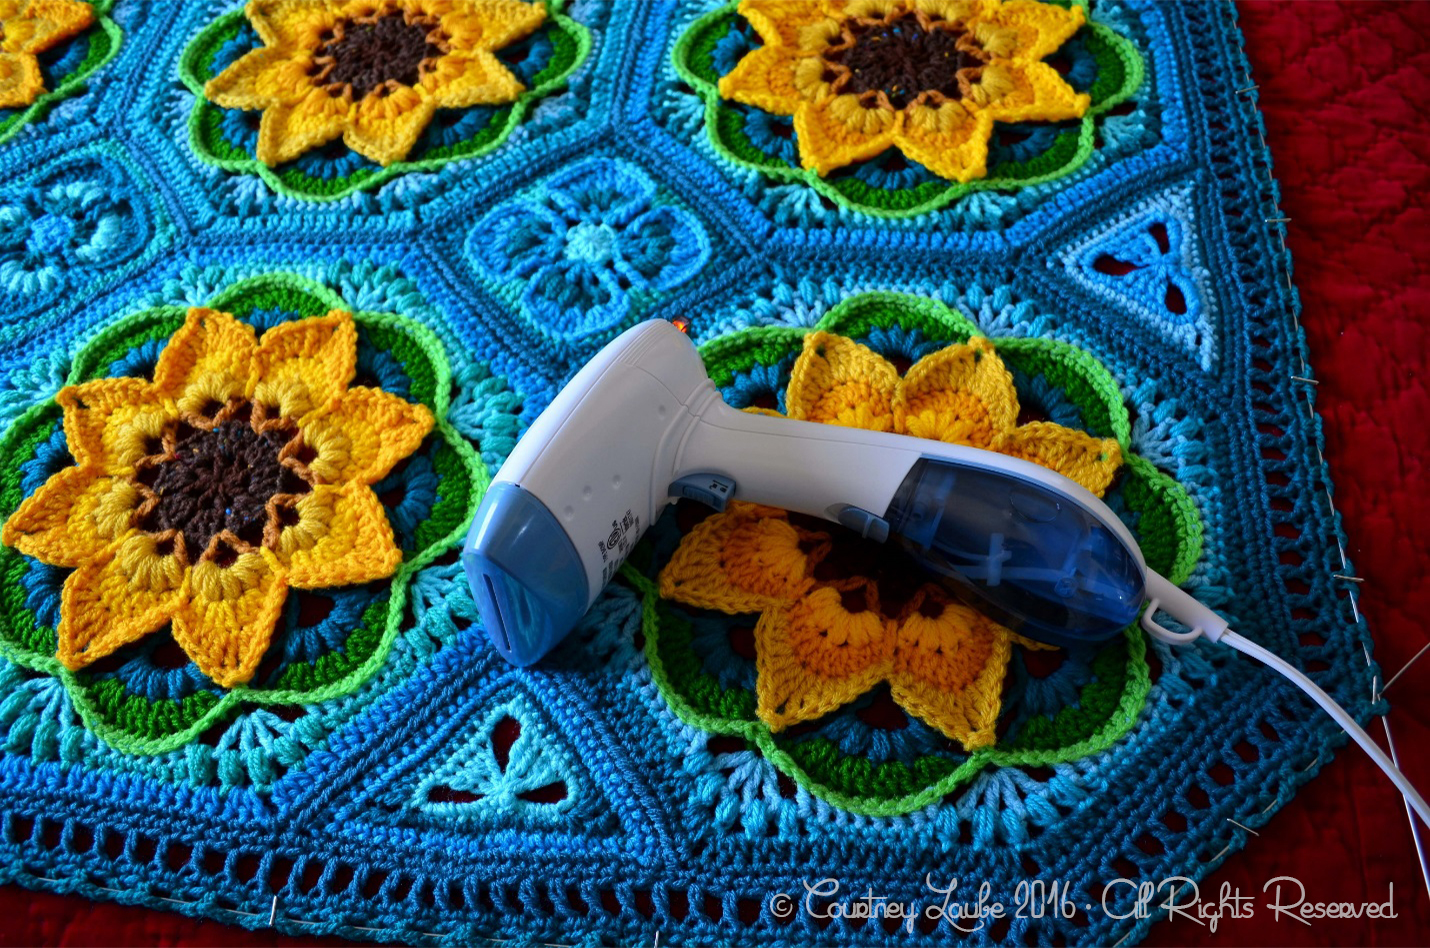
Start with your steamer on the lowest setting (until you are sure of how much steam you want to be using, I personally use mine on high) and hold it roughly perpendicular to your work 3 to 4 inches above the fabric of your work (remember that if you are using an iron rather than a steamer be careful to never let the iron touch).
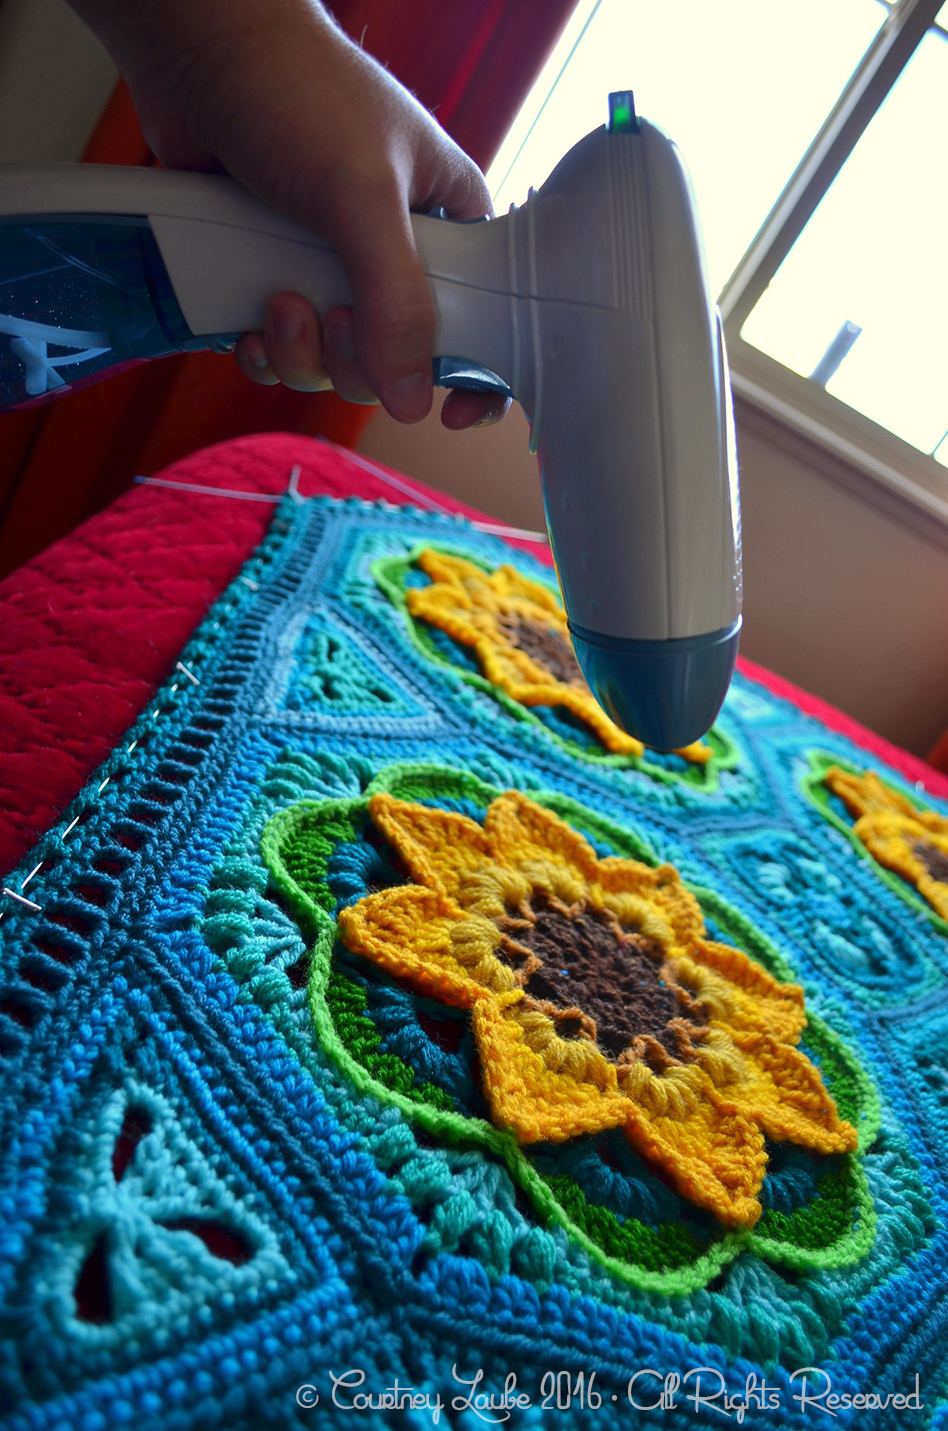
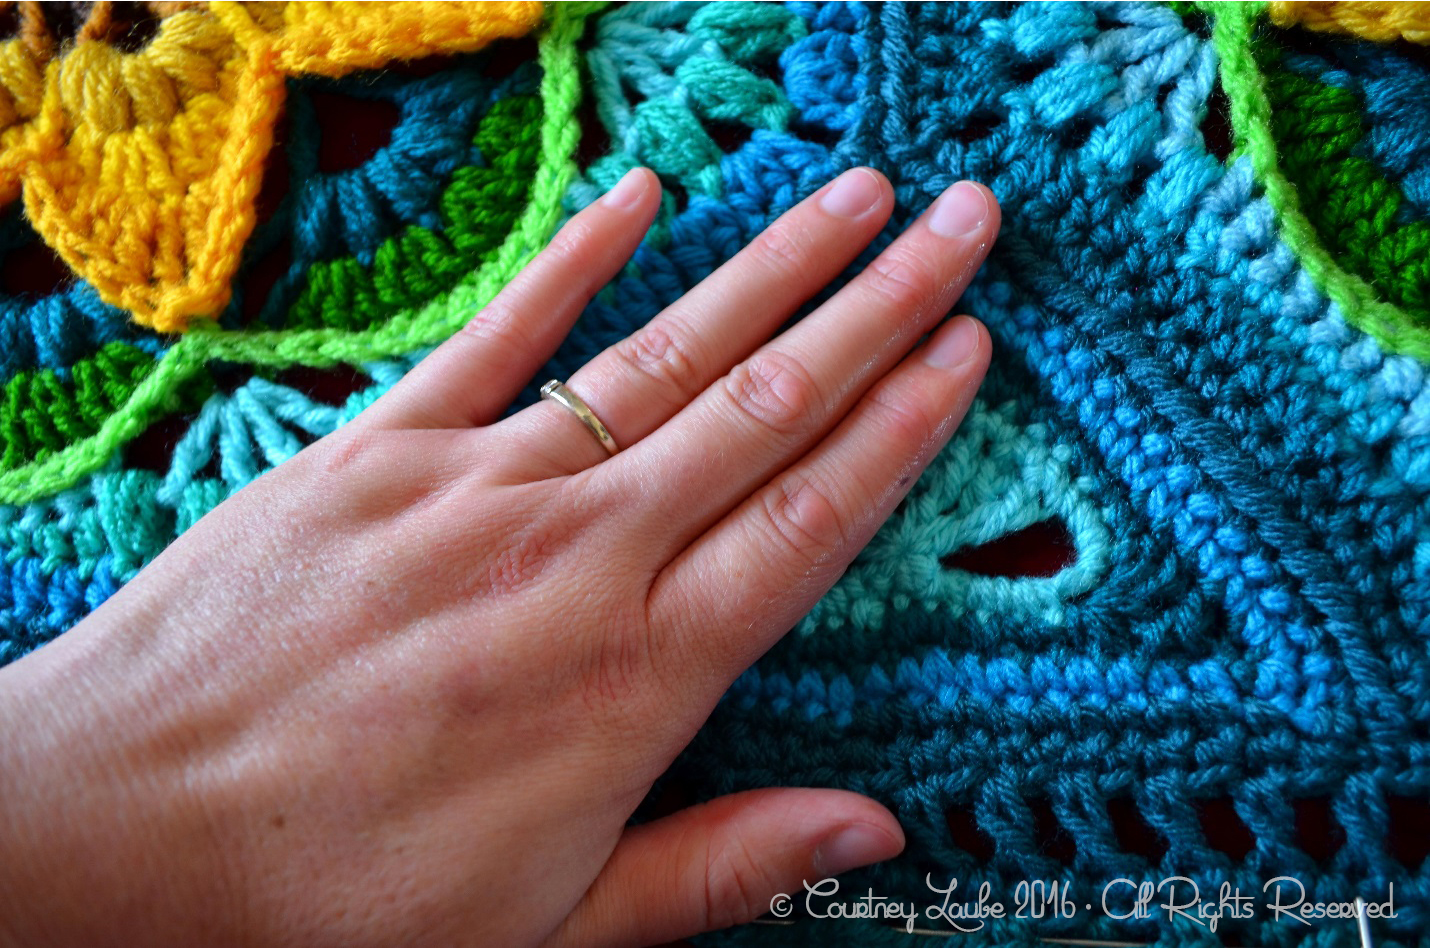
Move slowly back and forth across your work in small strokes. I work across small patches, roughly 8 inches square, until I see the work relax and I can feel with my hands that the area is warm and damp. Then I move on the next section.
I use my hands a lot while I’m steaming but I want to remind you that steam can burn you so please do be careful. 395 degrees Fahrenheit may not melt acrylic yarn but your poor hands aren’t quite so tough. I’ve had a few bad moments.
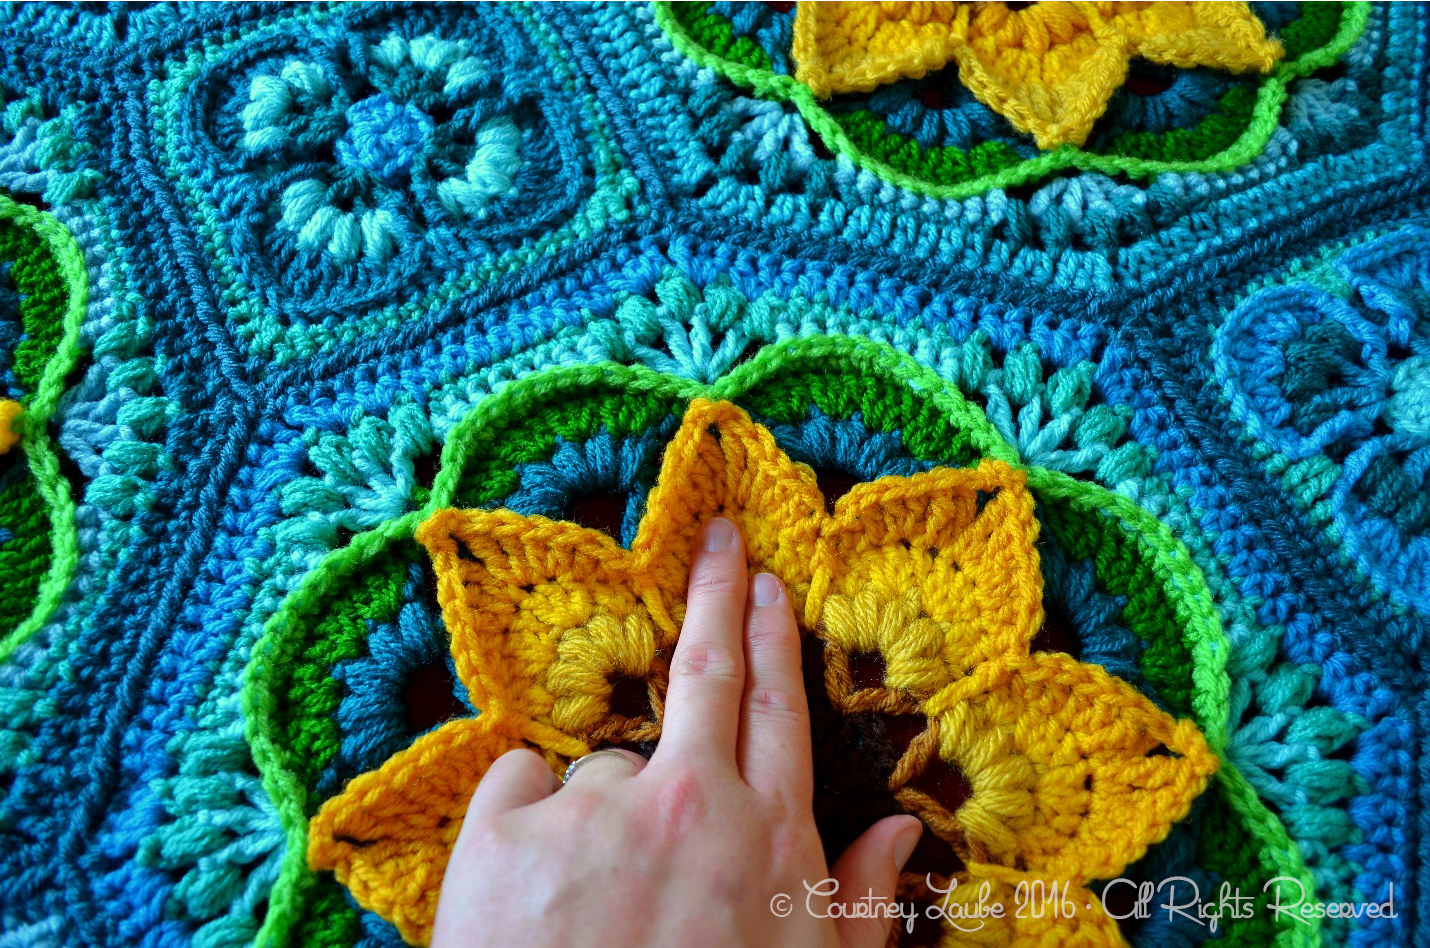
Repeat this step until the body of your work is finished. I spent a little extra time on The Lotus Moon Tiles Pressing down the center of each petal to make sure those edges popped!
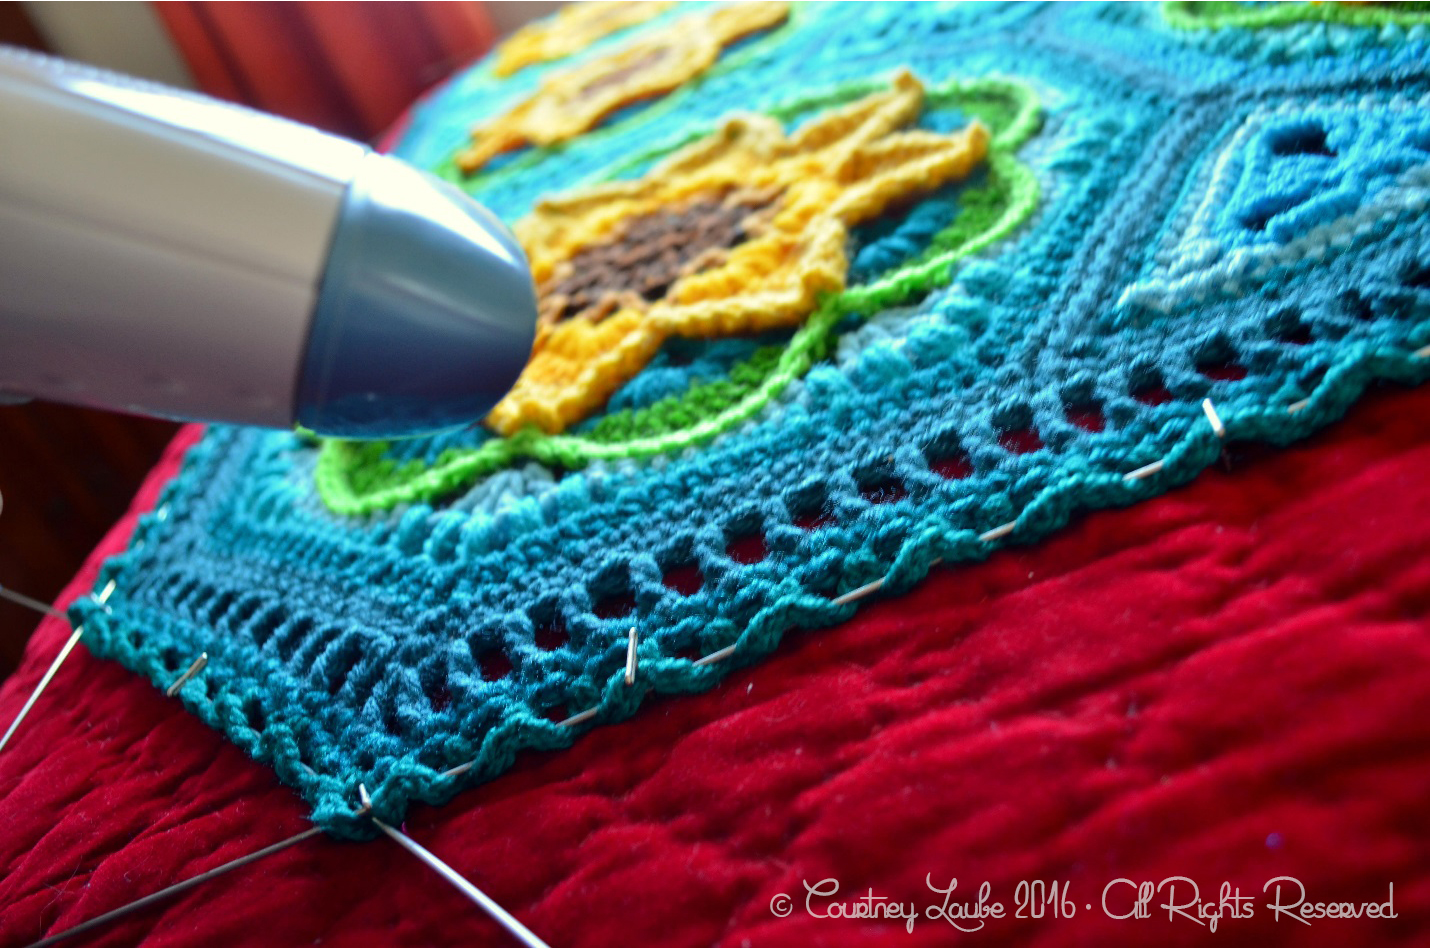
When the body of your work is complete, move on to your edges. Pay close attention to your edges, gently tugging your blocking wires as you go to pull the edges nice and straight and set your stitches.
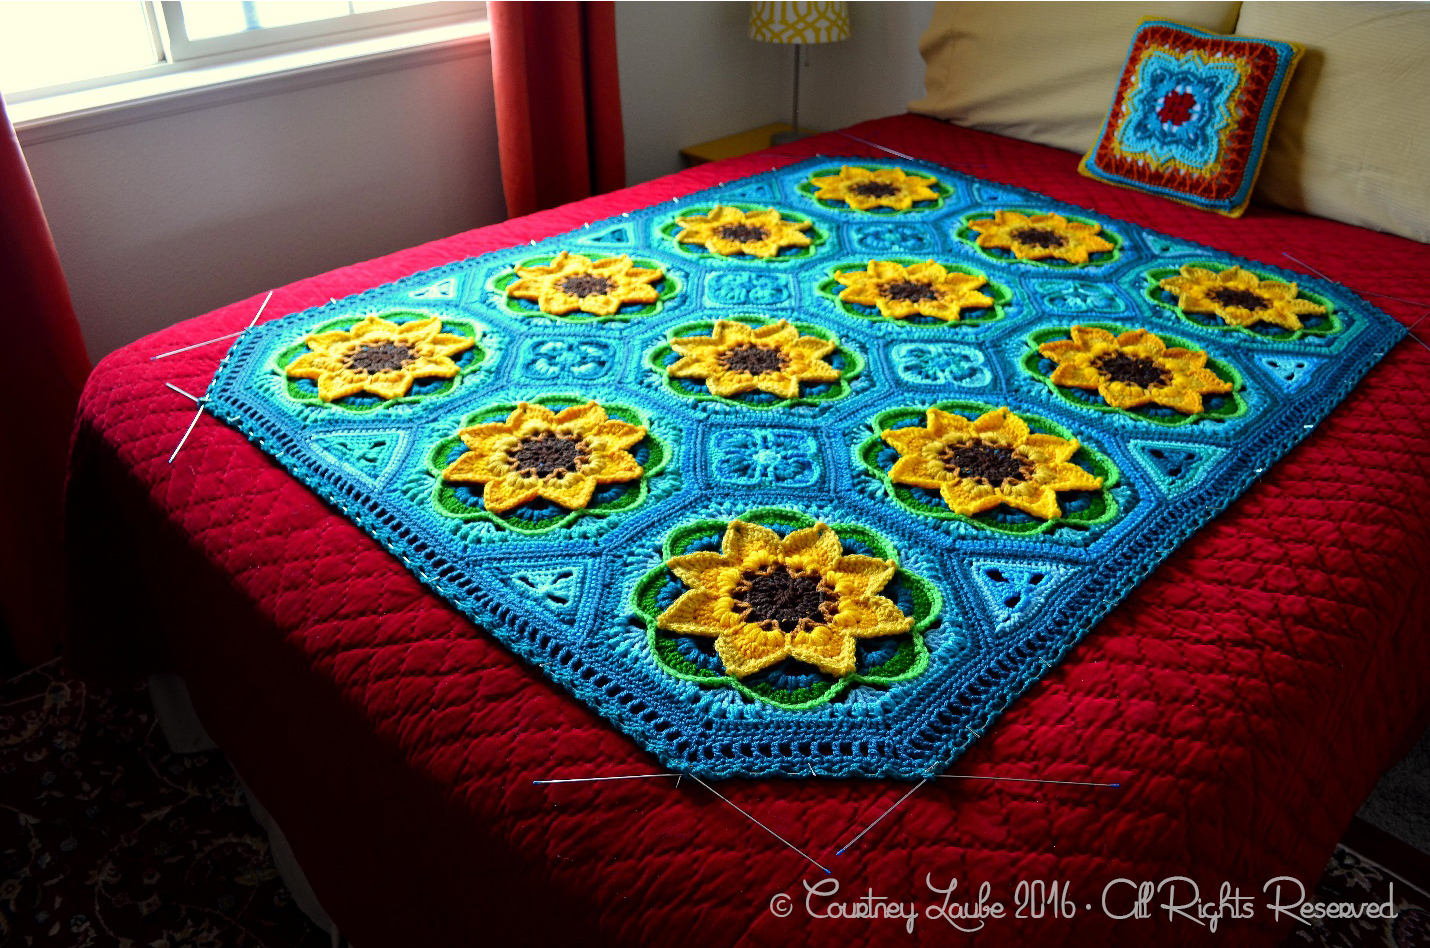
When you are finished your piece should look nice and square and should feel slightly damp to the touch. At this point you should give it a few hours to air dry.
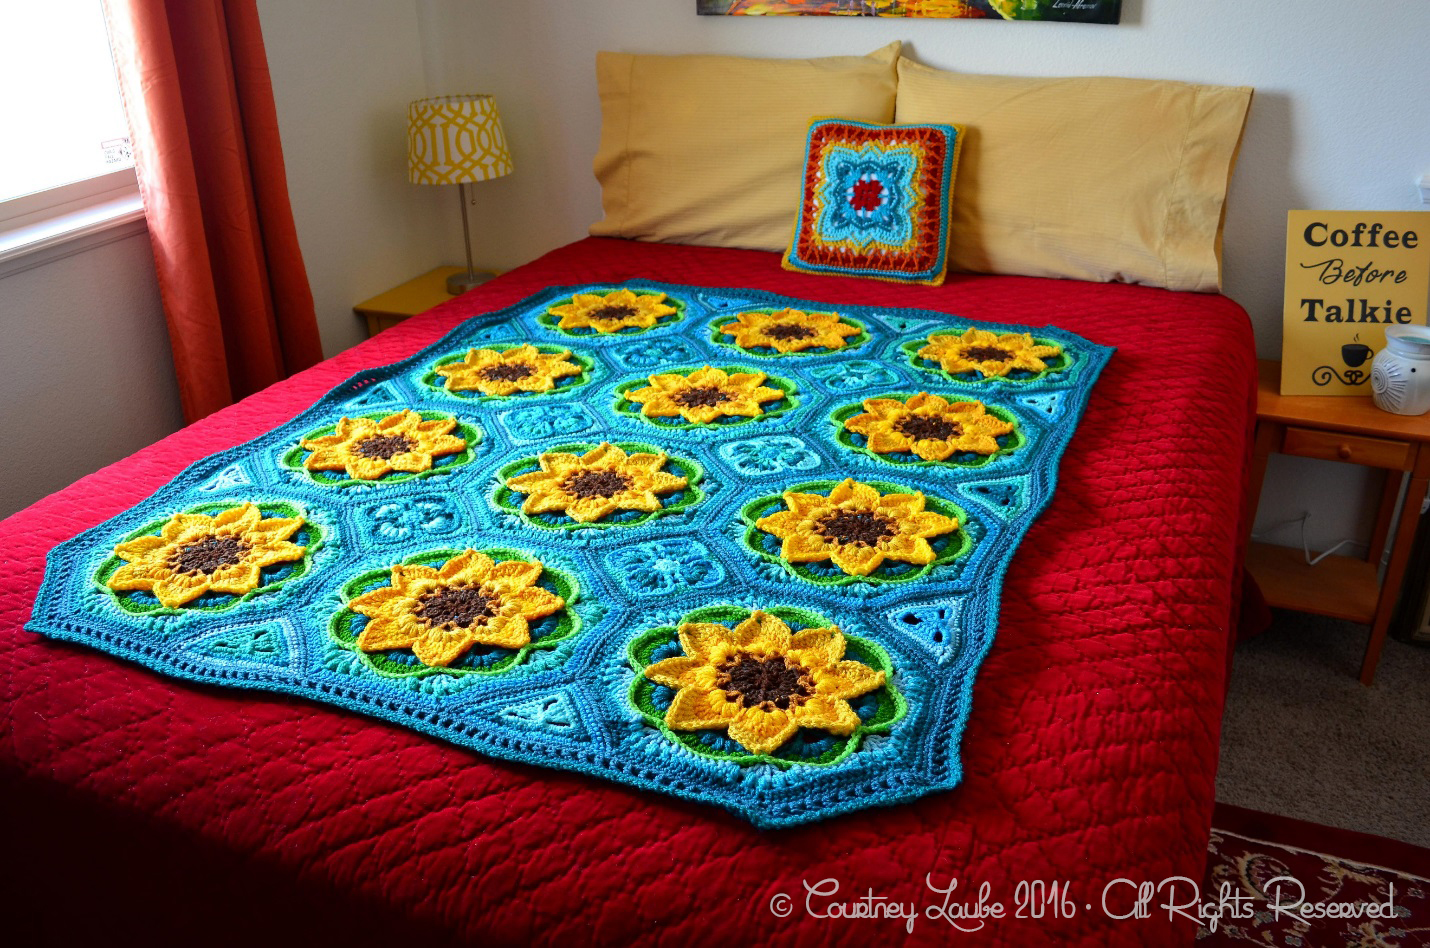
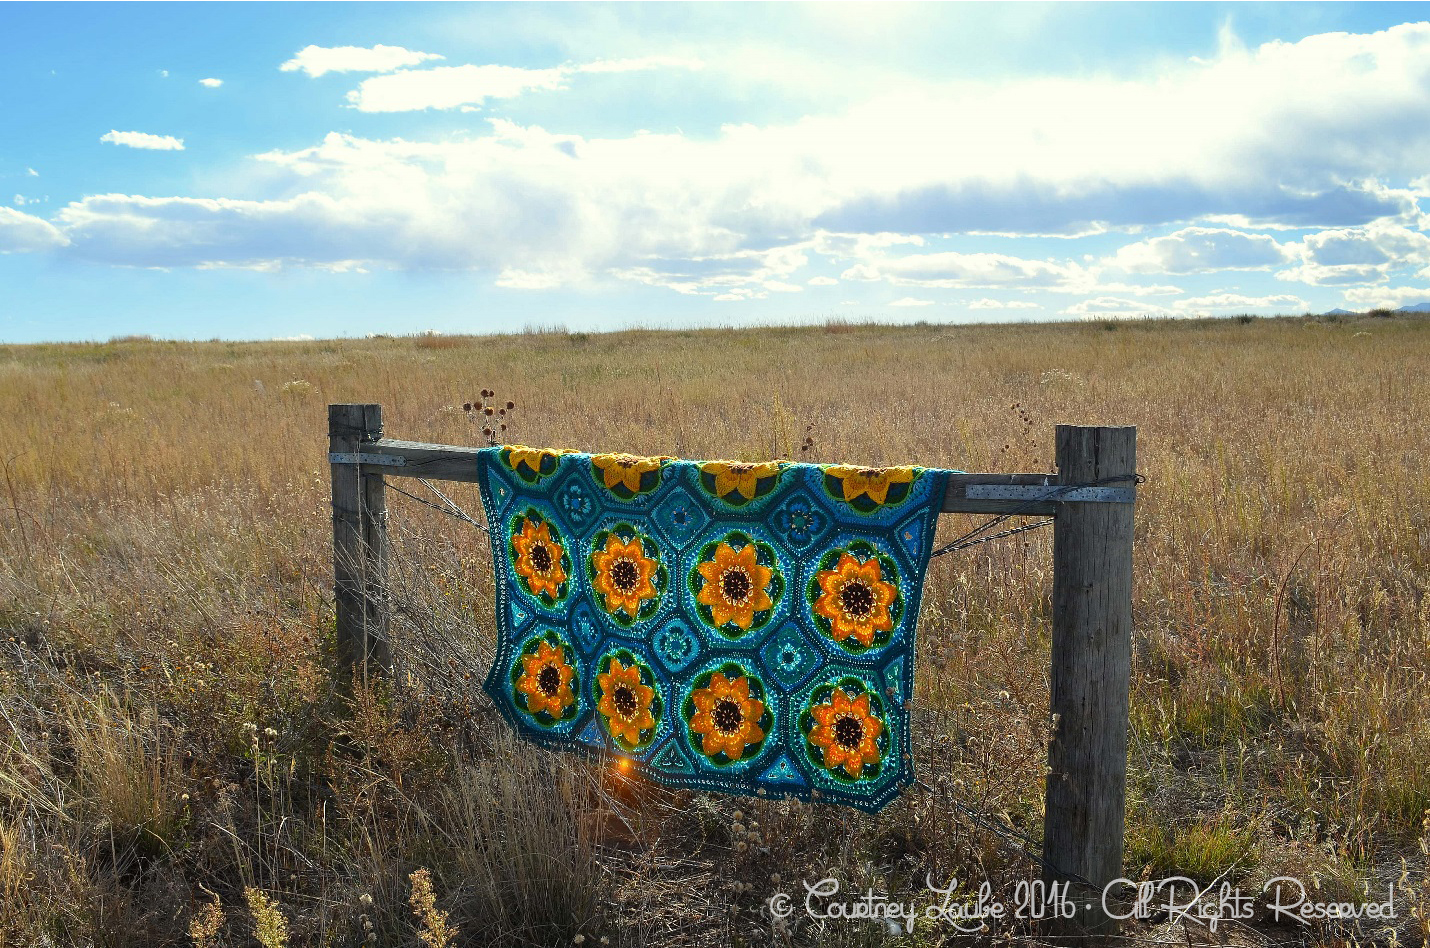
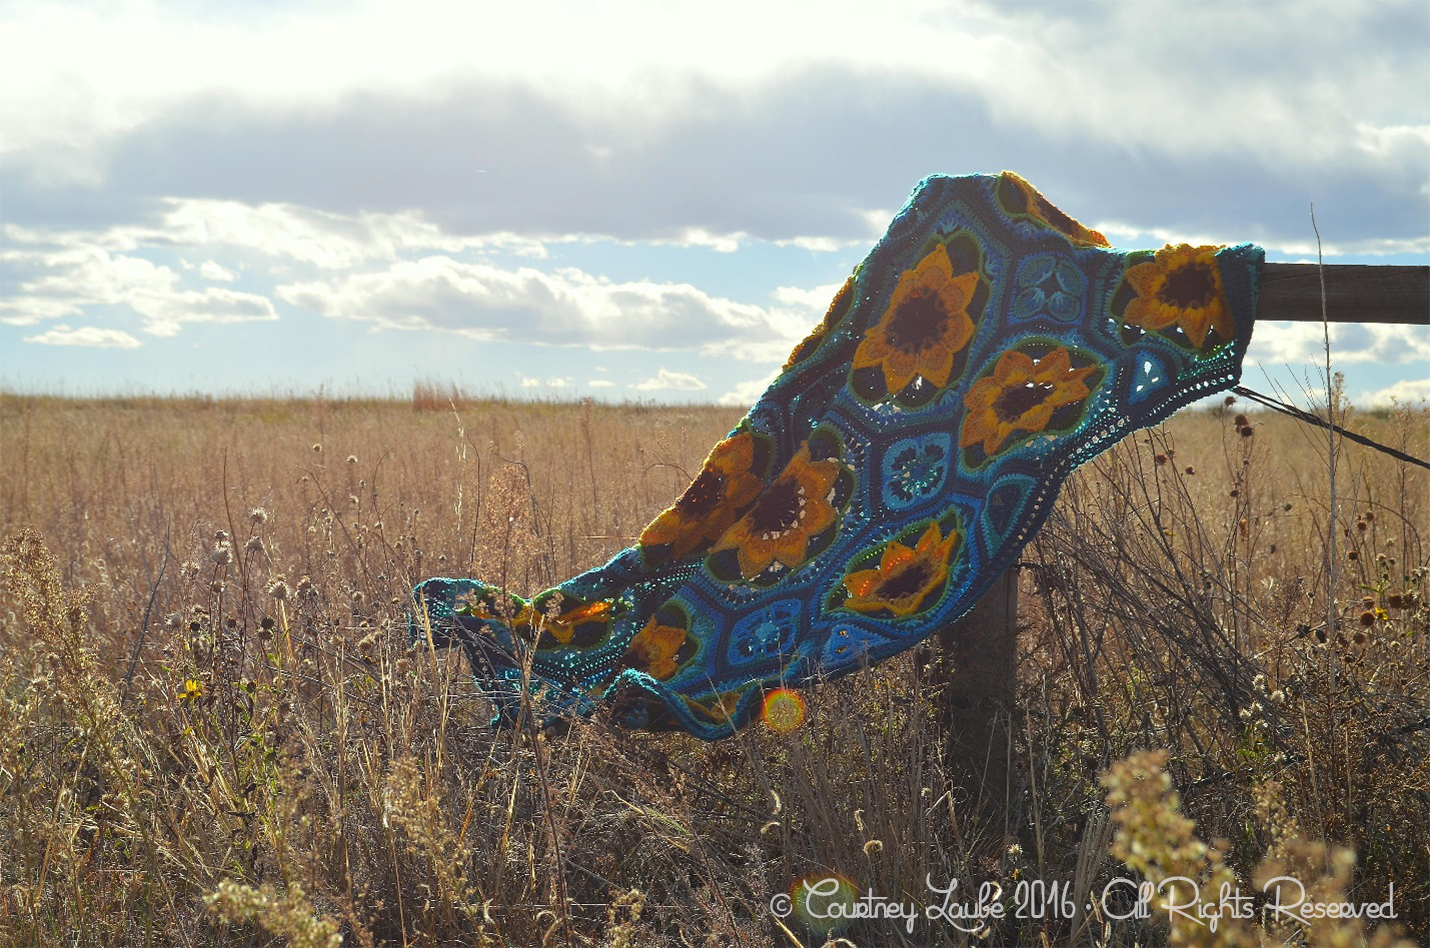
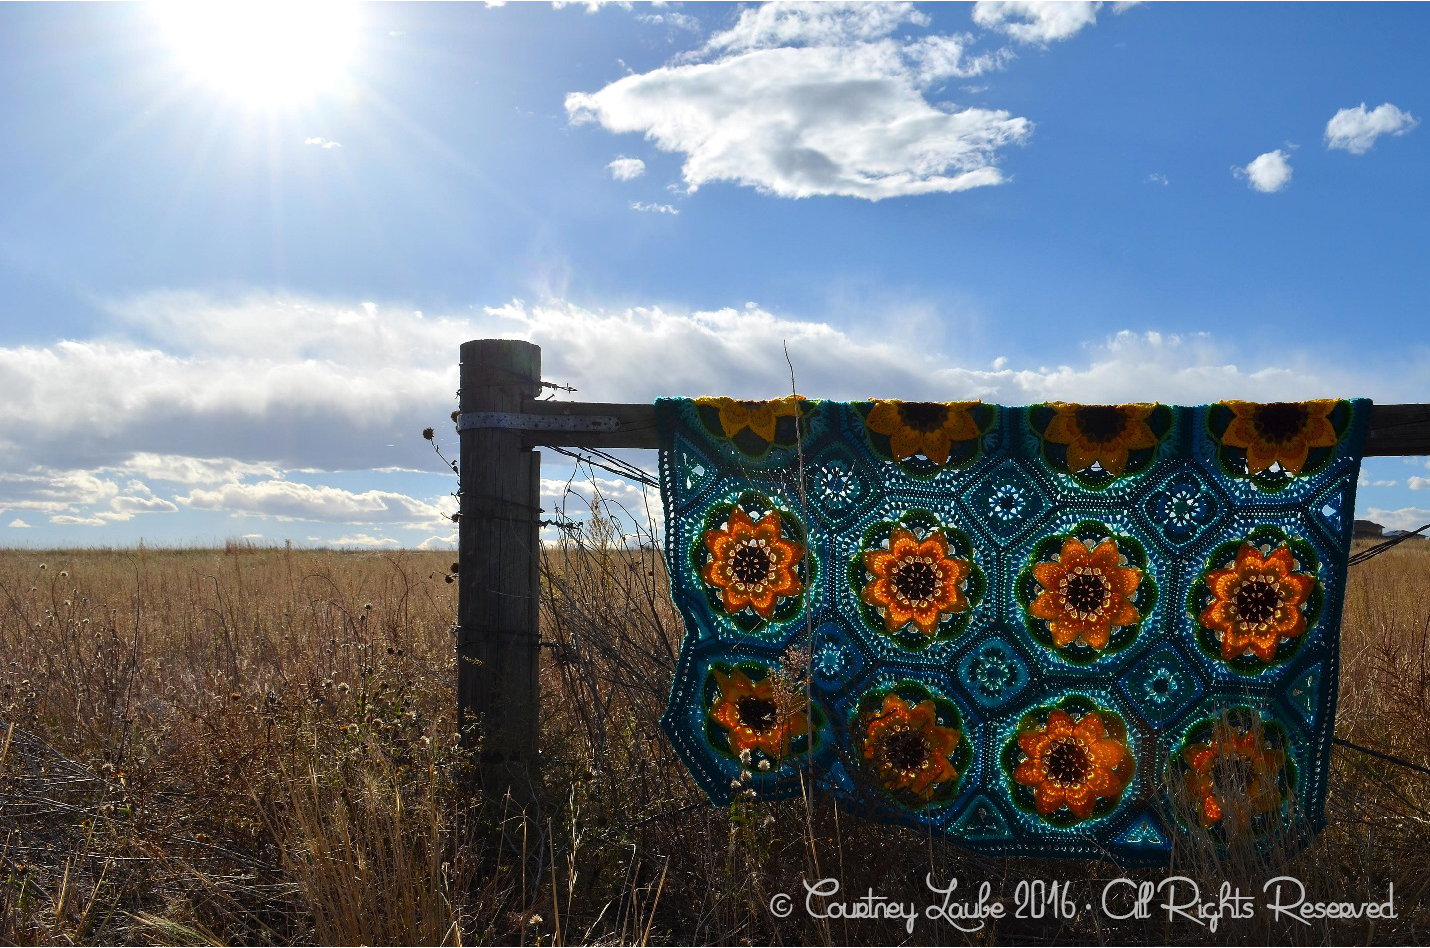
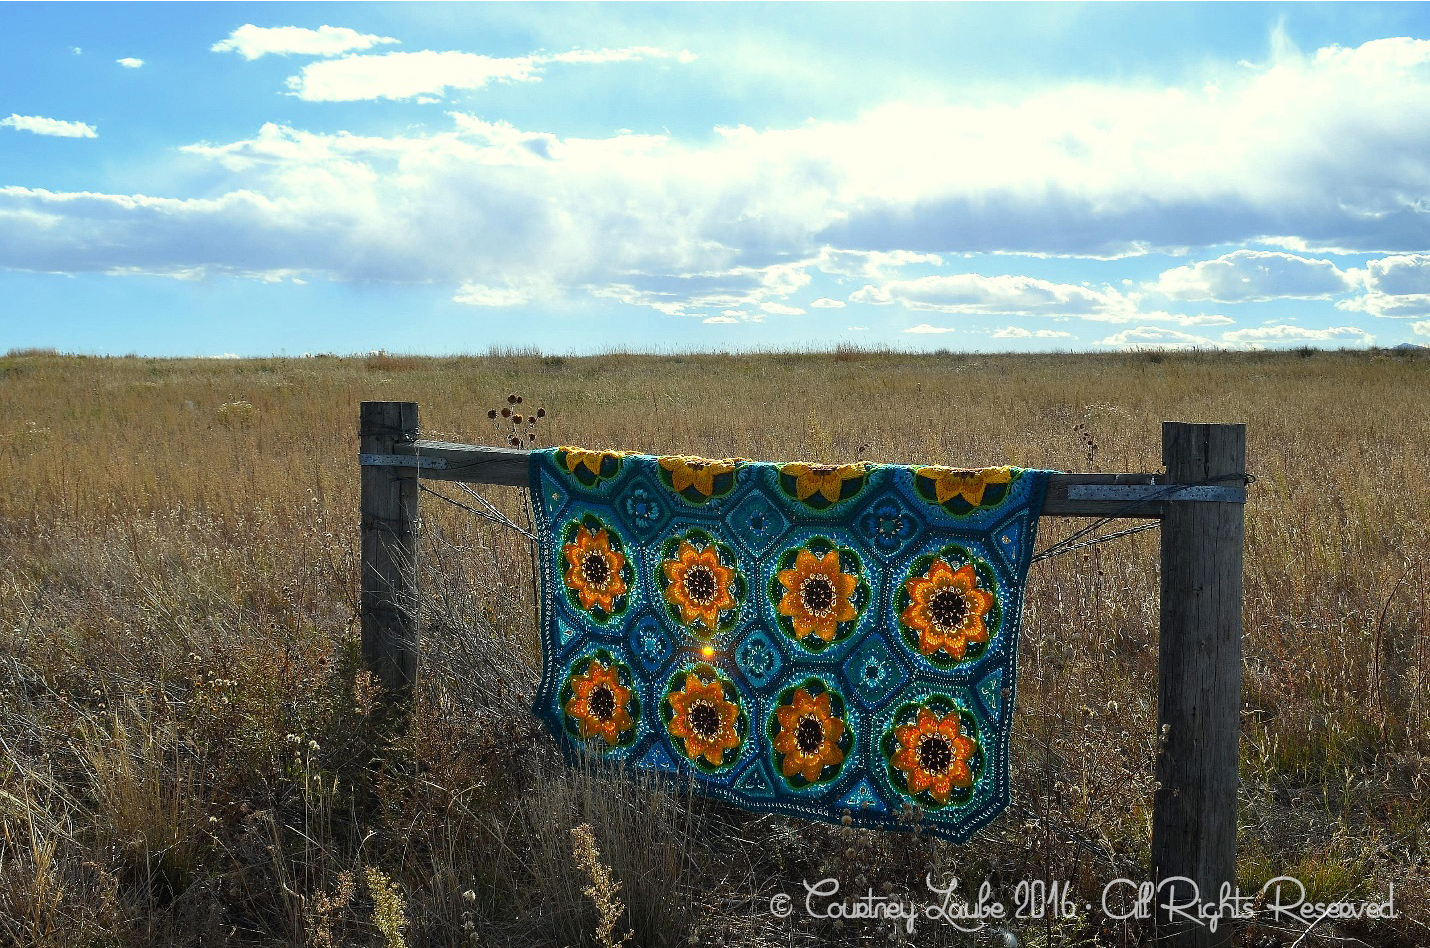
Once your work is dry, carefully remove your pins and blocking wires and it is ready to go! Mine went for a walk on the prairies where the grasses are turning gold for autumn. I thought they could use one last glimpse of sunny summer sunflowers.
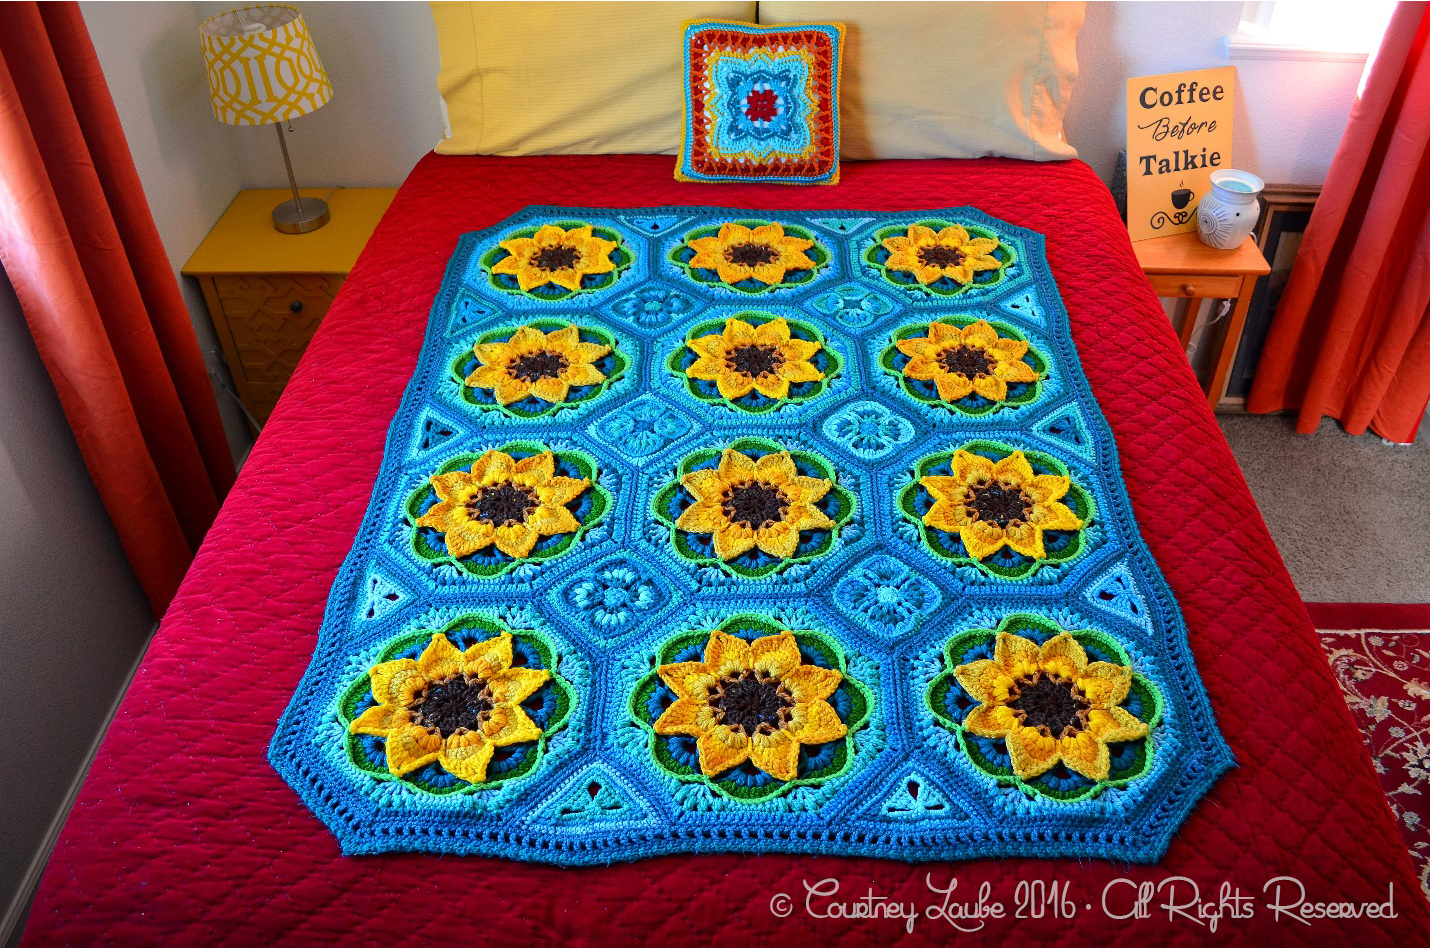
After my trash-the-blanket session I threw my Lotus Moon Tiles into the washing machine and the dryer (GULP) because I wanted to show you how the blocking does remain permanent after washing!!! This is how it came out of the dryer (delicate low heat dry) today!

If using an iron to steam block, does it make any difference what temperature setting you use on the iron? I know I won’t be touching the work with the iron, but wonder if the steam comes out hotter if the iron is hotter?
Good question! I’m not sure though. I would check your user manual and/or contact the manufacturer. If you can’t find out, I would try it on a small swatch to make sure it’s not too hot. I doubt it is, but still worth testing to be sure.
Thank you for such a thoughtful post. Your work is lovely and color choices were excellent. Would you mind sharing what yarn you used on this lovely project? Thank you.
Hi Sherri! Courtney’s project can be found on Ravelry and has all the info on the yarn she used. Here is the link: http://www.ravelry.com/projects/AFwifeCrochetNut/lotus-moon-tiles-2
Thank you! This will be very helpful.
Thanks Courtney! I have a question with the wires… on the long side, do you use them there also? And then do you just pin on the inside, up against wires? Getting ready to block my Sophie, and am going to try your method as it’s so big. Do the wires help with not having to use so many pins on a larger project?
Yes exactly! I weave the wires (sometimes on a long side you have to overlap two) down the side and then just pin on the inside of them using them to pull the work out evenly. It saves pins and gives you a nice even line. And on a big piece it also keeps you from accidentally ballooning out your work as you go!
Another Fabulous piece! Your work is just SO fantastic! <3
Please thank your DH for his service.
Blocking Acrylic! Brilliant! Thank you so much Sherri.
I made a lovely ripple blanket last year and realised half way through that the second half was slightly smaller – I got the pattern wrong after a long break away from it. I just sighed and got on with it. Now I know how to fix it!
Fingers crossed I do it right. ..
Tina
I am totally new to blocking although I have been crocheting for many years so I hope my question isn’t too silly. Do you not block each square before you put the blanket together?
Lynn I am so sorry to be so late in my reply… something is up with the way the comments are working on this post! No question is silly! You can absolutely block each square before putting the blanket together and for some that is preferred… in the Lotus Moon it’s not necessary but in her new pattern, A Day at the Grand Bazaar, it’s recommended. When you’re doing a blanket made of 12″ squares blocking them first makes it so much easier to get that perfect drape so yes you absolutely can!
great and useful info thank you for sharing 🙂
It worked! WOO HOO!
Thank you!
I am so sorry for my late reply! Something seems to be off with how the comments are posting on this article and I’m getting a flood! Which means I’m seeing both of yours and I’m so glad to hear it worked on your blanket! What a triumph! I myself just tested a blanket and used the wrong hook size for the second half… OOOPSSS… blocked the snot out of it and it came out beautifully! LOL
I’m just now finishing my Lotus Moon CAL afghan. Better late than never! What brand of blocking wires do you use? The place in your post where you mention them is blank. Also, how many wires did you use? I really enjoyed your post. Thank you.
Hi Carol! The exact set of blocking wires that I use are these:
https://www.amazon.com/BlokWRX-BLKWRK1-Premium-Blocking-Wires/dp/B00VKMAHTG/ref=sr_1_10?ie=UTF8&qid=1495210157&sr=8-10&keywords=blocking+wires
Due to the size of Lotus moon I was able to use one of the large wires on each end and two of the large wires per long side then a short (12″) wire per corner side. So a total of 6 36″ wires and 4 12″ wires.
I hope that helps!
This is super helpful!!
Thank you so much!!
Can i just say I love the way you explained this and your project is gorgeous! Lots of love from n.ireland! Kerrie x