This page contains affiliate links. If you click them and make a purchase I get a small commission at no additional cost to you.
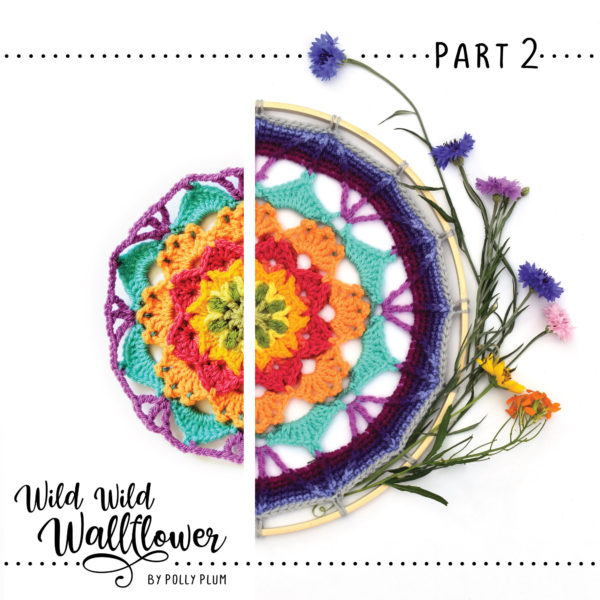
Hooray! You made it through part 1 of the CAL. In part 2 we’re going to see just what we can do with picots. Are you ready?
If you haven’t started yet, first read the introductory post so you know what you’ll need, and then start with part 1.
If you need some help along the way, remember you can watch the video tutorial (below) or get a copy of the PDF which contains photo tutorials for working into the picots.

The PDF isn’t just helpful, it’s beautiful too! My goal is to create a pattern document that is as enjoyable to look at as it is to crochet so that you have something you love to add to your pattern binder. The PDF is currently available on Ravelry, just click here. (Etsy coming soon too).
And, while, yes, purchasing the PDF is a great way to support my work so that I can keep bringing you more patterns (and more free patterns!), another wonderful thing you can do is to share pictures of what you make and link to this post. Show all your crocheting friends you’re beautiful work and tell them how proud you are!
Video Tutorial
Notes
This pattern is Copyright © 2021 Polly Plum. All rights reserved.
If you would like to share this pattern, please share the link to this webpage or the Ravelry pattern page (link below). Please do not distribute this pattern or photos in any other form. Please read more in the Copyright section.
Ravelry: Click here to favorite, queue, and hook up a project page for this pattern on Ravelry.
Help: If you need help or have any questions, scroll to the bottom of this page. There are links to where you can find lots of support.
Color Changes: At the beginning of each round, where possible, you’ll be given the option to start with new yarn (as in, a new color) or with the same yarn (continue with the same yarn as the previous round). The pattern will not tell you to fasten off at the end of a round unless it is necessary, and, in that case, the next round will only have the option to start with new yarn.
Details
Crochet Terminology: US
Skill Level: Intermediate
Stitches used: A wide and exciting variety, be prepared for anything!
Sizes: 12 inch/30cm circle
Hook size: 3.5mm or size needed for gauge
Gauge: 3 inches through round 4
Additional materials: 12” floral hoop or embroidery hoop, yarn need, scissors, ruler
Yarn: Sample uses scraps of Stylecraft Special DK, any DK scraps should work as long as your gauge is close
Abbreviations
- ch – chain
- dc – double crochet
- hdc – half double crochet
- r(#) – round number
- sc – single crochet
- sk – skip
- slst – slip stitch
- sm – stitch marker
- sp – space
- st– stitch
- tr – treble crochet
- yo – yarn over
Special Stitches
htr – {half treble} yo twice, insert hook into indicated st, yo and pull up a loop, yo and pull through 2 loops on hook, yo and pull through all 3 remaining loops on hook
picot – ch3 and slst in front 2 loops of previous st {insert hook behind the front loop and the loop that’s directly below}
Standing sc – with slip knot on hook, insert hook into indicated stitch, yo and pull up a loop, yo and pull through 2 loops on hook
Standing tr – with slip knot on hook, hold slip knot in place with thumb or finger, yo twice and hold those in place too, insert hook in indicated stitch, yo and pull up a loop, carefully yo and draw yarn through two loops on hook three times {Alternatively, slst to join yarn then ch4 to count as your first tr}
Working into bottom of picot – insert your hook from back to front through the center of the picot, then pull up a loop from under the bottom of the picot and pull back through the center of the picot {stitch will be placed in the bottom part of the picot and behind it}
Working into center of picot – insert hook from front to back through the center of the picot and pull up a loop {stitch will be placed in the top of the picot}
Pattern
Round 7
Sk all r6 sts, work only into r5 sc, keep work behind r6.
With new yarn: (Standing tr, ch3, tr) in any r5 sc, ch3.
*[Tr, ch3] twice in next r5 sc.*
Repeat from * to * 6 times more. Slst to first tr {or 4th ch of starting ch} to join.
64 sts around (16 tr, 16 ch3 sp)
Round 8
All sts worked into r7 ch3 sps and r5 ch1 sps. Sk all other sts.
With new yarn: Standing tr in any ch3 sp between 2 trs made into the same sc.
Or, with same yarn: Slst into next ch3 sp and ch4 {counts as first tr}.
Tr again in same ch3 sp.
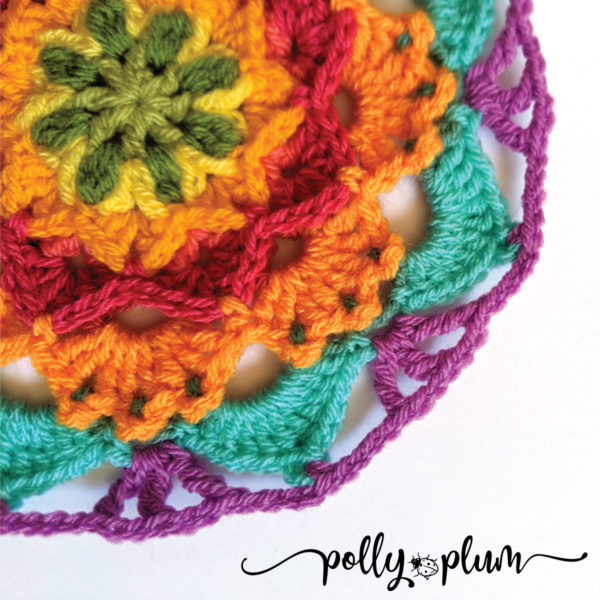
*^[Picot, 2tr] 3 times in same ch3 sp, sc in next r7 ch1 sp, sk next ch3 sp {now hidden behind r6 petal},^ 2tr in next ch3 sp.*
Repeat from * to * 6 times more and from ^ to ^ once more. Slst to first tr to join. Fasten off.
96 sts around (24 picot, 64 tr, 8 sc)
Round 9
Work only into picots. Sk all other sts.
With new yarn: Standing sc working in bottom of picot {see special stitches} in first picot of any petal.
*^[Ch3, sc into bottom of next picot] twice, ch5,^ sc into bottom of next picot {on next petal}.*
Repeat from * to * 6 times more and from ^ to ^ once more. Slst to first sc to join.
88 sts around (24 sc, 8 ch5 sp, 16 ch3 sp)
Round 10
With new yarn: Standing sc in first ch3 sp after any ch5 sp.
Or, with same yarn: Slst into next ch3 sp, ch1 and sc in same sp.
*^Ch3, sk next sc, sc in next ch3 sp, sk next sc, (2dc, 2htr, tr, picot, tr, 2htr, 2dc) in next ch5 sp, sk next sc,^ sc in next ch3 sp.*
Repeat from * to * 6 times more and from ^ to ^ once more. Slst to first sc to join. Fasten off.
128 sts around (8 picot, 16 tr, 32 htr, 32 dc, 16 sc, 8 ch3 sp)
Round 11
Work only into r10 picots and ch3 sps. Sk all other sts.
With new yarn: Standing sc into center of any picot {see special stitches}.
*^Ch4, (tr, ch2, tr, ch2, tr) into next ch3 sp, ch4,^ sc into center of next picot.*
Repeat from * to * 6 times more and from ^ to ^ once more. Slst to first sc to join.
128 sts around (24 tr, 8 sc, 16 ch4 sp, 16 ch2 sp)
That’s the end of Part 2! Part 3 comes soon, and it’s the final part, so get your hoops ready if you haven’t already.

Credits
Original crochet pattern design – Polly Plum
Photography and graphic design – Polly Plum
Testers:
Ann Downey
Leanne O’Connell
Paulina Smith
Jan White
If you’d like to show your support and/or say thank you for this free pattern – the most helpful thing you can do is share a picture of your work on Ravelry or Facebook. Seriously! That’s it. If you liked the pattern, tell your friends and show them what you made.
If you loved the pattern and want to make more, check out the Patterns page here on Every Trick on the Hook or my Ravelry store.
The best way to keep up with my goings-on is to follow Every Trick on the Hook on Facebook. You can also message me there, post on the wall, and follow my posts for the latest news.
If you’re looking for a more interactive Facebook experience, join the Polly Plum Pattern Posse Facebook group. We’re a fun and supportive group. Really! There’s so much help there that chances are your question will be answered by someone before I even see it. It’s the best place to go with a question. It’s also a great place to share your Polly Plum makes and see what others are making.

Leave a Reply